
Nothing ruins the look of a crisp, clean pair of shoes quite like the appearance of stubborn yellow stains.
Whether they creep up on the soles of your favorite sneakers or appear on the fabric of your canvas kicks, these unsightly marks can make even the newest shoes look old and worn. The good news is that you don’t have to demote them to “gardening shoes” just yet. Understanding how to tackle these stains can restore your footwear to its former glory.
This guide on how to remove yellow stains on shoes will walk you through everything you need to know to effectively banish those yellow spots.
What Will You Need?
Before you begin the cleaning process, it’s best to gather all your supplies. Having everything on hand will make the job quicker and more efficient.
- Soft-bristled brush (an old toothbrush works perfectly)
- Small bowl or container
- Clean microfiber cloths or rags
- Baking soda
- White vinegar
- Mild laundry detergent or dish soap
- Hydrogen peroxide (optional, for tough stains)
- Magic eraser (optional, for rubber soles)
- Clean water
- Shoe laces (if you need to replace old ones)
10 Easy Steps on How to Remove Yellow Stains on Shoes
Follow these detailed steps to bring your discolored shoes back to life. This method is effective for most fabrics, canvas, and rubber components of shoes.
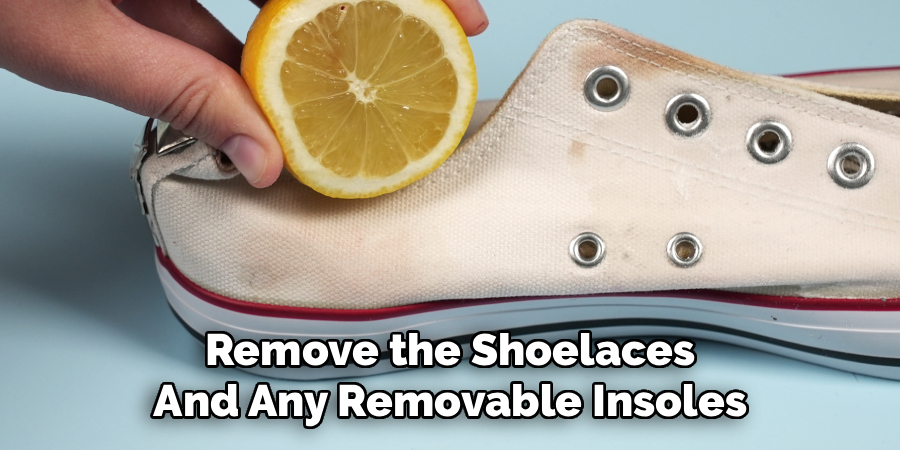
Step 1: Prepare Your Shoes
First things first, get your shoes ready for a deep clean. Remove the shoelaces and any removable insoles. This allows you to access all the nooks and crannies of the shoe, including the tongue and eyelets, where dirt and sweat can accumulate.
Brushing the laces separately or tossing them in a mesh bag with your laundry can get them looking new again. Use a dry, soft-bristled brush to knock off any loose dirt, dust, or debris from the entire surface of the shoe. Pay special attention to the seams and the area where the upper meets the sole, as a lot of grime can get trapped there. This initial step prevents you from rubbing dry dirt into the fabric, which could create more stubborn stains.
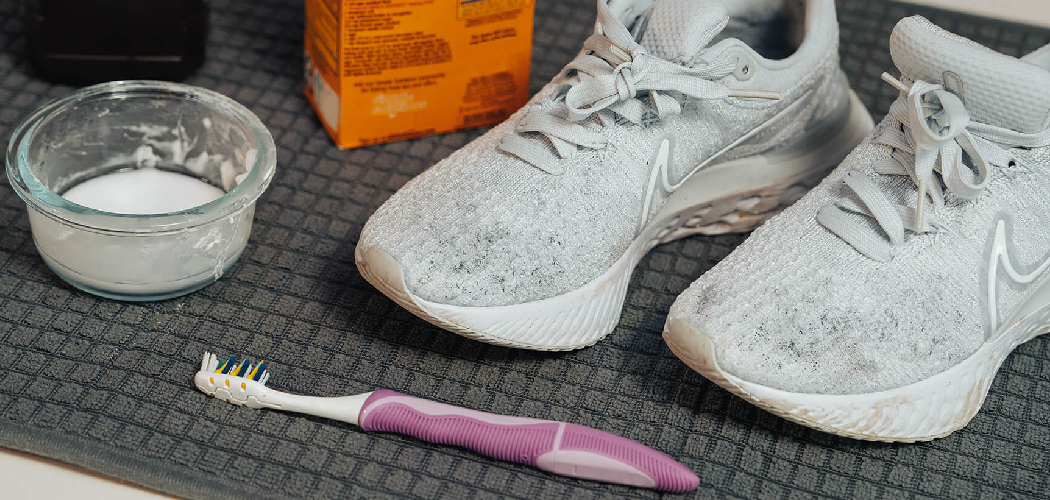
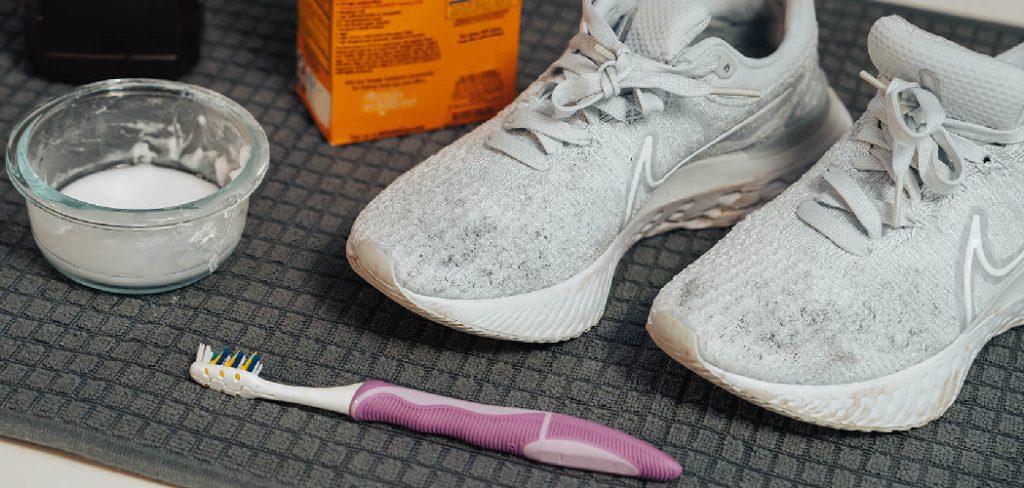
Step 2: Create Your Cleaning Solution
Now it’s time to mix up your stain-fighting concoction. In a small bowl, combine equal parts baking soda and water to form a thick paste. A good starting point is two tablespoons of baking soda and two tablespoons of water. Mix thoroughly until you have a smooth, consistent paste that’s easy to spread.
Baking soda is a fantastic, gentle abrasive that helps lift stains from the fabric without causing damage. For an extra boost of cleaning power, you can add a tablespoon of white vinegar or hydrogen peroxide to the mix. The vinegar helps break down the chemical bonds in the stain, while the peroxide acts as a mild bleaching agent. If you add a liquid, the paste will fizz a bit, which is a normal reaction.
Step 3: Apply the Paste to Stained Areas
Using your soft-bristled brush or an old toothbrush, apply the baking soda paste directly onto the yellow stains. Be generous with the application, ensuring the entire stained area is completely covered. Gently work the paste into the fabric using small, circular motions.
This scrubbing action helps the baking soda penetrate the fibers and begin breaking down the discoloration. Don’t be afraid to apply a bit of pressure, but avoid scrubbing so hard that you damage the shoe’s material. Focus on the most heavily stained sections first, then apply a thinner layer over any less noticeable yellowing areas for a consistent finish.
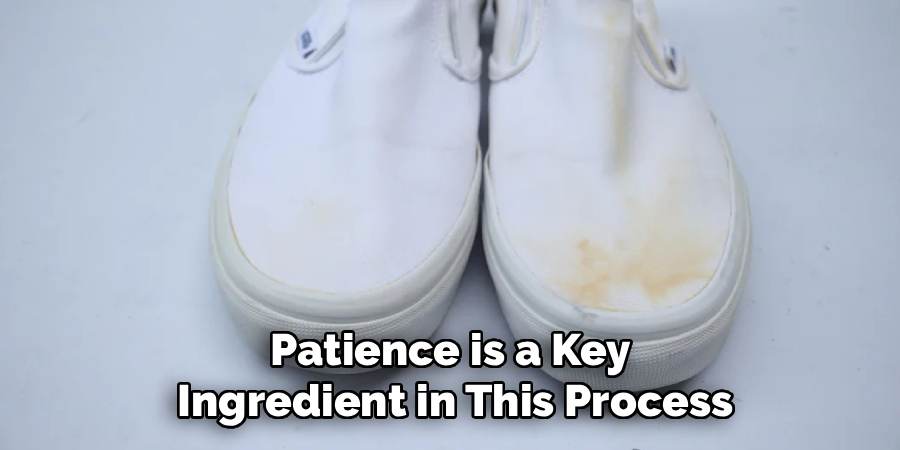
Step 4: Let the Solution Sit
Patience is a key ingredient in this process. Once you have applied the paste to all the yellowed areas, you need to let it work its magic. Place the shoes in a sunny spot, either outdoors or near a bright window.
The ultraviolet rays from the sun will react with the cleaning paste, naturally whitening the fabric and amplifying the stain-removing effect. Let the shoes sit for at least two to three hours, or until the paste is completely dry and has formed a hard, crusty layer. This waiting period is crucial for allowing the solution to lift the yellowing out of the material.
Step 5: Scrub the Entire Shoe
After the paste has dried, it’s time for a more general clean. Mix a small amount of mild laundry detergent or dish soap with warm water in a separate bowl to create a soapy solution. Dip your brush into this solution and begin scrubbing the entire shoe, not just the areas where you applied the paste.
This ensures an even clean and helps prevent water spots or color inconsistencies after the shoe dries. Use gentle, circular motions across the entire surface, including the fabric uppers, the tongue, and around the eyelets. This step will remove any remaining surface dirt and blend the cleaned areas with the rest of the shoe.
Step 6: Rinse Thoroughly
Once you’ve finished scrubbing, you need to remove all the dried paste and soap residue. Take a clean microfiber cloth, dampen it with cool water, and carefully wipe down the entire shoe. Rinse the cloth frequently to avoid spreading dirt or soap back onto the shoe. Continue wiping until all traces of the baking soda paste and suds are gone. It’s important to be thorough in this step, as any leftover cleaning solution can dry and leave behind a new residue or a stiff texture on the fabric.
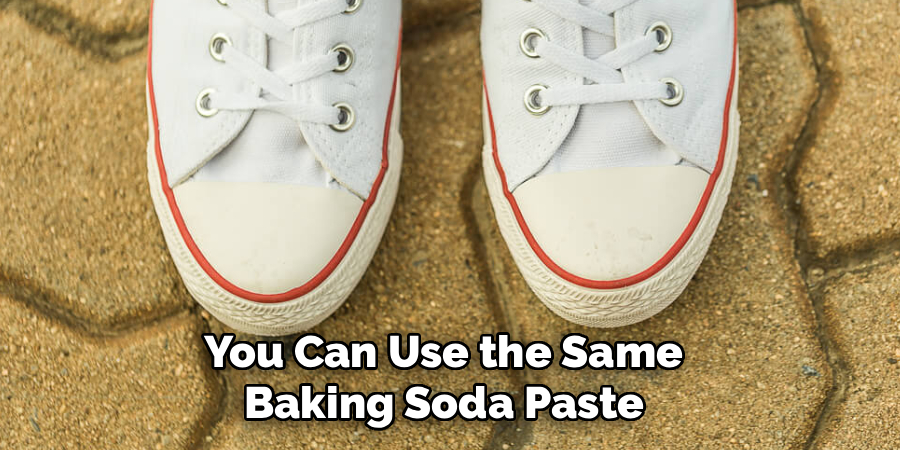
Step 7: Address the Soles
Yellow stains aren’t just for fabric; they’re notorious for appearing on the rubber soles and midsoles of sneakers. You can use the same baking soda paste on these areas, scrubbing with your brush to lift the discoloration. For particularly stubborn yellowing on rubber or synthetic soles, a magic eraser can be incredibly effective. Simply wet the magic eraser and rub it along the yellowed parts of the sole. You’ll be surprised at how quickly it can lift away the stains and restore the bright white color.
Step 8: Allow the Shoes to Air Dry
Proper drying is essential to prevent new stains or mildew from forming. Stuff your shoes with clean, dry paper towels or white tissue paper. This helps them retain their shape as they dry and wicks away excess moisture from the inside. Avoid using newspaper, as the ink can transfer onto the interior of your shoes. Place the stuffed shoes in a well-ventilated area away from direct heat or sunlight, as excessive heat can weaken adhesives and cause further yellowing. Let them air dry completely, which may take up to 24 hours.
Step 9: Clean and Re-lace
While your shoes are drying, take care of the laces. You can hand-wash them in the same soapy water solution you used for the shoes, or for a deeper clean, place them in a small mesh laundry bag and run them through a gentle cycle in your washing machine. Once the shoes and laces are completely dry, re-lace them. Your shoes should now look significantly brighter and cleaner.
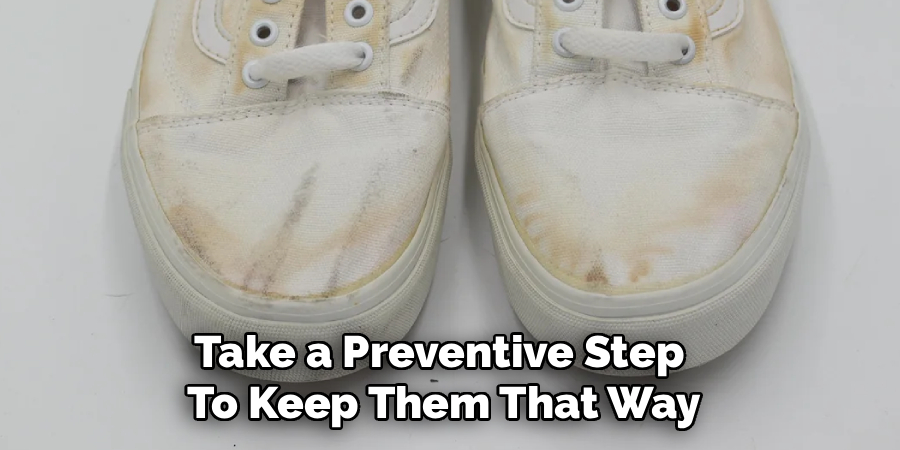
Step 10: Protect Your Shoes
Now that your shoes are clean, take a preventive step to keep them that way. Consider applying a spray-on stain and water repellent designed for footwear. These sprays create an invisible barrier on the surface of the shoe that helps repel dirt, moisture, and future stains. Reapply the protective spray every few months, or more often if you wear the shoes frequently in wet or dirty conditions. This final step will make future cleanings much easier and help keep yellow stains at bay.
5 Things You Should Avoid
To get the best results and protect your shoes, steer clear of these common mistakes.
- Using Bleach: While tempting, harsh chlorine bleach can damage shoe fabrics and may even cause a chemical reaction that makes yellowing worse, especially on synthetic materials.
- Putting Shoes in the Dryer: The high heat from a machine dryer can warp the shape of your shoes, melt the glue holding them together, and cause the rubber soles to become brittle and yellow.
- Scrubbing with a Wire Brush: Abrasive wire brushes are too harsh for most shoe materials. They can fray fabric, scratch leather, and permanently damage the shoe’s texture.
- Submerging Non-Washable Shoes: Not all shoes are meant to be soaked. Fully submerging materials like suede, nubuck, or leather in water can cause irreversible damage, water spots, and stiffness.
- Using Colored Cleaning Agents: Avoid soaps or detergents that contain dyes. The color can transfer to your shoes, especially light-colored ones, trading one stain for another.
Conclusion
Reviving your shoes and removing those stubborn yellow stains is a simple and rewarding process. With a few basic household ingredients and a little bit of time, you can restore your favorite footwear to its original brightness.
By following the steps outlined in this guide and avoiding common cleaning mistakes, you can extend the life of your shoes and step out with confidence every day. Consistent care is the key to keeping your collection looking its best.
Hopefully, this guide on how to remove yellow stains on shoes has helped you to better understand the causes of yellow stains on shoes and how to effectively remove them. Happy cleaning!
About
As the lead voice behind Shoenify, I bridge the gap between footwear aesthetics and technical performance. With a career dedicated to the intersection of fashion and function, I provide readers with data-driven reviews and deep dives into the global footwear market. My mission is to help every reader find the perfect fit, whether they are hitting the track or the boardroom.
Education RMIT University
-
RMIT University: Bachelor of Design (Footwear & Accessories)
-
Nottingham Trent University: MA in Fashion Design (Specializing in Footwear Innovation)
Publications and Impact
My insights on footwear trends and sustainable manufacturing have been featured in leading industry trade journals. Through Shoenify, I have influenced thousands of purchasing decisions by prioritizing transparency and rigorous testing. My work focuses on the evolution of “smart” footwear and the impact of 3D printing on the future of the industry.