
Enjoying a day at the park or playing sports often means your favorite shoes end up with stubborn green reminders of your activities. Grass stains on the rubber soles of your sneakers can be particularly frustrating, seeming to set into the material almost instantly. These chlorophyll marks can make even the newest pair of shoes look old and worn out.

Fortunately, you don’t have to live with these unsightly blemishes. With a few common household items and a little bit of effort, you can effectively restore the bright, clean look of your shoe soles. This guide on how to remove grass stains from rubber soles will walk you through a simple process to tackle those tough grass stains, ensuring your footwear stays in top condition for much longer.
Tools and Materials You’ll Need
- Non-gel white toothpaste
- Distilled white vinegar
- Baking soda
- A small bowl
- An old toothbrush or a soft-bristle brush
- Microfiber cloths or soft rags
- Water
- A melamine sponge (optional)
- Rubbing alcohol (optional)
7 Simple Step-By-Step Guidelines on How to Remove Grass Stains from Rubber Soles
Step 1: Prepare Your Shoes and Create a Cleaning Paste
Before you begin tackling the grass stains, it’s essential to prepare your shoes properly to avoid causing any further mess or damage. Start by removing the shoelaces so you can access all areas of the rubber sole without obstruction. Then, use a dry brush to knock off any loose dirt, mud, or blades of grass clinging to the soles. This initial cleaning prevents you from grinding abrasive particles into the rubber, which could cause scratches or embed the dirt deeper into the material. Wiping the soles with a slightly damp cloth can also help remove surface-level grime, giving you a cleaner canvas to work on.
Once your shoes are prepped, you can mix your primary cleaning agent. In a small bowl, create a paste using a one-to-one ratio of baking soda and distilled white vinegar. Combine them slowly, as the mixture will fizz. Stir until it forms a thick, consistent paste. This combination is highly effective; the mild abrasive quality of baking soda helps to scrub away the stain, while the acetic acid in the vinegar works to break down the chlorophyll pigments that cause the green discoloration. Let the mixture sit for a minute to allow the chemical reaction to settle before you move on to the application stage.
Step 2: Apply the Cleaning Paste to the Stained Area
With your potent cleaning paste ready, it’s time to apply it directly to the grass stains on the rubber soles. Using an old toothbrush or a small, soft-bristled brush, scoop up a generous amount of the baking soda and vinegar mixture. Apply it liberally over all the affected green areas, ensuring you cover the entire stain completely. The key is to create a thick layer of the paste, which will allow the active ingredients to penetrate the stain and begin their work. Don’t be afraid to apply it generously; a thin layer may dry out too quickly and be less effective at lifting the pigment from the rubber.
After applying the paste, you need to let it sit and work its magic. Allow the mixture to rest on the rubber soles for at least 15 to 20 minutes. This waiting period is crucial as it gives the vinegar time to break down the complex chlorophyll molecules and the baking soda time to start lifting them from the surface of the sole. You might notice the paste starting to dry or change color slightly as it absorbs the stain, which is a good sign that the process is working. Be patient during this step, as giving the paste enough time to act is fundamental to achieving a clean result without excessive scrubbing.
Step 3: Scrub the Stains Gently but Thoroughly
Now that the cleaning paste has had sufficient time to penetrate the stain, the next step is to begin scrubbing. Take your old toothbrush or soft-bristled brush and start to scrub the stained areas in small, circular motions. Applying moderate pressure is important—enough to work the paste into the texture of the rubber sole, but not so hard that you risk damaging or scuffing the material. The circular motion helps lift the stain particles from every angle, especially on soles with intricate patterns or textures. Pay close attention to the edges of the stain and any crevices where the green pigment might be more concentrated.
As you scrub, you should start to see the green stain lifting and mixing with the white paste. Continue this process for several minutes, periodically checking your progress. If the paste becomes too dry while you’re scrubbing, you can dip your brush lightly in water or a little more vinegar to re-moisten it and continue the cleaning action. This step requires some patience and elbow grease, but it is the most critical part of physically removing the stain. Keep scrubbing until you see a significant reduction in the green discoloration across all the affected parts of the rubber sole.

Step 4: Utilize Toothpaste for Stubborn Spots
After the initial scrubbing with the baking soda and vinegar paste, you may find that some stubborn or deeply set grass stains remain. This is where non-gel white toothpaste comes in as a powerful secondary cleaning agent. Squeeze a small amount of the white toothpaste directly onto the remaining stained spots. It’s important to use a basic white paste, not a gel or colored variety, as these can sometimes contain dyes that might transfer to the rubber and create a new stain. White toothpaste contains mild abrasives that are excellent for polishing surfaces and lifting tough blemishes.
Using the same toothbrush, work the toothpaste into the lingering stains with firm, circular motions. Just as you did with the first paste, you want to scrub thoroughly to ensure the abrasives can effectively buff away the remaining chlorophyll. You may need to add a little water to your brush to help create a slight lather, which can aid in the cleaning process. Let the toothpaste sit on the stain for about 10 minutes after scrubbing to allow its cleaning agents to continue working on the discoloration. This targeted approach is often all that is needed to eliminate those last traces of green.
Step 5: Wipe and Rinse the Soles Clean
Once you are satisfied that you have scrubbed away the grass stains, the next step is to remove all the cleaning residue from the rubber soles. Start by using a clean, damp microfiber cloth to wipe away the majority of the baking soda paste and toothpaste. Microfiber is excellent for this task because it effectively traps dirt and residue particles within its fibers, preventing you from simply smearing the mess around. Wipe the soles thoroughly, rinsing the cloth frequently in clean water to ensure you are lifting the grime off the shoe, not just moving it.
After the initial wipe-down, it’s best to rinse the soles completely to remove any remaining film or grit. You can do this by holding the bottom of the shoe under a gentle stream of cool running water. Be careful to direct the water only onto the rubber sole to avoid soaking the upper part of the shoe, especially if it’s made from materials like suede or leather. A thorough rinse ensures that no acidic vinegar or abrasive baking soda is left behind, which could potentially degrade the rubber over time. This step is vital for a truly clean finish and for preserving the integrity of your footwear.

Step 6: Address Any Lingering Stains with a Melamine Sponge or Rubbing Alcohol
In some cases, especially with older or more porous rubber soles, a faint hint of green may still be visible even after extensive scrubbing. For these very persistent marks, you have a couple of advanced options. A melamine sponge, often known as a magic eraser, can be highly effective. Dampen a corner of the sponge with water and gently rub it over the remaining discoloration. The micro-scrubbers in the sponge work on a microscopic level to lift stains from surfaces. Use light pressure, as melamine can be abrasive and might dull a shiny finish if used too aggressively.
Alternatively, rubbing alcohol can be used to break down the last remnants of the chlorophyll pigment. Apply a small amount of rubbing alcohol to a cotton ball or the corner of a clean cloth. Dab it onto the faint stain and rub gently. The alcohol acts as a solvent, dissolving the stain that has bonded with the rubber. After using either the sponge or the alcohol, be sure to wipe the area again with a clean, damp cloth to remove any residue. This final spot treatment should take care of even the most stubborn traces of green, leaving your soles looking pristine.
Step 7: Dry the Shoes Completely and Inspect Your Work
The final step in the process is to ensure your shoes are completely dry before you wear them again. After rinsing and spot-treating, use a dry, clean cloth to wipe off as much excess water as possible from the rubber soles. Then, find a well-ventilated area away from direct sunlight or heat sources to let them air dry naturally. Stuffing the shoes with paper towels can help them hold their shape and absorb any internal moisture that may have seeped in during the cleaning process. Avoid using a hairdryer or placing them near a radiator, as intense heat can damage the shoe’s adhesives and materials.
Once the shoes are thoroughly dry, give the rubber soles a final inspection. Check them from all angles in good lighting to make sure no traces of the grass stain remain. At this point, the soles should look significantly cleaner and brighter. If you’re happy with the results, you can re-lace your shoes, and they are ready to be worn. Proper drying is not just about convenience; it also prevents the growth of mildew or unpleasant odors, ensuring your shoes are fresh and truly clean from the inside out. Your footwear is now restored and ready for your next adventure.
Following these steps on how to remove grass stains from rubber soles, you can easily clean your shoes and keep them looking new for longer. However, prevention is always better than a cure when it comes to stains. To avoid grass stains on your rubber soles, try to avoid stepping on wet grass or muddy areas. Also, consider wearing protective covers over your shoes if you know you will be walking through grassy areas.

Common Mistakes to Avoid
- Using harsh chemicals like bleach can turn white rubber yellow and damage it.
- Scrubbing too aggressively with a wire brush can scratch and scuff the rubber.
- Applying heat to dry the shoes, as it can weaken adhesives and warp the rubber.
- Using colored toothpaste or gel, which can leave behind new stains on the soles.
- Not removing loose dirt first, which can grind into the rubber during scrubbing.
Frequently Asked Questions
Q1: Can This Method Be Used on Colored Rubber Soles?
A1: Yes, this method is generally safe for colored rubber soles, but you should always perform a spot test first. Apply a small amount of the cleaning paste to an inconspicuous area of the sole and let it sit for a few minutes before wiping it away. Check for any discoloration or fading. The ingredients, like baking soda and white vinegar, are mild, but it’s always better to be cautious with colored materials to avoid any unintended lightening of the dye.
Q2: What Should I Do if the Grass Stain Is Very Old?
A2: Older grass stains are more challenging because the pigment has had more time to set into the rubber. For these, you may need to repeat the cleaning process multiple times. You can also try letting the baking soda and vinegar paste sit on the stain for a longer period, perhaps up to an hour, to give it more time to work. Following up with the toothpaste and melamine sponge steps will also be crucial for breaking down and lifting these stubborn, set-in stains.
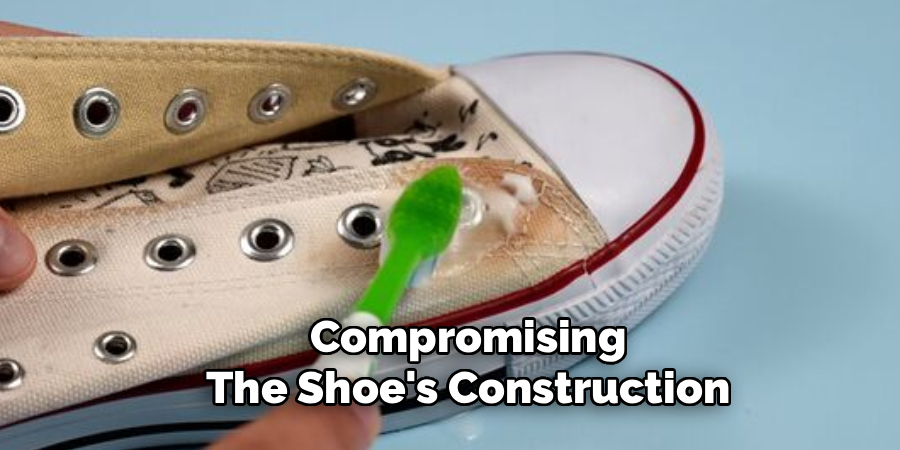
Q3: Will Vinegar Damage the Glue Holding the Sole to the Shoe?
A3: When used correctly, distilled white vinegar is unlikely to damage the shoe’s adhesive. The key is to apply the cleaning solution only to the rubber sole and avoid saturating the area where the sole connects to the upper part of the shoe. Rinsing the sole thoroughly after cleaning is also important to remove any residual acid. By being careful with application and rinsing properly, you can clean the stains effectively without compromising the shoe’s construction.
Conclusion
Grass stains on rubber soles might seem permanent, but they don’t have to be. By following these detailed steps, you can effectively remove even the most stubborn green marks. The combination of household staples like baking soda, vinegar, and toothpaste provides a powerful yet safe cleaning solution that restores the look of your favorite shoes. A little bit of patience and methodical scrubbing is all it takes to lift the stains away.
Remembering to address stains quickly and avoid common mistakes will make the process even more successful. With this guide on how to remove grass stains from rubber soles, you now have the knowledge to keep your footwear looking fresh and clean, no matter how many times you venture onto the grass. Taking care of your shoes not only improves their appearance but also extends their lifespan, ensuring they are ready for whatever comes next.
About
As the lead voice behind Shoenify, I bridge the gap between footwear aesthetics and technical performance. With a career dedicated to the intersection of fashion and function, I provide readers with data-driven reviews and deep dives into the global footwear market. My mission is to help every reader find the perfect fit, whether they are hitting the track or the boardroom.
Education RMIT University
-
RMIT University: Bachelor of Design (Footwear & Accessories)
-
Nottingham Trent University: MA in Fashion Design (Specializing in Footwear Innovation)
Publications and Impact
My insights on footwear trends and sustainable manufacturing have been featured in leading industry trade journals. Through Shoenify, I have influenced thousands of purchasing decisions by prioritizing transparency and rigorous testing. My work focuses on the evolution of “smart” footwear and the impact of 3D printing on the future of the industry.