
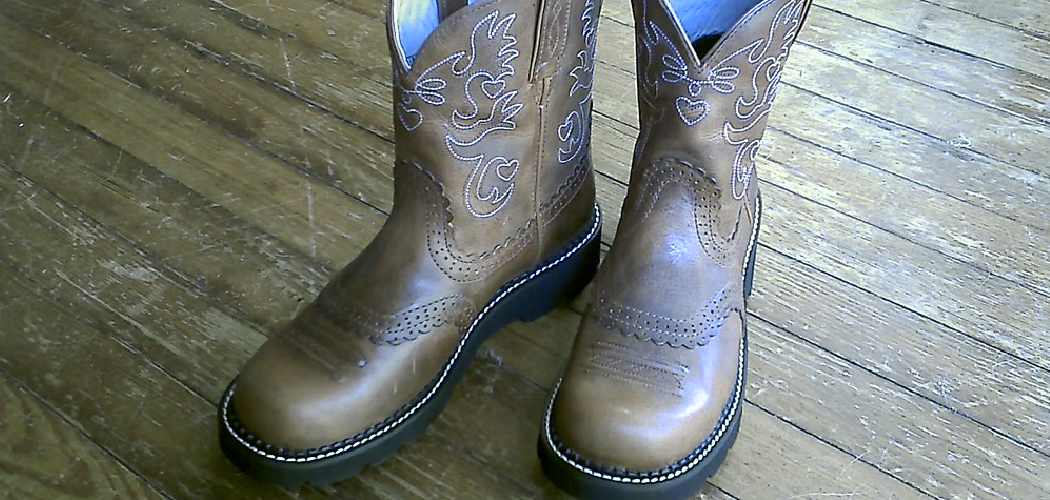
Owning a pair of Ariat boots is an investment in comfort, durability, and style, whether you use them for equestrian sports, ranch work, or simply as a fashion statement. However, to ensure that your investment lasts for years and withstands the harshest elements, proper maintenance is absolutely essential, with waterproofing being the most critical step in that process. Leather is a natural material that is porous and susceptible to water damage, which can lead to cracking, shrinking, and rot if left unprotected against rain, snow, and mud.

By taking the time to properly waterproof your Ariat boots, you are not only keeping your feet dry during downpours but also preserving the structural integrity and aesthetic appeal of the leather itself. This guide on how to waterproof Ariat boots will walk you through a comprehensive process to seal and protect your boots, ensuring they remain rugged and reliable. We will cover everything from the essential preparation steps to the specific products you need, demystifying the care process so you can tackle the outdoors with confidence.
Preparing the Boot Surface
Before you even think about applying a waterproofing agent, the surface of your Ariat boots must be impeccably prepared to ensure the product bonds correctly with the leather fibers. If you attempt to waterproof a dirty boot, you are essentially sealing in dirt, grit, and bacteria, which will grind away at the leather over time and degrade the material from the inside out. Preparation involves stripping away old layers of polish, removing caked-on mud, and ensuring the pores of the leather are open and ready to accept the new protective coating.
This preparation phase is often the difference between a waterproofing job that lasts a few weeks and one that lasts an entire season. It requires patience and attention to detail, as you need to ensure the boots are completely dry and free of surface contaminants. You should remove laces and false tongues to reach every nook and cranny where water might seep in. By dedicating time to this foundational step, you ensure that the waterproofing compound penetrates deep into the grain rather than just sitting superficially on top of dust and grime.
Tools and Materials You’ll Need
To successfully waterproof your boots, you will need the following tools and materials:
- A soft-bristled brush or cloth
- Warm water
- Mild soap or boot cleaner
- Waterproofing compound (such as beeswax or silicone-based spray)
- Hairdryer or a warm, well-ventilated area for drying
- Optional: Leather conditioner or oil to maintain the leather’s texture and prevent cracking over time
6 Simple Step-by-step Guidelines on How to Waterproof Ariat Boots
Step 1: Deep Clean the Boots Thoroughly
The first and arguably most important step in the waterproofing process is to perform a deep clean of your Ariat boots to remove every particle of dirt, mud, and manure. You should start by removing the laces to access the tongue and eyelets, which are common entry points for moisture. Use a stiff brush to knock off any large clumps of dried mud, paying special attention to the welt (where the sole meets the upper), as this area traps debris that can wick moisture into the boot. Once the loose dirt is gone, use a damp cloth and a high-quality leather cleaner or saddle soap to scrub the leather in circular motions, lifting out ground-in grime.
It is crucial that you do not soak the leather during this process; the goal is to clean the surface, not saturate the material with water. If you are using saddle soap, create a rich lather and work it across the entire boot, ensuring you clean panels evenly to prevent discoloration. Once you have scrubbed the boots, wipe away all soap residue with a clean, damp cloth. Any leftover soap can prevent the waterproofing wax or oil from penetrating effectively, so take your time to ensure the leather is essentially “naked” and clean before moving on.
Step 2: Allow the Boots to Dry Completely
After cleaning, your boots will be damp, and you must allow them to dry completely before applying any waterproofing product, as oil and water do not mix. This drying process should be done slowly and naturally; never rush it by placing your leather boots next to a radiator, fire, or heater, as extreme heat can cause the wet leather to become brittle, crack, and shrink. Instead, stuff the boots with crumpled newspaper or insert cedar shoe trees, which will help absorb internal moisture and maintain the boot’s shape while it dries.

Place the boots in a well-ventilated area at room temperature and allow them to sit for at least 12 to 24 hours. If the newspaper becomes soaked, replace it periodically to speed up the moisture absorption. You can check if they are ready by feeling the leather; it should feel dry to the touch and not cool or clammy. Applying waterproofing agents to damp leather will seal moisture inside the fibers, leading to mold growth and potential rotting from the inside, so patience in this step is non-negotiable for long-term durability.
Step 3: Condition the Leather Fibers
Once your boots are clean and bone-dry, the leather might feel slightly stiff or dry, which indicates that the natural oils have been stripped away during cleaning. Before sealing the surface with a heavy waterproofer, it is highly beneficial to apply a dedicated leather conditioner to replenish these essential oils and restore flexibility. Pour a small amount of conditioner onto a soft cloth and massage it into the leather using small, circular motions, ensuring you cover every inch of the material.
Conditioning prevents the leather from cracking in the future and creates a healthy base for the waterproofing layer. Allow the conditioner to soak in for about 15 to 20 minutes; you will see the leather darken slightly as it absorbs the nutrients. If the boots are particularly old or dry, they may drink up the conditioner rapidly, in which case a second light application might be necessary. This step ensures that your waterproofing seal protects a healthy, supple material rather than locking in dryness that could lead to structural failure later on.
Step 4: Choose and Test Your Waterproofing Product
Selecting the right waterproofing product is critical because different leather finishes on Ariat boots require different treatments to maintain their appearance and function. For rugged work boots or full-grain leather, a beeswax-based paste or mink oil is often the best choice for heavy-duty protection, while suede or nubuck Ariats require a specialized silicone spray to avoid ruining the nap. Before applying the product to the entire boot, you must perform a patch test on a small, inconspicuous area, such as the back of the heel or inside the tongue.
Apply a tiny amount of the product and wait to see how the leather reacts; some waterproofing oils will significantly darken the leather, and you need to decide if you are comfortable with this cosmetic change. If you are using a spray, ensure you are in a well-ventilated area to avoid inhaling fumes. Once you are satisfied with the patch test results and have confirmed the product is compatible with your specific boot model, you can proceed with confidence, knowing you won’t accidentally ruin the finish of your expensive footwear.
Step 5: Apply the Waterproofing Agent Evenly
Now begins the main event: applying the waterproofing compound to seal the boots against moisture intrusion effectively. If you are using a wax or paste, scoop a small amount onto a clean cloth or your fingers (the heat from your hand helps melt the wax) and work it vigorously into the leather. You need to pay extra attention to the seams, stitching, and the welt area, as these are the weak points where water is most likely to penetrate; don’t be afraid to apply a slightly thicker layer in these critical zones.

If you are using a spray, hold the can about 6 to 8 inches away from the boot and apply a continuous, even coat, ensuring you don’t miss any spots. For waxes, ensure you spread the product thinly and evenly to avoid a sticky buildup that attracts dirt. The goal is to saturate the surface fibers without clogging the leather completely, allowing it to breathe while repelling water. Be methodical, working from the toe box back to the heel, and ensure that the tongue area behind the laces is fully treated, as this area acts as a funnel for rain and snow.
Step 6: Cure, Buff, and Reapply if Necessary
After applying the waterproofing agent, you cannot simply put the boots on and walk out the door; the product needs time to cure and bond with the leather. Let the boots sit in a warm, dry place for another few hours or overnight to allow the wax or oil to set fully. Once the product has cured, the boots may look dull or hazy, so take your horsehair brush and buff the leather vigorously to remove any excess product and restore a healthy shine to the surface.
For boots that will be subjected to extreme conditions, such as deep snow or constant mud, a single coat may not be sufficient protection. After the first coat has cured and been buffed, consider applying a second, lighter coat to ensure maximum water resistance. This layering technique builds a robust barrier that can withstand heavy abuse. Finally, replace your laces, and your Ariat boots are now fully armored against the elements, ready to keep your feet dry and comfortable no matter what the weather forecast holds.
Following these steps on how to waterproof Ariat boots will not only prolong the life of your boots but also save you from having to buy a new pair sooner than necessary. It is important to take care of your boots, especially if you use them for outdoor activities or work in harsh weather conditions.
Common Mistakes to Avoid
One of the most frequent errors people make is over-oiling their boots, which softens the leather too much and causes it to lose its supportive shape and structure. Another major mistake is applying waterproofing products to dirty boots, which traps grit that acts like sandpaper, destroying the fibers as you walk.

Many owners also neglect the seams and welts, focusing only on the toe and sides, which leaves the most vulnerable points exposed to leaks. Additionally, using silicone sprays on full-grain leather intended for oil treatment can dry out the leather over time, reducing its lifespan. Finally, never force-dry your boots with high heat after waterproofing, as this can cause the leather to crack and the adhesive soles to delaminate.
Do You Need To Use Professionals?
While waterproofing boots is generally a straightforward DIY task that most owners can handle at home, there are specific instances where seeking professional help is advisable. If your Ariat boots are made of exotic leathers like ostrich, caiman, or lizard, standard waterproofing methods can easily ruin the finish and texture, making a professional cobbler’s expertise invaluable. Professionals have access to specialized products and techniques that can clean and protect delicate or high-end leathers without altering their appearance or breathability.
Furthermore, if your boots are severely damaged, with deep cracks or separated soles, waterproofing alone will not solve the problem and might even mask structural issues. A professional can repair the stitching and soles before applying a heavy-duty industrial waterproofing treatment that is far superior to consumer-grade sprays. For standard maintenance on full-grain leather work boots, you likely do not need a pro, but for restoration or exotic materials, the cost of a professional service is worth the peace of mind to protect your expensive investment.
How Much Will It Cost?
The cost of waterproofing your Ariat boots is generally quite low, especially when compared to the price of replacing a ruined pair of boots. If you choose the DIY route, you can expect to spend between $15 and $30 on a basic kit that includes a good cleaner, a conditioner, and a waterproofing wax or spray. These products typically last for many applications, meaning the cost per treatment drops to just a few dollars, offering immense value for the protection provided.
On the other hand, if you opt for professional services, the price can vary significantly based on your location and the condition of the boots. A basic clean and waterproof service from a local cobbler might range from $25 to $50, while a full restoration that includes deep conditioning and minor repairs could cost upwards of $80. While the professional route is more expensive, it saves you time and ensures the job is done with industrial-grade materials, which can be a smart choice for high-value or vintage boots.
Frequently Asked Questions
Q1: How Often Should I Waterproof My Ariat Boots?
A1: The frequency of waterproofing depends entirely on how often you wear the boots and the conditions you expose them to. For daily work boots used in mud, snow, or wet grass, you should aim to clean and re-waterproof them once a month to maintain the barrier. However, for casual wear boots that only see occasional rain, a comprehensive treatment at the start and end of the winter season is usually sufficient. A good rule of thumb is to watch water behavior on the boot surface; if water stops beading up and starts soaking into the leather, it is immediately time to treat them again.
Q2: Can I Use Mink Oil on All Types of Ariat Boots?
A2: No, you cannot use mink oil universally on all Ariat boots, as it is a heavy conditioner best suited for oil-tanned and rugged work leathers. Mink oil significantly darkens leather and can ruin the nap of suede or nubuck finishes, turning them into a greasy, matted mess that is impossible to fix. For lighter-colored fashion boots or those with a suede finish, you must use a specialized spray that is designed to protect without altering the color or texture. Always read the manufacturer’s care guide for your specific model before applying heavy oils like mink or neatsfoot.
Q3: Will Waterproofing My Boots Affect Their Breathability?
A3: Yes, waterproofing will slightly affect breathability, but using the correct product minimizes this impact. Heavy waxes and greases create a solid seal that blocks water effectively but also reduces the leather’s ability to let sweat vapor escape, which can make your feet warmer. Modern silicone sprays and water-based emulsions are designed to coat the individual leather fibers rather than clogging the pores entirely, offering a good balance between keeping water out and letting air flow. If breathability is a major concern, opt for lighter sprays and apply them more frequently rather than using heavy, occlusive pastes.
Conclusion
Waterproofing your Ariat boots is a fundamental aspect of ownership that pays dividends in comfort and longevity. By following the steps on how to waterproof Ariat boots outlined above—cleaning, drying, conditioning, and sealing—you ensure that your boots remain a reliable barrier against the elements, whether you are traversing a muddy job site or walking through a snowy pasture.
While the process requires a small investment of time and money, the result is a pair of boots that not only look better but also perform better for years to come. Don’t wait for your feet to get wet; take proactive steps today to protect your gear.
About
As the lead voice behind Shoenify, I bridge the gap between footwear aesthetics and technical performance. With a career dedicated to the intersection of fashion and function, I provide readers with data-driven reviews and deep dives into the global footwear market. My mission is to help every reader find the perfect fit, whether they are hitting the track or the boardroom.
Education RMIT University
-
RMIT University: Bachelor of Design (Footwear & Accessories)
-
Nottingham Trent University: MA in Fashion Design (Specializing in Footwear Innovation)
Publications and Impact
My insights on footwear trends and sustainable manufacturing have been featured in leading industry trade journals. Through Shoenify, I have influenced thousands of purchasing decisions by prioritizing transparency and rigorous testing. My work focuses on the evolution of “smart” footwear and the impact of 3D printing on the future of the industry.