

There is nothing quite as frustrating as looking down at your favorite pair of shoes and spotting an ugly, dark scuff mark ruining the finish. Whether you are heading to an important business meeting or just trying to look your best for a night out, these blemishes can instantly downgrade your entire outfit and leave you feeling less confident about your appearance.

Fortunately, you don’t need to throw out your beloved footwear or spend a fortune at a professional cobbler just because of a few surface marks. With the right knowledge and a few household items, you can easily restore your shoes to their former glory, ensuring they look polished, clean, and ready for whatever your day holds. In this guide on how to remove shoe scuffs, we’ll walk you through the most effective methods for getting rid of those pesky marks and making your shoes look like new again.
Understanding Shoe Materials
Before tackling scuffs, it’s important to understand the material your shoes are made of. Different materials require different cleaning techniques, and using the wrong method can cause further damage. Leather, for instance, is durable but sensitive to harsh chemicals and excess moisture, while suede demands gentle care due to its soft and delicate texture.
Additionally, synthetic materials, canvas, and patent leather each have their own unique properties that dictate the best cleaning approach. By identifying your shoe’s material, you can choose the most effective and safe method for removing scuffs, ensuring your footwear remains in great condition for longer.
Tools and Materials You’ll Need
To effectively clean your shoes, there are a few essential tools and materials you’ll need to have on hand. These include:
- Soft-bristled brush or toothbrush
- Mild soap or detergent
- White vinegar
- Baking soda
- Warm water
- Cloth or sponge
- Toothpaste (for white sneakers)
Having these items readily available will make the cleaning process much easier and more efficient.
8 Step-by-step Guidelines on How to Remove Shoe Scuffs
Step 1: Assess the Shoe Material Before You Begin
Before you apply any cleaning solution or start scrubbing away at a mark, the absolute first step is identifying exactly what material your shoes are made from. Leather, suede, canvas, patent leather, and synthetic fabrics all react very differently to cleaning agents, and using the wrong method can turn a small scuff into permanent damage. For instance, water is generally safe for canvas but can leave unsightly stains on certain types of suede if not handled correctly. Taking a moment to read the care label inside the shoe or looking up the manufacturer’s recommendations can save you from a disaster.
Once you have confirmed the material, you should inspect the scuff itself to determine if it is merely a surface transfer of dirt or a deep scratch that has removed the finish. A surface scuff sits on top of the material and is usually removable with cleaning, whereas a deep scratch might require filling or dyeing later on. By understanding the nature of the damage and the material you are working with, you can select the appropriate tool from your kit. This preparation ensures that your efforts will be effective and safe, preserving the longevity of your footwear.
Step 2: Clean and Prep the Surface Area
You should never start scrubbing a specific scuff mark while the rest of the shoe is covered in loose dust, mud, or grit. If you rub a dirty shoe vigorously, those tiny particles of dirt act like sandpaper and can create new micro-scratches surrounding the area you are trying to fix. Begin by taking a soft-bristled brush or a dry microfiber cloth and gently wiping down the entire shoe to remove any surface debris. This is particularly important for leather and patent leather shoes, where even small grains of sand can mar the glossy finish during the cleaning process.
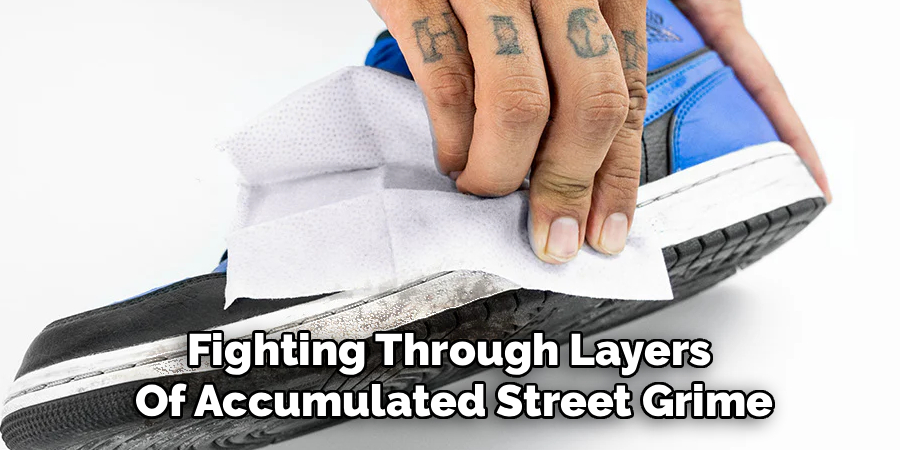
After the dry wipe, if the shoe material allows it (like leather or canvas), use a slightly damp cloth to wipe away any lingering dust or sticky residue near the scuff. Allow this to air dry for a minute or two, so you aren’t working on a soaking wet surface, unless the specific cleaning method calls for it. This preparatory step creates a clean canvas for your work, ensuring that the cleaning agents you apply next can focus entirely on breaking down the scuff mark rather than fighting through layers of accumulated street grime.
Step 3: Try the Pencil Eraser Method First
For many surface-level scuffs, especially on leather, suede, and white rubber soles, the simplest solution is often the most effective one: a standard pencil eraser. You should use a white eraser to avoid transferring pink dye onto light-colored shoes. Gently rub the eraser back and forth over the scuff mark, applying a moderate amount of pressure. The friction works to lift the rubber or dirt transfer off the shoe’s surface without using any liquid chemicals that might alter the material’s texture or color.
This method is particularly excellent for suede shoes, which are notoriously difficult to clean with liquids. As you rub, you might notice the eraser leaving behind crumbs; simply brush these away periodically to check your progress. It might take a few minutes of persistent, gentle rubbing to see the mark completely disappear. If the eraser doesn’t seem to be working after a minute or two, stop and proceed to a stronger method, but always start here because it is the least invasive technique and carries the lowest risk of damaging your shoe’s finish.
Step 4: Utilize the White Toothpaste Technique
If the eraser method fails to remove the mark, grab a tube of standard white toothpaste—avoiding gel varieties or those with whitening crystals that could scratch the surface. Apply a small, pea-sized amount of toothpaste onto a soft cloth or an old toothbrush, depending on the texture of the shoe. Gently rub the paste onto the scuff mark in small, circular motions. The mild abrasives in the toothpaste act similarly to a polishing compound, gently grinding away the foreign material that created the scuff without harming the durable surface underneath.
This technique is surprisingly effective for leather sneakers and the rubber toe caps of canvas shoes. Continue scrubbing gently for about a minute, then wipe away the residue with a clean, damp cloth to inspect the area. You may need to repeat the process a second time for stubborn marks. It is crucial to be gentle and patient; aggressive scrubbing can dull the finish of shiny leather. Once the scuff is gone, ensure you wipe away absolutely all traces of the toothpaste, as dried residue can leave a white, chalky film on your footwear.
Step 5: Harness the Power of Baking Soda
For canvas shoes or tougher scuffs on durable synthetic materials, a baking soda paste can be a game-changer. Mix about one tablespoon of baking soda with a small amount of warm water until it forms a thick, consistent paste. Dip your toothbrush or cloth into this mixture and apply it directly to the scuff. The baking soda provides a slightly stronger abrasive action than toothpaste and also has natural cleaning properties that help lift dirt and grime from the fibers of the fabric.
Scrub the area in a circular motion, working the paste into the texture of the shoe. This method is particularly good for white canvas shoes that have dark scuffs from rubber or asphalt. Let the paste sit on the mark for a few minutes to break down the stain before wiping it off with a clean, wet cloth. If you are cleaning a canvas, you might want to rinse the area thoroughly to prevent the baking soda from drying into a powdery residue. This natural cleaner is effective and eco-friendly, making it a great option for maintaining casual footwear.
Step 6: Use Nail Polish Remover on Patent Leather
Patent leather shoes are known for their high-gloss shine, but they are also magnets for dark, ugly scuff marks that stand out vividly. To tackle these, dip a cotton swab or a corner of a cloth into acetone-free nail polish remover. It is vital to use an acetone-free formula because harsh acetone can strip the finish right off the leather, causing irreparable damage. Test a tiny, hidden spot on the shoe first to ensure there is no adverse reaction before you attack the main scuff.
Once you have tested it, gently rub the scuff mark with the dampened swab using light pressure. You should see the scuff transfer from the shoe to the cotton almost immediately. Do not rub too hard or for too long in one spot, as you want to remove the mark, not the shoe’s coating. As soon as the scuff is gone, wipe the area with a damp cloth to neutralize the chemicals and stop them from eating into the finish. This method requires a delicate touch but yields professional-looking results on glossy footwear.
Step 7: Apply the Magic Eraser for Rubber Soles
When it comes to the white rubber sidewalls and soles of sneakers, few tools rival the effectiveness of a melamine sponge, commonly known as a Magic Eraser. Wet the sponge and squeeze out the excess water so it is damp but not dripping. Rub the sponge firmly over the scuffs on the rubber parts of your shoes. The micro-scrubbers in the foam work deep into the textured rubber surface, lifting out dirt, grass stains, and black scuff marks that other methods often leave behind.
You will likely see the sponge disintegrate slightly as you scrub; this is normal and part of how the product works. Keep moving to a clean section of the sponge as it gets dirty to avoid spreading the grime back onto the shoe. While this is amazing for rubber, be very careful not to rub the sponge on the upper material of the shoe, especially if it is leather or suede, as the abrasive nature of the sponge can strip color and finish. Stick strictly to the soles and toe caps for a blindingly white result that makes old sneakers look brand new.
Step 8: Condition and Protect After Cleaning
After you have successfully removed the scuff marks, the cleaning process has likely stripped away some of the natural oils or protective coatings on the shoe. To prevent the material from drying out or cracking, and to blend the cleaned area with the rest of the shoe, you must apply a conditioner or polish. For leather shoes, use a high-quality leather conditioner or a matching shoe polish. Apply it with a soft cloth in circular motions, covering the entire shoe, not just the spot you cleaned, to ensure a uniform look.
Buff the shoes with a clean horsehair brush or a microfiber cloth to bring back the shine and seal the surface. If you cleaned canvas or suede, consider applying a protective spray designed for those materials to repel future dirt and water. This final step is what separates a quick fix from proper shoe care. By nourishing the material after the stress of cleaning, you extend the life of your shoes and make them more resistant to future scuffs, keeping them looking sharp for the long haul.
Following these steps on how to remove shoe scuffs and marks will not only help you maintain the look of your shoes, but it also save you money from constantly replacing them. Proper shoe care is essential in making sure your footwear lasts longer and stays in good condition.
Frequently Asked Questions
Q1: Can I Use Alcohol To Remove Scuffs From Leather Shoes?
A1: While rubbing alcohol can be effective at removing ink stains and some scuffs, it should be used with extreme caution on leather shoes. Alcohol is a drying agent and can quickly strip the leather of its natural oils and dye, potentially leaving a faded patch that looks worse than the original scuff. If you must use it, dilute it with water, apply it gently to a small area, and immediately follow up with a rich leather conditioner to restore the lost moisture. It is generally safer to stick to milder methods like toothpaste or specific leather cleaners first.
Q2: How Do I Prevent Scuff Marks From Happening In The First Place?
A2: While it is impossible to completely prevent scuffs if you wear your shoes regularly, you can minimize the damage by applying a protective wax or spray before you wear them. Polishing leather shoes regularly creates a protective barrier that sits on top of the material, meaning scuffs often damage the wax layer rather than the leather itself. Additionally, being mindful of how you walk and storing your shoes properly—using shoe trees and keeping them in dust bags rather than throwing them in a pile—can significantly reduce the accumulation of scratches and marks over time.
Q3: What Should I Do If The Scuff Mark Has Removed The Color?
A3: If the “scuff” is actually a deep scratch where the surface finish and color have been scraped away, cleaning alone will not fix the problem. In this case, you need to restore the pigment using a color-matched shoe polish or a leather dye. Apply the polish to the affected area, letting it fill in the scratch, and then buff it to blend with the surrounding material. For very deep gouges or expensive footwear, it might be worth taking the shoes to a professional cobbler who can fill the scratch and refinish the leather expertly.
Conclusion
Removing shoe scuffs doesn’t have to be a complicated or expensive ordeal. By correctly identifying your shoe’s material and using simple household items like toothpaste, baking soda, or a pencil eraser, you can easily handle most surface blemishes at home. The key is to start with the gentlest method and work your way up, ensuring you protect the integrity of your footwear.
Remember, the final step of conditioning is just as important as the cleaning itself. Taking these few minutes to care for your shoes not only saves you money on replacements but also ensures you always step out looking polished and professional. Treat your shoes well, and they will continue to complete your outfit perfectly for years to come. Thanks for reading this on how to remove shoe scuffs.
About
As the lead voice behind Shoenify, I bridge the gap between footwear aesthetics and technical performance. With a career dedicated to the intersection of fashion and function, I provide readers with data-driven reviews and deep dives into the global footwear market. My mission is to help every reader find the perfect fit, whether they are hitting the track or the boardroom.
Education RMIT University
-
RMIT University: Bachelor of Design (Footwear & Accessories)
-
Nottingham Trent University: MA in Fashion Design (Specializing in Footwear Innovation)
Publications and Impact
My insights on footwear trends and sustainable manufacturing have been featured in leading industry trade journals. Through Shoenify, I have influenced thousands of purchasing decisions by prioritizing transparency and rigorous testing. My work focuses on the evolution of “smart” footwear and the impact of 3D printing on the future of the industry.