

The iconic silhouette of the Nike Air Force 1 has remained a staple in sneaker culture for decades, transcending trends and generations. While the crisp white leather and chunky sole are instantly recognizable, the way you lace them up can completely transform their vibe. Whether you are aiming for a relaxed, street-ready look or a tight, performance-based fit, mastering the art of lacing is essential.

This guide on how to tie Air Force laces dives deep into the nuances of tying your Air Force laces, ensuring your kicks look fresh and feel great every time you step out.
Understanding Decorative vs. Functional Laces
When we talk about lacing up a pair of Air Force 1s, it is crucial to distinguish between two primary approaches: decorative and functional lacing. Functional lacing is exactly what it sounds like—it is designed to keep the shoe securely attached to your foot. This method prioritizes stability, support, and performance.
If you are planning on walking long distances, playing a pickup game of basketball, or simply have a day full of active movement ahead of you, functional lacing is non-negotiable. You pull the laces tight enough to lock your heel in place and prevent slippage, ensuring that the shoe moves with you rather than against you. This style often ends in a traditional bow knot, which allows for easy adjustments throughout the day.
On the other hand, decorative lacing—often referred to as “loose lacing” or “factory styling”—is purely aesthetic. This approach emerged from streetwear culture, where the goal is to make the shoe look as relaxed and effortless as possible. In this method, the laces are often left untied or tucked away inside the shoe, creating a clean, seamless appearance without a visible knot.
The laces are threaded loosely through the eyelets, giving the sneaker a wider, chunkier profile that pairs perfectly with baggy jeans or cargo pants. While this looks incredibly stylish and laid-back, it sacrifices the secure fit provided by functional lacing. Understanding the difference allows you to switch your style based on your activity level and outfit choice, giving you versatile options for the same pair of sneakers.
6 Simple Step-By-Step Guidelines on How to Tie Air Force Laces
Step 1: Prepare the Sneaker and Center Your Laces
Before you even begin threading the laces through the eyelets, it is absolutely vital to prepare your sneaker properly to ensure a clean final result. Start by completely unlacing the shoe if it came pre-laced from the factory, or if you are switching out old laces for a fresh pair. Take a moment to clean the tongue and the area around the eyelets, as dust and dirt can accumulate there and ruin the crisp look of your white laces.
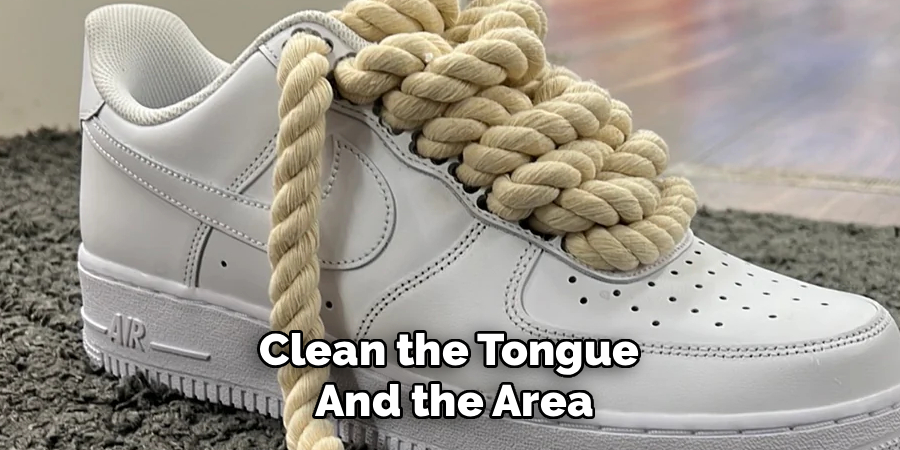
Once the shoe is prepped, take your lace and find the center point by holding the two aglets (the plastic tips) together and letting the lace hang down. This step is often overlooked, but ensuring equal length on both sides right from the start saves you the headache of re-lacing the entire shoe later when one side ends up too short to tie.
Insert the aglets into the bottom two eyelets closest to the toe box, going from the outside in (over the top). This creates a horizontal bar across the bottom of the lacing system, which serves as the foundation for the rest of your work. Pull the laces through until the loop is flat against the tongue.
At this stage, double-check your lengths again by pulling both ends upward. If one side is longer than the other, adjust the horizontal bar until they are perfectly even. This attention to detail in the very first step is the secret to a professional-looking lace job. Make sure the lace is flat and not twisted as it passes through the eyelets, as twisted laces can look messy and disrupt the clean lines that Air Force 1s are famous for.
Step 2: Begin the Crisscross Pattern Upward
With your foundation set, you can now begin the classic crisscross pattern that defines the standard lacing style. Take the lace on the right side and cross it over to the left side, inserting it into the next available eyelet. Again, go from the outside in (over the top) to maintain that clean, flat look against the shoe’s upper.
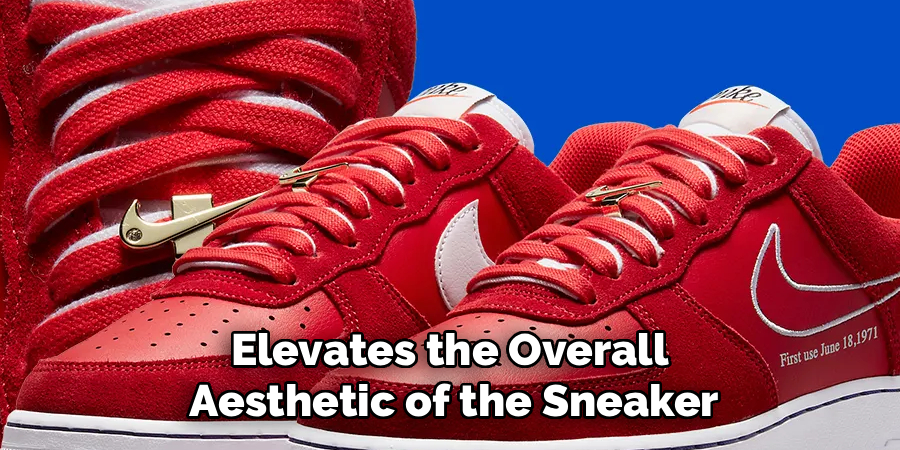
Repeat this motion with the left lace, crossing it over to the right side and inserting it into the corresponding eyelet. As you do this, pay close attention to how the laces lay on top of each other. Consistency is key here; decide now if you want the right lace to always cross over the left, or vice versa. Sticking to one pattern creates a uniform, intentional appearance that elevates the overall aesthetic of the sneaker.
Continue this alternating pattern, moving up one set of eyelets at a time. It is important to maintain consistent tension as you work your way up the shoe. You do not want the bottom to be extremely tight while the middle is loose; aim for a snug but comfortable hold.
Every time you pull a lace through, take a second to smooth it out with your fingers, removing any twists or kinks. If you are going for the loose-lace look, leave a little bit of slack in each crossover, allowing the shoe to sit wider on your foot.
If you prefer a tighter fit, give a gentle tug after each cross to secure the tension. This rhythmic process forms the backbone of your sneaker’s look, so take your time to get the spacing and tension just right before moving higher up the tongue.
Step 3: Navigate the Tongue Loop Stability
As you reach the middle of the tongue on your Air Force 1s, you will notice a small fabric loop or slit designed to hold the tongue in place. This feature is not just decorative; it is a critical functional element that prevents the tongue from sliding down or drifting to the side while you walk.
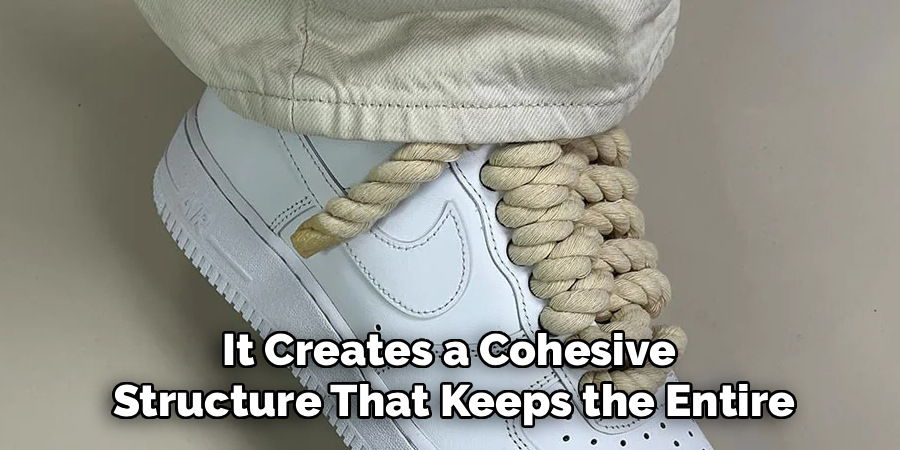
When your lacing pattern reaches the eyelets adjacent to this loop, you have a choice to make. For maximum stability, thread the laces through this loop as you cross them over. This effectively locks the tongue in a centered position, ensuring that the branding on the tongue tag remains visible and upright. It creates a cohesive structure that keeps the entire upper part of the shoe aligned correctly with your foot.
If you skip the tongue loop, you might find yourself constantly adjusting your sneakers throughout the day as the tongue slips to the side, which can be annoying and looks unkempt. To use the loop correctly, take the lace that is crossing over at that specific level and pass it through the loop before inserting it into the eyelet on the opposite side.
Do this for both laces if the design allows, or just the one that naturally aligns with the loop’s position. This step adds an extra layer of security to the fit. Even if you are aiming for a loose, decorative style, utilizing the tongue loop is highly recommended because it maintains the shoe’s silhouette without adding unnecessary tightness. It essentially anchors the decorative looseness so the shoe doesn’t look sloppy.
Step 4: Adjust Tension for Desired Style
Once you have laced past the tongue loop and are approaching the top of the shoe, pause to evaluate the overall tension and fit. This is the stage where customization truly happens. If you are going for the popular “loose lace” aesthetic seen on many influencers and celebrities, you need to go back down to the bottom eyelets and gently pull on the crosses to introduce slack.
Work your way up from the toe to the ankle, loosening each section just enough so the shoe feels roomy but not like it’s falling off. The goal is to have the laces hover slightly above the tongue rather than pressing down into it. This creates that chunky, relaxed profile that pairs so well with streetwear.
Conversely, if you prefer a secure, athletic fit, now is the time to tighten things up. Start from the bottom bar and pull each cross-section taut, ensuring the leather upper hugs your foot comfortably. As you move up, maintain that firmness. This ensures that your heel stays locked in the back of the shoe and provides the support necessary for walking long distances.
Be careful not to over-tighten, as this can restrict blood flow and make the shoes uncomfortable to wear for extended periods. Finding the “Goldilocks” zone—not too tight, not too loose—takes a bit of trial and error. Adjusting the tension now, before you finish the top eyelets, ensures the pressure is distributed evenly across the top of your foot, preventing hot spots or pinching later on.
Step 5: Handle the Top Eyelets and Aglets
Now you have reached the final set of eyelets near the ankle collar. How you handle this step depends heavily on whether you plan to tie a bow or tuck the laces. For a traditional tie, thread the laces through the top eyelets from the inside out (under to over). This positions the laces perfectly for tying a knot on the outside of the shoe.

However, for the clean, no-tie look, you should thread the laces from the outside in (over to the top), leaving the aglets hanging inside the shoe. Some sneakerheads prefer to stop one eyelet short of the very top to give the tongue maximum forward lean, which emphasizes the “tongue pop” look.
If you have excess lace length at this point, do not panic. This is common, especially with factory laces, which tend to be quite long. If you are tying a knot, simply proceed to the next step. If you are tucking them, you need to figure out where that extra length goes. You can loosely coil the excess lace and tuck it under the insole of the shoe (if removable) or simply lay it flat along the sides of your foot inside the shoe.
Another technique is to double-back the lace through the top two eyelets to eat up some length before tucking the ends. The key is to ensure the aglets and excess lace do not rub against your ankle or cause discomfort. Arrange them carefully so they sit flush against the padded interior of the sneaker.
Step 6: Finalize the Knot or Tuck
The final step is the finishing touch that defines the entire look. If you opted for the functional route, tie a standard bow knot. To keep it looking neat, try the “bunny ear” method or a standard shoelace knot, but focus on keeping the loops proportional to the size of the shoe. A massive, floppy bow can ruin the sleek lines of the Air Force 1, while a tiny, tight knot can look disproportionate.
Aim for loops that are similar in size to the width of the tongue. Make sure the knot is tight enough to hold but easy to undo. Double-knotting is an option if you are active, but it tends to look bulkier.
For the untied, loose aesthetic, the goal is invisibility. With the laces ending inside the shoe (as set up in Step 5), ensure the ends are tucked away comfortably. Some people let the tips hang loose out of the top eyelets for a rugged look, just barely dangling about an inch. Others prefer the completely seamless look where the laces disappear entirely into the shoe.
Put the shoe on and walk around your room for a minute. If you feel the aglets poking your foot, adjust their position. The shoe should stay on your foot securely enough for casual walking without the heel slipping out, held in place by the internal friction of the padded collar and the general structure of the leather. Once you are satisfied with the comfort and the visual, you are ready to hit the streets.
Following these steps on how to tie Air Force laces, you can ensure that your shoes stay secure and comfortable throughout the day. Additionally, properly tied laces can also improve the overall look of your outfit.
Seasonal Styling Tips
Adapting your Air Force 1 lacing style to the changing seasons can significantly enhance both your comfort and your outfit’s aesthetic. In the warmer summer months, opting for a loose, relaxed lacing style allows for better airflow and circulation around the foot, preventing overheating during hot days while matching the laid-back vibe of shorts and t-shirts. Conversely, during autumn and winter, tightening your laces provides a more secure seal against cold winds and moisture, pairing perfectly with heavier denim, layered hoodies, and thick coats.
You might also consider swapping standard cotton laces for thicker, rope-style laces or even waxed laces in winter to add a rugged texture that complements cold-weather gear. Furthermore, experimenting with seasonal colors—like burnt orange or deep burgundy laces in the fall, or pastel tones in the spring—can instantly update your classic white kicks without buying a new pair.
Common Mistakes to Avoid
One of the most frequent errors people make is twisting the laces as they thread them, which creates a messy, disorganized appearance that detracts from the shoe’s clean lines. Another common mistake is inconsistent tension, where the bottom of the lacing is tight while the top is loose, leading to an uneven fit and potential foot fatigue.
Many wearers also neglect the tongue loop, causing the tongue to slide sideways and ruining the symmetry of the sneaker. Over-tightening is a pitfall to avoid as well; choking the foot not only causes discomfort but can also warp the leather shape of the shoe over time. Finally, leaving one lace significantly longer than the other at the start results in a lopsided bow or awkward tucking situation at the end.
Comfort and Fit Tips
Achieving the perfect balance between style and comfort starts with wearing the right socks; a cushioned crew sock can fill out the shoe for a better fit if you prefer loose lacing. If you find your heel slipping, try the “runner’s loop” or lace lock technique at the top eyelets to secure the ankle without over-tightening the rest of the foot. For those with wider feet, skipping a crossover in the middle of the shoe (window lacing) can relieve pressure on the high point of the instep.
Always lace your shoes while your foot is inside them to gauge the true fit and pressure points accurately. Furthermore, remember that leather stretches over time, so you may need to re-tighten your laces after a few weeks of wear to maintain that perfect, snug feeling.
Care and Maintenance
Keeping your laces pristine is just as important as cleaning the leather upper; dirty laces can make even a clean pair of shoes look dingy. Regularly remove the laces and wash them in a mesh laundry bag with mild detergent and cold water to prevent fraying and shrinking. If your white laces have stubborn stains, soaking them in a mixture of water and baking soda or a specialized sneaker cleaner before washing can restore their brightness.
Avoid drying laces in a machine dryer, as the high heat can damage the plastic aglets and warp the fabric; instead, let them air dry completely before re-lacing. Inspect the aglets periodically for cracks or damage, as a broken tip makes lacing difficult and looks sloppy. Keeping a spare pair of fresh white laces on hand is a pro tip for instantly reviving beat-up kicks.
Frequently Asked Questions
Q1: Can I Machine-Wash My Air Force 1 Laces Without Ruining Them?
A1: Yes, you can absolutely machine wash your Air Force 1 laces, and it is often the most effective way to get them bright white again. However, you should never throw them in loose, as they can get tangled in the agitator or lost in the drain seal. Always place them inside a mesh laundry bag or a pillowcase tied securely at the top to protect them during the cycle. Use a gentle cycle with cold water to prevent shrinking or damage to the fibers, and avoid using bleach unless they are pure white, as bleach can weaken the material over time. Always air-dry them afterward.
Q2: How Do I Prevent My Air Force 1 Tongue From Sliding To The Side?
A2: The sliding tongue is a common annoyance with Air Force 1s, but it is easily fixable by utilizing the lace loop located in the middle of the tongue. When you are lacing up your shoes, ensure that you thread the laces through this fabric slit or loop rather than just crossing over it. This anchors the tongue to the laces, physically preventing it from drifting left or right while you walk. If your specific model lacks a loop, or if it still slides, you can try lacing the shoes slightly tighter near the top to hold the tongue more firmly against your ankle.
Conclusion
Mastering how to tie your Air Force 1 laces is a small detail that makes a massive difference in your overall style and comfort. Whether you prefer the laid-back, loose-laced look that dominates streetwear or the secure, functional fit of a traditional bow, the method you choose says a lot about your personal aesthetic. By following the step-by-step guidelines on how to tie Air Force laces provided, you can ensure your sneakers always look fresh, symmetrical, and intentional. Taking the time to prep your laces, ensure even tension, and utilize the tongue loop correctly will elevate your shoe game instantly.
Beyond the tying technique, remembering the tips for seasonal styling, maintenance, and fit will extend the life of your sneakers and keep them feeling as good as they look. Don’t be afraid to experiment with different tensions and styles until you find what works best for your foot shape and daily activities. Your Air Force 1s are a canvas—how you lace them is just another way to express your individuality. So grab your kicks, unlace them, and start fresh with the confidence that you now have the ultimate guide to lacing them perfectly.
About
As the lead voice behind Shoenify, I bridge the gap between footwear aesthetics and technical performance. With a career dedicated to the intersection of fashion and function, I provide readers with data-driven reviews and deep dives into the global footwear market. My mission is to help every reader find the perfect fit, whether they are hitting the track or the boardroom.
Education RMIT University
-
RMIT University: Bachelor of Design (Footwear & Accessories)
-
Nottingham Trent University: MA in Fashion Design (Specializing in Footwear Innovation)
Publications and Impact
My insights on footwear trends and sustainable manufacturing have been featured in leading industry trade journals. Through Shoenify, I have influenced thousands of purchasing decisions by prioritizing transparency and rigorous testing. My work focuses on the evolution of “smart” footwear and the impact of 3D printing on the future of the industry.