
Derby shoes are a staple in menswear, offering a versatile blend of formal elegance and casual comfort that few other footwear styles can match. Their open lacing system makes them distinctively different from Oxfords, providing a wider fit that accommodates higher insteps with ease. Whether you are dressing for a business meeting or a relaxed weekend outing, knowing how to lace them properly is key to maintaining their sharp appearance.

Mastering the art of tying Derby shoes not only enhances your overall look but also ensures superior comfort throughout the day. While it might seem like a simple task, the method you choose can affect the shoe’s longevity and how it sits on your foot.
By paying attention to the details of lacing, you elevate your style quotient significantly. In this guide on how to tie Derby Shoes, we’ll cover the basics and some creative techniques to give your footwear a unique touch.
Do Loafers Actually Need to Be Tied?
It is a common point of confusion for footwear enthusiasts, but generally speaking, traditional loafers are slip-on shoes designed specifically to be worn without laces. The quintessential loafer relies on its structure, saddle, or elastic gore to stay on the foot rather than a lacing system.
However, the fashion world loves hybridization, and you will occasionally see “loafer-style” shoes or boat shoes that feature decorative lacing around the collar or a small tie on the vamp.
In these specific hybrid cases, the laces are often purely aesthetic or provide minimal adjustment. For the vast majority of true loafers—like Penny, Tassel, or Horsebit loafers—tying is completely unnecessary, and attempting to add laces would ruin the clean, streamlined silhouette that defines the style.
Understanding Decorative vs. Functional Laces
Distinguishing between decorative and functional laces is crucial for proper shoe maintenance and fit. Functional laces are the mechanical heart of a Derby shoe; they actively pull the two quarters together to secure the shoe onto your foot.
When you tighten functional laces, you can feel the upper leather hugging your arch and instep, providing necessary support and stability. These laces need to be strong, often made of waxed cotton or durable nylon, to withstand the daily tension of walking.
Decorative laces, on the other hand, serve no structural purpose. You will often find these on boat shoes or certain fashion-forward hybrids where the lace runs around the heel cup purely for nautical aesthetics. Tugging on decorative laces will not tighten the fit of the shoe and might actually damage the eyelets or the leather channel they run through.
In the context of a true Derby shoe, the laces are always functional. If your Derby shoe has laces that don’t tighten the fit, it is likely not a true Derby but a slip-on disguised as one. Understanding this ensures you don’t over-tighten a shoe that isn’t designed to be constricted, preserving the leather’s shape.
6 Simple Step-By-Step Guidelines on How to Tie Derby Shoes
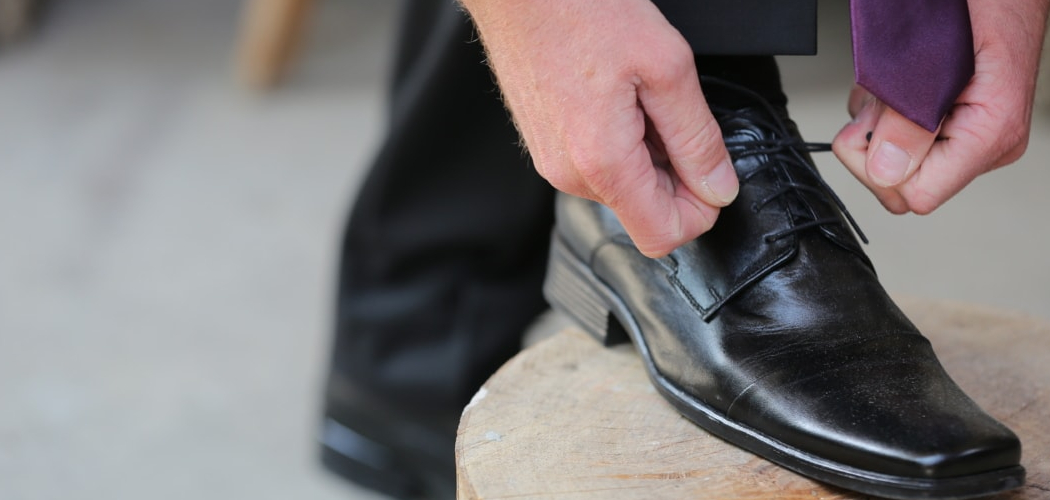
Step 1: Start with a Straight Bar at the Bottom
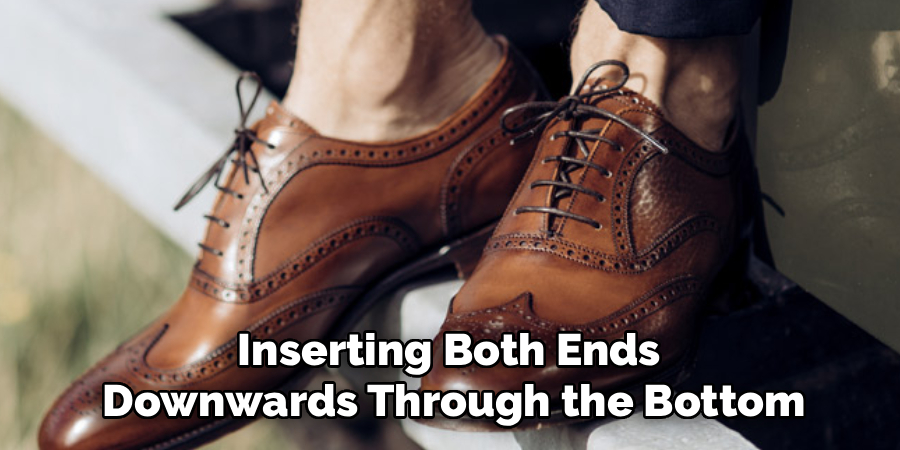
The foundation of a perfectly tied Derby shoe begins at the very bottom eyelets, where precision is paramount for creating a clean visual anchor. To begin, hold your shoe facing you and take your lace, inserting both ends downwards through the bottom-most pair of eyelets (closest to the toe).
Pull the laces through until the horizontal bar formed on the outside is perfectly straight and taut against the leather tongue. It is absolutely critical at this stage to ensure that the lengths of the lace on both the left and right sides are exactly even. If they are uneven now, you will end up with one loop significantly larger than the other when you finish tying the knot, which looks messy and unprofessional.
Once you have established this initial straight bar, take a moment to smooth out the lace so it lies flat against the leather rather than twisting. Twisted laces at the bottom bar can create pressure points on the top of your foot and ruin the sleek aesthetic you are aiming for. This first step sets the tension for the entire lacing system.
If you start too loose here, the whole shoe will feel sloppy; if you start too tight, you will constrict your toes. Aim for a firm, snug fit that holds the quarters in place without pinching the vamp. This foundational bar is the signature of the “straight lacing” or “bar lacing” method, which is generally preferred for dressier Derby shoes over the more casual crisscross method often seen on sneakers.
Step 2: Create the First Crossover on the Inside
With your bottom bar established, the next move happens underneath the leather quarters to maintain that clean exterior look essential for sharp dressing. Take the left end of the lace (which is now on the inside of the shoe) and feed it straight up through the next available eyelet on the same side.
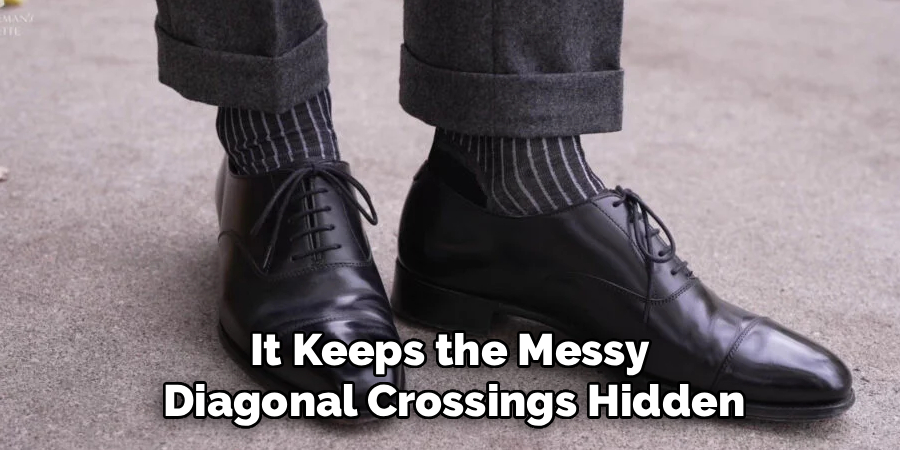
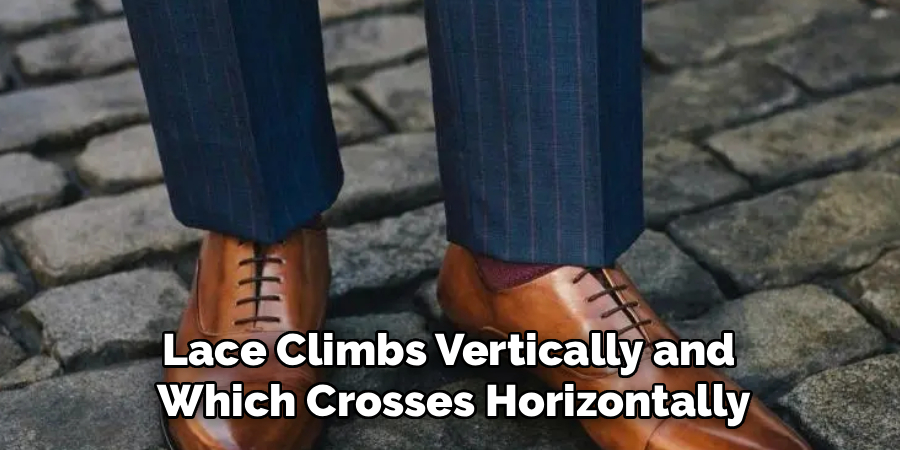
Do not cross over to the other side yet. Simultaneously, take the right end of the lace (also on the inside) and skip one eyelet, feeding it straight up through the third eyelet on the right side. This vertical movement inside the shoe is the secret to achieving the horizontal bar look on the outside. It keeps the messy diagonal crossings hidden between the tongue and the quarters, leaving only neat parallel lines visible to the observer.
This step can be slightly confusing for beginners because the two ends of the laces are doing different things. One is moving up a single space, while the other is jumping a space. This offset is necessary because you need to alternate which lace creates the horizontal bar at each level. By keeping the vertical runs on the inside, you also reduce friction against the top of your foot.
If you were to cross them diagonally underneath, you might create a bulky lump that presses into your instep, causing discomfort during long periods of wear. Double-check that your laces haven’t twisted during this internal maneuver. Flat laces are particularly prone to twisting inside the eyelets, so run your thumb along the lace as you pull it through to keep it smooth and aligned.
Step 3: Form the Second Horizontal Bar
Now that your laces have emerged from their respective eyelets on the vertical climb, it is time to create the second visible horizontal bar across the shoe. Take the lace that is currently coming out of the second eyelet on the left side and cross it over the top of the tongue to the second eyelet on the right side.
Insert it downwards into the eyelet. You should now have two parallel horizontal bars: the initial starting one at the bottom, and this new one directly above it. This creates a satisfying symmetrical appearance that complements the open lacing system of the Derby, making the shoe look wider and more substantial.
As you pull this lace through to the inside of the right quarter, ensure you maintain the same tension as the bottom bar. Consistency is key here; if one bar is tighter than the other, the shoe will pull unevenly, potentially distorting the leather and causing the shoe to wear irregularly over time.
You should also check the tongue of the shoe at this point. As you tighten the horizontal bars, the tongue has a tendency to slide to one side. Center it carefully before applying final tension.
This step solidifies the pattern: vertical movement inside, horizontal movement outside. It is a rhythmic process that, once mastered, becomes muscle memory. This specific bar lacing technique is superior for Derby shoes because it allows the quarters to meet neatly in the middle if your instep allows, or sit parallel if you have a higher arch.
Step 4: Continue the Alternating Pattern Upward
You will continue the pattern established in the previous steps, alternating which side of the lace climbs vertically and which crosses horizontally. The lace that you just fed into the right side (ending up inside the shoe) now needs to travel straight up to the next empty eyelet on that same right side.
Meanwhile, the other lace end—which had previously skipped an eyelet and is currently waiting on the left side—now crosses over horizontally to the right side to form the next bar. It enters the eyelet downwards, joining the internal structure. This leapfrog motion ensures that every eyelet is utilized and that the horizontal bars remain perfectly parallel all the way up the vamp.
This phase of the process requires a bit of concentration to ensure you don’t miss an eyelet or accidentally cross underneath. If you have a shoe with an odd number of eyelet pairs (like 5 pairs), the pattern adjusts slightly at the top, but the principle remains the same. Keep checking for twists.
Nothing ruins the look of a high-quality leather Derby more than a twisted, gnarly lace sitting right on top of the tongue. Taking the time to untwist the lace at every pass demonstrates an attention to detail that people notice, even if they don’t consciously realize why your shoes look better than everyone else’s.
As you climb higher toward the ankle, slight adjustments in tightness become more perceptible, so try your best to keep the pressure even across the entire bridge of the foot.
Step 5: Prepare for the Final Knot at the Top
As you reach the final pair of eyelets at the top of the quarters, both lace ends should be inside the shoe, ready to emerge for the final tie. Feed both ends straight up through the last eyelets, so they come out pointing away from the shoe.
At this stage, you should have a series of perfect horizontal bars running up the front of the shoe, with both lace ends now free at the top. Before you tie the knot, do a final tension check. Flex your foot inside the shoe. Wiggle your toes. The lacing should feel secure like a firm handshake—not a vice grip. If it feels too loose, start from the bottom bar and gently pull the slack up through each subsequent bar until it reaches the top.
Once the tension is perfect, you are ready to tie the knot. Most people default to a standard “granny knot,” which often sits crooked and comes undone easily. For a Derby shoe, you want a knot that sits horizontally to match the bars you just created. To achieve this, start with a standard left-over-right starting knot. Then, when you create the loops for the bow, ensure you go right-over-left.
This inversion of direction is what creates a “reef knot” or square knot structure, which lies perfectly flat and horizontal rather than twisting vertically. This small adjustment in how you tie the final bow makes a massive difference in the visual symmetry of the shoe and ensures the knot stays tight throughout the day without double-knotting.
Step 6: The Finishing Touches and Adjustment
With the knot tied, the final step involves aesthetic grooming and comfort adjustments to ensure the shoe is wearable for the long haul. Look at the loops of your bow; they should be roughly the same size as each other, and not so large that they drag on the ground or look floppy.
If the loops are too big, it means your laces are too long for the shoe, and you might consider buying a shorter pair (usually 75cm or 80cm works well for standard 4-5 eyelet Derbies). Conversely, if the loops are tiny stubs, the laces are too short, making them hard to grasp and tie. Ideally, the loops should sit neatly on top of the tongue without obscuring the top horizontal bar too much.
Finally, stand up and walk a few paces. Your feet expand slightly when you bear weight on them. If the lacing feels restrictive across the instep immediately upon standing, sit back down and loosen the bars slightly. Derby shoes are designed to accommodate volume, so you shouldn’t feel the laces cutting into your foot.
Tuck the ends of the laces away if you prefer a super-clean look, though with a Derby, visible loops are generally acceptable and part of the casual-formal charm. Check that the tongue hasn’t slipped sideways during the tying process one last time. A centered tongue protects your instep from the laces and keeps the shoe comfortable. Your Derbies are now perfectly laced, secure, and ready for any occasion.
Following these steps on how to tie Derby Shoes, you can confidently wear your shoes without worrying about them coming undone or causing discomfort. But aside from knowing how to properly tie your Derby Shoes, there are also other things that you should keep in mind when wearing this type of footwear.
Seasonal Styling Tips
Derby shoes are incredibly versatile and can transition through seasons with the right styling adjustments. In the warmer months of spring and summer, opt for lighter-colored suede Derbies in tan, stone, or light grey.
Pair them with no-show socks and cuffed chinos or tailored linen trousers to expose a bit of ankle, creating a breezy, relaxed aesthetic perfect for garden parties or casual Fridays. The texture of suede adds a softness that complements lighter fabrics effectively.
As the weather cools into autumn and winter, switch to leather Derbies in darker hues like oxblood, chocolate brown, or classic black. These pair exceptionally well with heavier fabrics such as wool flannel, corduroy, and dark denim. For a practical winter modification, consider Derbies with a rubber sole (like a Dainite sole) to handle wet pavement better than leather soles. You can also swap out standard waxed cotton laces for slightly thicker, textured boot laces if you are wearing a rugged brogue Derby, adding a touch of outdoorsy character to your winter ensemble.
Common Mistakes to Avoid
One of the most frequent errors is using laces that are the wrong length, resulting in giant, floppy loops that ruin the shoe’s sleek line. Another common mistake is mismatched tension, where the bottom of the lacing is loose while the top is strangled tight, causing foot fatigue and uneven leather creasing.
Many people also neglect the condition of their laces; frayed or faded laces make even expensive shoes look cheap and neglected. Finally, avoid “granny knots” that twist vertically; always aim for a balanced knot that sits horizontally across the shoe.
Comfort and Fit Tips
The beauty of the Derby shoe lies in its open lacing system, which offers far more adjustability than the closed lacing of an Oxford. If you have a high instep (the top part of the foot), the Derby is your best friend because the quarters can sit further apart without looking incorrect. However, ensure that the quarters don’t sit so far apart that the tongue is almost fully exposed, as this indicates the shoe is too narrow. Conversely, if the quarters touch each other completely when tied, the shoe might be too wide or the volume too high for your foot.
Always try on Derbies later in the day when your feet have naturally swollen to their maximum size to ensure a realistic fit. Wear the socks you intend to wear with the shoes; trying on dress Derbies with thick athletic socks will result in a poor fit assessment. If you experience heel slippage—a common issue—try a “heel lock” lacing method or insert a tongue pad to push your foot back into the heel cup. Remember that quality leather will stretch and mold to your foot over time, so a snug (but not painful) fit at the start is usually ideal.
Frequently Asked Questions
Q1: Why Are Derby Shoes Considered Less Formal Than Oxfords?
The distinction in formality comes down to the construction of the lacing system. Oxfords feature “closed lacing,” where the eyelet tabs are stitched underneath the vamp, creating a smooth, seamless, and restrictive silhouette that looks very sleek with a tuxedo or formal suit. Derby shoes utilize “open lacing,” where the eyelet tabs are sewn on top of the vamp. This construction appears slightly bulkier and more rugged, creating a visible separation between the shoe’s components. While a black patent Derby can certainly be worn with a suit, the inherent visible flaps of the open lacing system have historically aligned them closer to country wear and business casual attire rather than strict black-tie formality.
Q2: Can I Wear Derby Shoes With Jeans?
Absolutely, Derby shoes are arguably the best dress shoes to pair with jeans because of their inherent versatility and slightly chunkier profile. The open lacing system complements the casual nature of denim perfectly. However, the type of Derby matters; avoid super sleek, high-shine black patent Derbies with distressed jeans, as the contrast is too jarring. Instead, opt for brown leather, oxblood, or suede Derbies and perhaps choose a pair with brogueing (decorative perforations) to match the texture of the denim. Ensure your jeans are hemmed or cuffed appropriately so they don’t swallow the shoe; the hem should just kiss the top of the laces.
Conclusion
Tying Derby shoes correctly is a small detail that makes a significant impact on both your personal style and your daily comfort. By understanding the distinction between functional and decorative laces, and mastering the straight-bar lacing method, you ensure your footwear looks intentional and polished.
The Derby’s open lacing system offers a unique blend of roominess and elegance, making it a wardrobe essential for men with various foot shapes. Whether you are navigating a busy workday or enjoying a weekend brunch, a well-tied, well-fitted Derby shoe provides the perfect foundation. Remember to pay attention to lace length, avoid twisting, and adjust for seasonal fabrics to get the most out of this timeless footwear classic. Thanks for reading this guide on how to tie Derby Shoes.
About
As the lead voice behind Shoenify, I bridge the gap between footwear aesthetics and technical performance. With a career dedicated to the intersection of fashion and function, I provide readers with data-driven reviews and deep dives into the global footwear market. My mission is to help every reader find the perfect fit, whether they are hitting the track or the boardroom.
Education RMIT University
-
RMIT University: Bachelor of Design (Footwear & Accessories)
-
Nottingham Trent University: MA in Fashion Design (Specializing in Footwear Innovation)
Publications and Impact
My insights on footwear trends and sustainable manufacturing have been featured in leading industry trade journals. Through Shoenify, I have influenced thousands of purchasing decisions by prioritizing transparency and rigorous testing. My work focuses on the evolution of “smart” footwear and the impact of 3D printing on the future of the industry.