

Tan shoes are a versatile and stylish addition to any wardrobe, capable of elevating both casual and formal outfits. Their neutral, earthy tone offers a sophisticated alternative to standard black or brown footwear. However, their lighter color also means that dirt, scuffs, and stains are more visible, making regular cleaning and maintenance essential to keep them looking their best.

Proper care not only preserves the appearance of your tan shoes but also extends their lifespan, ensuring you can enjoy them for years to come. Whether your shoes are made of leather, suede, or canvas, understanding the right cleaning techniques is key. This guide on how to clean tan shoes will walk you through a simple, step-by-step process to effectively clean your tan shoes and protect your investment.
Understanding Tan Shoes
The appeal of tan shoes lies in their remarkable versatility and timeless charm. The color tan itself is a pale tone of brown, and it comes in various shades, from light beige to a richer caramel. This spectrum allows tan footwear to complement a wide range of colors, from navy and gray suits to denim and pastel casual wear.
Unlike black shoes, which can sometimes appear too formal, or dark brown shoes, which may not suit every color palette, tan shoes strike a perfect balance. They add a touch of warmth and personality to an outfit without overpowering it. This unique quality makes them a staple for fashion-conscious individuals who value both style and practicality.
7 Simple Step-By-Step Guidelines on How to Clean Tan Shoes
Step 1: Gather Your Cleaning Supplies
Before you begin the cleaning process, it’s crucial to gather all the necessary supplies. Being prepared will make the task smoother and more efficient, preventing you from having to search for items midway through. For leather shoes, you will need a horsehair brush, a soft microfiber cloth, a leather cleaner specifically formulated for light-colored leather, a leather conditioner, and a cream polish that matches the shade of your tan shoes. It’s also helpful to have a small bowl of water and some shoe trees to help the shoes maintain their shape.
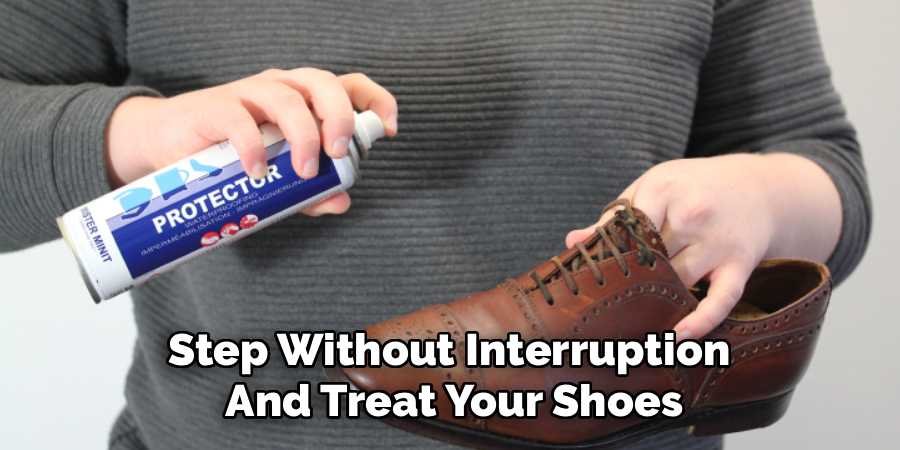
For suede or nubuck tan shoes, your kit will look slightly different. You’ll need a suede brush (which typically has both nylon and rubber bristles), a suede eraser for stubborn spots, a specialized suede cleaner, and a protective spray. For canvas shoes, a gentle laundry detergent or a mild soap, a soft-bristled brush (like an old toothbrush), and a couple of clean cloths will suffice. Having everything organized and within reach ensures you can follow each step without interruption and treat your shoes with the care they deserve.
Step 2: Prepare Your Shoes for Cleaning
The first active step in cleaning your tan shoes is preparation. This stage is about removing any surface-level dirt and getting the shoes ready for a deeper clean. Start by taking out the shoelaces. You can wash these separately by hand with a bit of soap and water or put them in a small mesh laundry bag and run them through a washing machine. If your shoes have insoles that are removable, take those out as well. This allows you to clean the interior of the shoe more effectively and lets the insoles air out.
Next, use a soft, dry brush to gently sweep away any loose dirt, dust, and debris from the entire surface of the shoe. For leather, a horsehair brush is ideal as it’s soft enough not to scratch the material. For suede, use a dedicated suede brush. Pay close attention to the seams and crevices where dirt tends to accumulate. This initial brushing is a critical step because attempting to apply cleaner over a layer of grit can grind the particles into the material, potentially causing scratches or permanent damage. A thorough dry brushing ensures you’re working on a clear surface.
Step 3: Address Stains and Scuffs
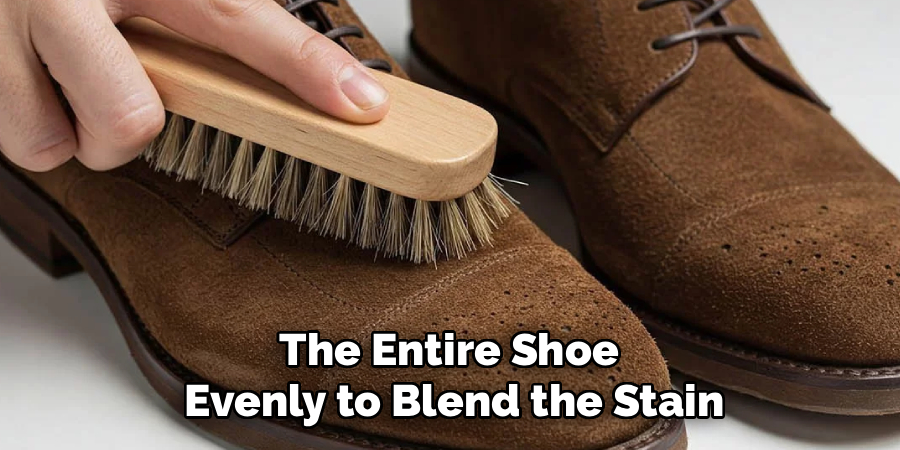
After the initial dry brushing, it’s time to focus on any specific stains or scuff marks. The method you use will depend heavily on the shoe’s material. For smooth leather, you can address minor scuffs by gently buffing them with a clean, soft cloth. For more stubborn marks, you can use a pencil eraser—a simple white or art gum eraser works best. Rub it gently over the scuff mark until it fades. For water stains on leather, dampen a cloth with plain water and blot the entire shoe evenly to blend the stain, then let it dry naturally.
For suede shoes, a suede eraser is your best tool for dry stains and scuffs. Rub the eraser over the affected area with moderate pressure. For oily or greasy stains on suede, you might need to apply a bit of cornstarch to the spot, let it sit for a few hours to absorb the oil, and then brush it off. On canvas shoes, you can create a paste of baking soda and water to gently scrub at stains with a toothbrush. Always test any spot treatment on an inconspicuous area first to ensure it doesn’t discolor the material.
Step 4: Perform a Deep Clean
With the surface dirt and isolated stains handled, you can now proceed with a thorough cleaning of the entire shoe. For leather shoes, apply a small amount of a pH-balanced leather cleaner onto a clean, damp cloth. Do not apply the cleaner directly to the shoe. Gently rub the cloth over the entire surface of the shoe in small, circular motions. This will lift any remaining dirt and grime from the leather’s pores. Work in sections to ensure you cover the whole shoe evenly without letting any one area become too saturated.
For suede, use a specialized suede and nubuck foam or liquid cleaner. Apply the cleaner to a soft brush or sponge and work it into the material using gentle, circular motions. The foam will lift dirt from the nap without soaking the suede. For canvas shoes, mix a small amount of mild soap or gentle laundry detergent with warm water. Dip a soft brush or cloth into the soapy solution and scrub the entire shoe, again using circular motions. Be careful not to oversaturate the canvas, as this can affect the glue holding the shoe together.
Step 5: Rinse and Dry Properly
Once you have finished the deep clean, the next step is to remove any cleaning residue and allow the shoes to dry completely. For leather shoes, take a separate, clean cloth, dampen it slightly with plain water, and wipe down the entire shoe to remove any excess cleaner. This step is important because leftover cleaning solution can leave a film on the leather. After wiping them down, stuff the shoes with newspaper or insert shoe trees. This helps them retain their shape and absorb excess moisture from the inside.
For suede and canvas, you’ll also need to wipe away excess cleaning foam or soap. Use a clean, damp cloth to blot the surface. Be careful not to rub, as this can damage the suede’s nap or push dirt back into the canvas weave. After blotting, stuff the shoes with paper or shoe trees. The most critical part of this step is the drying process. Let the shoes air dry naturally, away from direct sunlight or any direct heat source like a radiator or vent. Heat can cause leather to crack, suede to become stiff, and canvas to yellow or shrink. Patience is key; it may take 24 hours for them to dry completely.

Step 6: Condition and Polish
After your tan leather shoes are completely dry, it’s time to replenish the moisture that was stripped away during cleaning. Leather is a natural skin, and just like our own skin, it needs to be moisturized to stay soft, supple, and prevent cracking. Apply a small amount of leather conditioner onto a clean, soft cloth and gently rub it into the leather using circular motions. Ensure you apply a thin, even layer across the entire shoe, including the tongue and along the seams. Let the conditioner sit and absorb for about 15-20 minutes, then buff off any excess with another clean cloth.
Following conditioning, you can enhance the color and add a layer of protection with a cream polish that matches the shade of your tan shoes. Using a dauber brush or a soft cloth, apply the cream polish in small, circular motions. A cream polish is better than a wax polish for this purpose as it nourishes the leather while adding color. Let the polish dry for about 10 minutes. Afterward, use a horsehair brush to buff the entire shoe vigorously. This action creates friction and heat, which works the polish into the leather and brings out a beautiful, soft shine. This step is for leather shoes only; do not apply conditioner or polish to suede or canvas.
Step 7: Protect Your Shoes for the Future
The final step is arguably the most important for long-term care: protecting your newly cleaned shoes from future damage. Applying a protective barrier will help repel water, dirt, and stains, making subsequent cleanings much easier and extending the life of your footwear. For leather, suede, and canvas shoes alike, a quality waterproofing or stain-repellent spray is an excellent investment. Make sure you choose a product that is appropriate for the specific material of your shoes to avoid discoloration or damage.
Hold the spray can about six to eight inches away from the shoe and apply a light, even coat across the entire surface. Don’t saturate the material; it’s better to apply two light coats than one heavy one. Let the first coat dry for about an hour before applying a second one for maximum protection. Allow the shoes to dry completely before wearing them. This protective layer will act as an invisible shield, preventing moisture and dirt from penetrating the material. Reapply this protective spray every few weeks or after each deep cleaning to maintain its effectiveness.
Following these steps on how to clean tan shoes, you can easily keep your shoes looking new and extend their lifespan. With regular maintenance, your tan shoes will continue to elevate your style for years to come.
Seasonal Styling Tips
Tan shoes are a year-round accessory, fitting seamlessly into any season’s wardrobe with a few simple adjustments. In the spring and summer, pair light tan loafers or boat shoes with chinos, shorts, or linen trousers in colors like white, light blue, or olive green for a fresh, relaxed look. They also work beautifully with summer dresses and skirts.
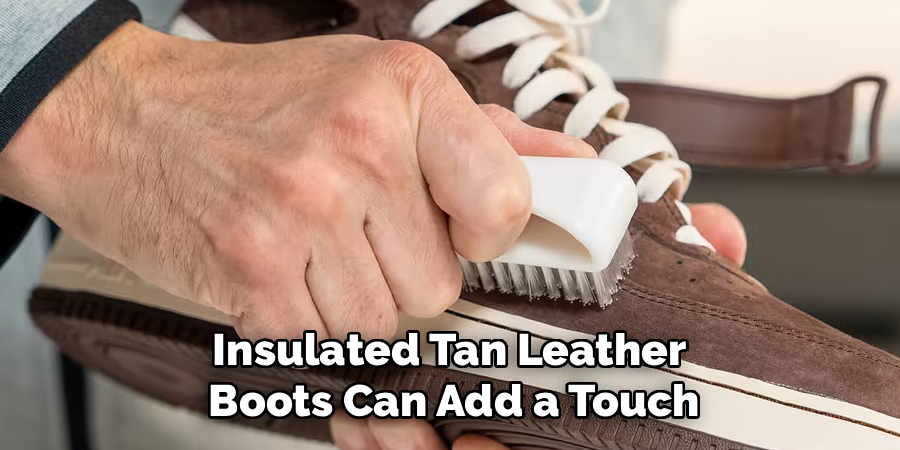
During the fall, richer, caramel-toned tan boots or brogues complement the season’s earthy palette. Wear them with dark-wash denim, corduroys, and chunky knits in shades of burgundy, forest green, and navy. In the winter, insulated tan leather boots can add a touch of warmth and style to a heavy coat and wool trousers, providing a smart contrast to darker winter ensembles.
Common Mistakes to Avoid When Wearing Tan Shoes
To keep your tan shoes looking their best, avoid a few common mistakes. Never wear them with an outfit where the colors clash; for example, avoid pairing them with black trousers in a formal setting, as the contrast can be too jarring.
Do not neglect regular maintenance, as their light color shows dirt quickly. Avoid wearing suede tan shoes in heavy rain or snow without proper waterproofing. Finally, don’t try to match your belt exactly to your tan shoes; instead, choose a belt in a complementary brown or cognac shade for a more sophisticated look.
Frequently Asked Questions
Q1: How to Maintain Tan Shoes?
A1: Regular maintenance is key to keeping your tan shoes in top condition. After each wear, give them a quick wipe with a soft cloth or a brush to remove surface dust. Store them with cedar shoe trees inserted to help absorb moisture, deodorize them, and maintain their shape. Every few months, or as needed, perform a full clean, condition (for leather), and polish. Re-apply a waterproofing spray periodically, especially before wearing them in potentially wet weather.
Q2: Can You Darken Tan Shoes?
A2: Yes, it is possible to darken tan leather shoes, but it should be done carefully and with the understanding that the process is generally permanent. You can achieve a darker shade by using a colored cream polish or a leather dye in a darker brown or mahogany. Always test the product on a small, hidden area first. Apply the polish or dye in thin, even layers, allowing each layer to dry before deciding if you want to go darker. Keep in mind, this will fundamentally change the character of your shoes.
Conclusion
In conclusion, darkening tan leather shoes can be a rewarding way to refresh their appearance and match them to a new wardrobe preference. However, it’s essential to approach the process with care and patience, as the results are permanent and can alter the original characteristics of the leather.
By testing products first, applying them in controlled layers, and prioritizing proper aftercare, you can achieve a professional-looking finish while extending the life of your shoes. Thanks for reading this guide on how to clean tan shoes.
About
As the lead voice behind Shoenify, I bridge the gap between footwear aesthetics and technical performance. With a career dedicated to the intersection of fashion and function, I provide readers with data-driven reviews and deep dives into the global footwear market. My mission is to help every reader find the perfect fit, whether they are hitting the track or the boardroom.
Education RMIT University
-
RMIT University: Bachelor of Design (Footwear & Accessories)
-
Nottingham Trent University: MA in Fashion Design (Specializing in Footwear Innovation)
Publications and Impact
My insights on footwear trends and sustainable manufacturing have been featured in leading industry trade journals. Through Shoenify, I have influenced thousands of purchasing decisions by prioritizing transparency and rigorous testing. My work focuses on the evolution of “smart” footwear and the impact of 3D printing on the future of the industry.