
Properly adjusting your Chaco sandals is the key to unlocking their legendary comfort and support. A well-fitted sandal prevents discomfort and ensures your foot is secure, whether you’re walking downtown or exploring a new trail. This customization is what sets Chacos apart, providing a fit that feels made just for you.
Taking a few moments to correctly adjust the straps transforms your experience, allowing the LUVSEAT™ footbed to align perfectly with your foot. This guide on how to adjust Chacos with 3 straps will walk you through the simple process, ensuring you get the most out of your sandals for years of adventure and everyday wear.
Materials You’ll Need
- Your Chaco sandals
- Your feet
- A few minutes of your time
7 Simple Steps on How to Adjust Chacos With 3 Straps
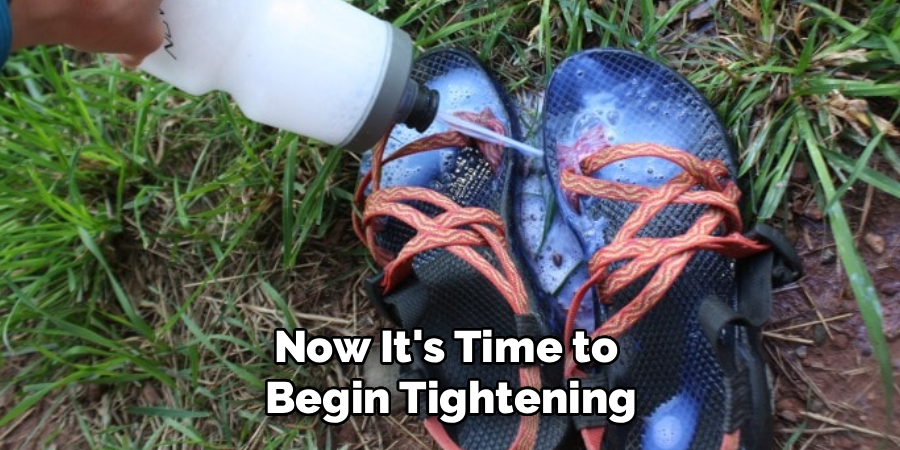
Step 1: Loosen All the Straps Completely
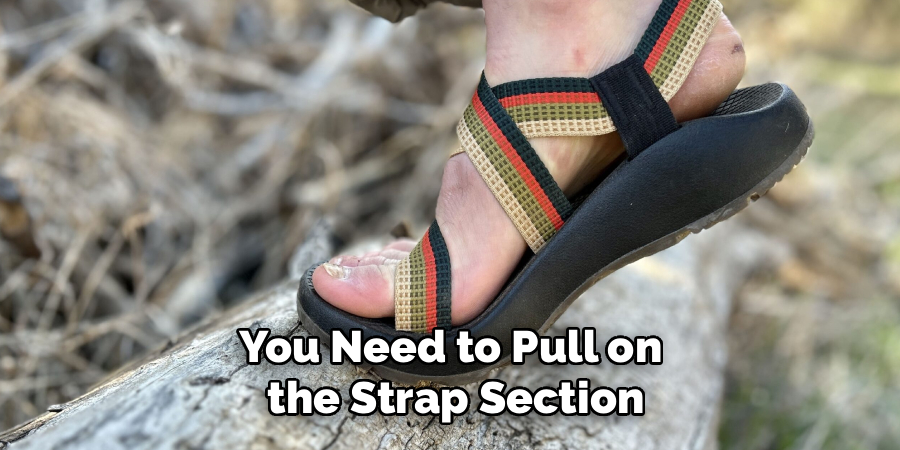
Before you begin to tighten anything, it’s essential to start with a blank slate. To do this, you need to fully loosen all three visible straps on your Chaco sandal. Begin by pulling on the strap section that rests over your instep, nearest your ankle. You will see the other parts of the strap system start to move and feed through the hidden channels within the sandal’s midsole. Continue pulling until the straps are all as loose as they can possibly be. This might feel counterintuitive, but it’s a critical first step.
Having all the straps completely loose ensures that you are not fighting against any pre-existing tension from a previous adjustment. This process allows you to reset the entire fit, making it much easier to isolate and adjust each section of the strap individually. By pulling the slack out of the system from the start, you can systematically tighten each part around your foot for a truly customized and secure fit without any awkward bunching or pressure points.
Step 2: Place Your Foot Firmly on the Footbed
With the straps fully loosened, place your foot squarely onto the sandal’s footbed. Make sure your heel is nestled securely into the heel cup and your arch is aligned with the arch support of the LUVSEAT™ footbed. This initial placement is crucial because it establishes the foundation for the entire adjustment process. If your foot is not positioned correctly from the start, you will not be able to achieve an optimal fit, regardless of how well you adjust the straps.
Wiggle your toes and settle your foot to ensure it feels natural and centered. Your foot should not be hanging off any of the edges, and it should feel fully supported from heel to toe. This is your opportunity to feel how the contours of the footbed are designed to support your foot’s natural shape. Taking this moment to get your foot placement right will pay dividends in comfort once the straps are tightened and you begin walking.
Step 3: Adjust the Innermost Strap First
Now it’s time to begin tightening. Start with the strap section closest to the inside of your foot, near your arch. This is the first anchor point for securing your foot in the sandal. Pull this strap upwards and away from your foot, guiding the slack towards the buckle. You should feel the strap that crosses over your instep begin to tighten, securing the middle part of your foot firmly against the footbed. The goal is a snug fit, not a constricting one.
This adjustment is vital for providing medial support and preventing your foot from sliding inward as you walk. As you pull, do so in short, steady increments, checking the tension as you go. You want it tight enough that your foot feels stable, but loose enough that you can still wiggle your toes and have some natural movement. This strap works in tandem with the others to create a supportive web around your foot.
Step 4: Tighten the Outer Strap Across the Instep
Next, focus on the strap that crosses over the top or instep of your foot. This is often the largest section of the webbing and plays a significant role in locking your heel into place. Pull this strap to take up the slack that you fed through from the innermost strap. You will feel the sandal start to conform more closely to the unique shape of your foot. The tension should be distributed evenly across your instep.
This step secures your entire midfoot and is key to preventing your foot from lifting out of the sandal while you walk. It ensures that your heel remains in the heel cup, which is critical for stability and proper biomechanics. Again, aim for a secure but comfortable fit. The strap should lie flat against your skin without digging in or causing any pinching. Continue pulling the slack towards the buckle.
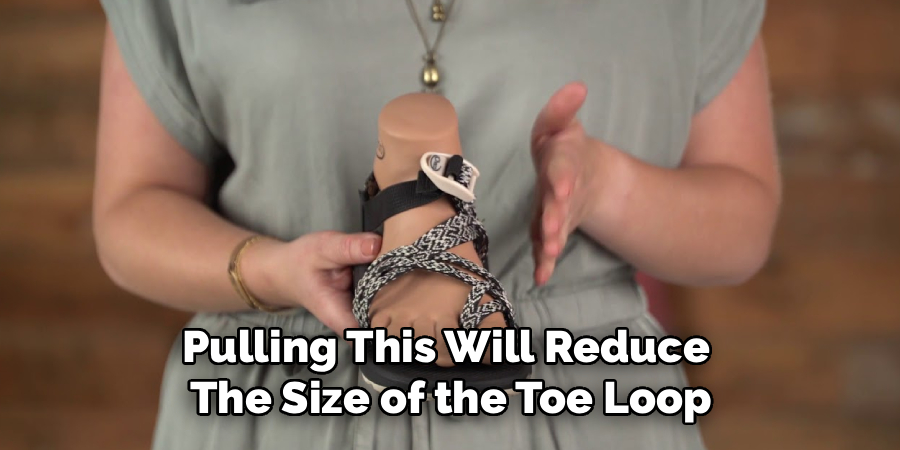
Step 5: Adjust the Toe Loop (If Applicable)
If your Chacos have a toe loop, this is the time to adjust it. This strap is often the trickiest for new users. To tighten the toe loop, you need to pull on the small section of the strap that is located on the outside of your foot, just below your little toe. Pulling this will reduce the size of the toe loop, making it snug around your big toe. Conversely, to loosen it, you pull on the main instep strap.
The toe loop provides extra security and control, especially on uneven terrain, by preventing your foot from sliding forward. The ideal fit is one where the loop is secure but does not constrict or pull on your toe. It should feel like a gentle anchor, not a restraint. You should be able to lift your big toe slightly. Take your time with this step, making small adjustments until it feels just right.
Step 6: Pull the Main Strap Through the Buckle
You have now systematically moved all the excess slack from the strap system to the final section connected to the buckle. Grab the loose end of the strap and pull it through the plastic buckle to secure the entire fit. This final pull locks in all the adjustments you have made across the inner, outer, and toe straps. Pull until the entire sandal feels snug and secure around your foot.
Once you pull the strap through the buckle, the fit is set. The strap should be tight enough to prevent your foot from moving around inside the sandal but not so tight that it cuts off circulation or causes discomfort. There should be no significant gaps between the straps and your foot. The tail end of the strap should lie flat and can be tucked away if desired.
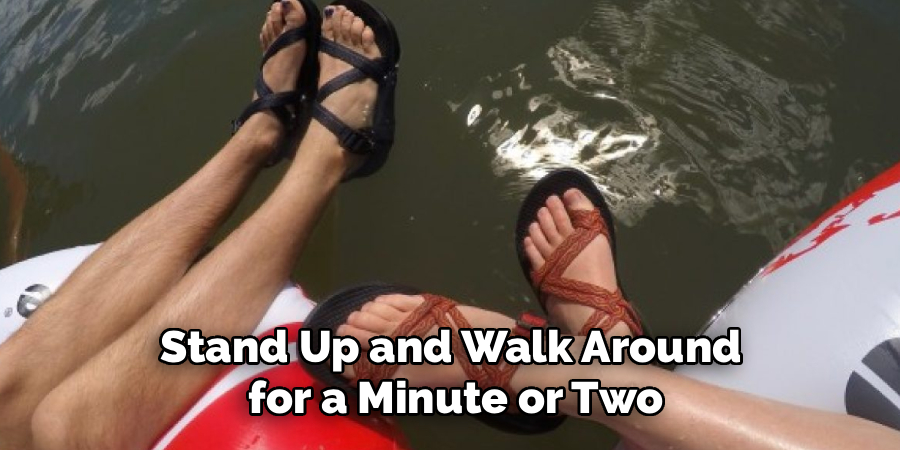
Step 7: Test the Fit and Make Final Adjustments
The last step is to test your new custom fit. Stand up and walk around for a minute or two. Pay attention to any areas that feel too tight or too loose. Do you feel any rubbing or pinching? Does your heel lift out of the heel cup when you take a step? Now is the time to make minor tweaks. You can easily loosen or tighten specific sections by gently pulling the corresponding part of the strap system.
For example, if the toe loop is too tight, you can loosen it by pulling up on the instep strap to introduce a little slack. If the instep feels too loose, you can go back a few steps and pull more slack through towards the buckle. This final check ensures that your Chacos are perfectly molded to your feet, providing you with maximum comfort and support for whatever your day holds.
Following these steps on how to adjust Chacos with 3 straps, you should now have a perfectly fitted pair of Chacos. However, keep in mind that with regular use and wear, the straps may loosen over time. This is completely normal and just means it’s time for another adjustment.
Common Mistakes to Avoid
- Adjusting the straps while not wearing the sandal.
- Overtightening the straps, which restricts blood flow and causes chafing.
- Pulling on the buckle to tighten all straps at once, which creates an uneven fit.
- Forgetting to adjust the toe loop can lead to forward foot slippage.
- Not starting with all straps completely loose, preventing a true custom fit.
Frequently Asked Questions
Q1: How Do I Loosen the Toe Strap on My Chacos?
A1: Loosening the toe strap, or toe loop, can seem confusing at first, but it’s quite simple. Instead of pulling on the toe loop itself, you need to pull on the strap section that crosses over the top of your foot (the instep strap). Pulling this strap up and away from your foot will feed slack back into the toe loop, making it larger and looser. It’s best to do this while wearing the sandal so you can feel the adjustment in real-time and stop when it feels comfortable.
Q2: Why Does One Strap Seem to Tighten All the Others?
A2: The webbing on your Chacos is actually one continuous strap that runs through hidden channels in the midsole of the sandal. This brilliant design is what allows for a fully customized fit. When you pull on one visible part of the strap, you are essentially pulling that continuous piece of webbing through the sole, which in turn tightens or loosens other sections. Understanding this concept is the key to mastering the adjustment process and achieving the perfect fit.
Q3: Can I Adjust the Straps While They Are Wet?
A3: Yes, you can adjust your Chaco straps when they are wet. In fact, some people find it easier to make fine-tuned adjustments when the webbing is damp, as it may slide through the channels more smoothly. Adjusting them while wet can also help the straps conform to your foot as they dry. However, be mindful not to overtighten them, as the wet webbing might feel slightly different against your skin. A fit that feels perfect when wet might become too tight once the straps dry and shrink slightly.
Conclusion
Mastering the art of adjusting your Chacos is a small investment of time that pays off with incredible comfort and support. By following these steps on how to adjust Chacos with 3 straps, you can create a personalized fit that makes your sandals feel like an extension of your feet.
Remember to start with loose straps, adjust each section systematically, and test the fit before heading out. A properly adjusted Chaco is your best companion for comfort and adventure.
About
As the lead voice behind Shoenify, I bridge the gap between footwear aesthetics and technical performance. With a career dedicated to the intersection of fashion and function, I provide readers with data-driven reviews and deep dives into the global footwear market. My mission is to help every reader find the perfect fit, whether they are hitting the track or the boardroom.
Education RMIT University
-
RMIT University: Bachelor of Design (Footwear & Accessories)
-
Nottingham Trent University: MA in Fashion Design (Specializing in Footwear Innovation)
Publications and Impact
My insights on footwear trends and sustainable manufacturing have been featured in leading industry trade journals. Through Shoenify, I have influenced thousands of purchasing decisions by prioritizing transparency and rigorous testing. My work focuses on the evolution of “smart” footwear and the impact of 3D printing on the future of the industry.