
There is a unique thrill that comes with unboxing a new pair of dance shoes. The smell of fresh leather, the pristine soles, and the promise of countless hours of movement create a sense of excitement and possibility. However, every seasoned dancer knows that this initial excitement is quickly followed by the reality of the breaking-in period. Fresh out of the box, dance shoes are often stiff, unyielding, and even painful. They have not yet molded to the unique contours of your feet and can cause blisters, hot spots, and general discomfort that can hinder your performance.

The process of breaking in a new pair of dance shoes is a crucial ritual that transforms a generic piece of footwear into a personalized extension of your body. It is about more than just surviving the first few wears; it is a systematic process of softening the materials and training the shoe to support your foot in exactly the right places. Rushing this process or ignoring it altogether can lead to injury and frustration, while a proper break-in period ensures comfort, enhances performance, and extends the life of your expensive gear.
This article serves as a comprehensive guide on how to break in dance shoes of all types. Whether you are working with stiff new tap shoes, unforgiving ballroom heels, or a fresh pair of ballet slippers, these techniques will help you safely and effectively mold your footwear, making the transition from box to ballroom a seamless one.
Why Breaking in Dance Shoes is a Non-Negotiable Step
Unlike your everyday sneakers, which are often designed for immediate comfort, dance shoes are built for performance, precision, and longevity. They are constructed from durable materials like leather and satin, with reinforced shanks and heel counters designed to provide specific support. These materials are intentionally rigid at first.
Molding to Your Unique Foot Shape
No two feet are identical. A new shoe is a blank slate, manufactured to a generic last (the foot-shaped mold a shoe is built around). The breaking-in process uses the heat and pressure generated by your foot’s movement to soften the leather and other materials, causing them to stretch and mold perfectly to your individual arches, toe shape, and pressure points. A well-broken-in shoe fits like a glove because it has literally been shaped by your foot.
Injury Prevention
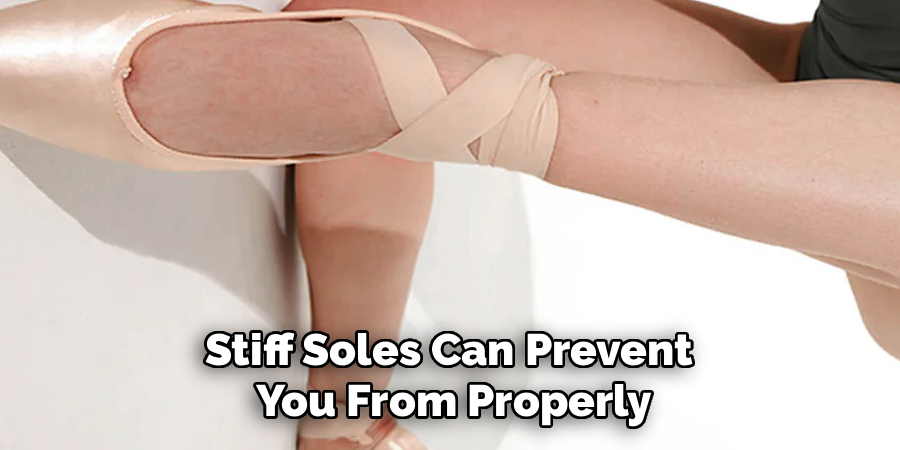
Dancing in stiff, ill-fitting shoes is a recipe for disaster. Blisters from friction are the most common complaint, but the risks are far more serious. A shoe that doesn’t flex properly with your foot can put undue stress on your tendons and ligaments, leading to conditions like tendonitis or plantar fasciitis. Stiff soles can prevent you from properly articulating your foot, affecting your technique and potentially leading to slips or falls. By gradually softening the shoe, you allow your foot to move naturally within a supportive structure, significantly reducing the risk of injury.
Enhancing Performance
A shoe that moves with you rather than against you allows for greater control and precision. When your shoe is properly broken in, you can feel the floor better, execute more intricate footwork, and trust that your footwear will respond exactly as you intend. This connection between foot, shoe, and floor is essential for confident and expressive dancing.
The Universal First Step: How to Break in Dance Shoes
Regardless of the type of dance shoe, the break-in process should always begin at home, not in the studio. Your first few hours in a new pair should be in a low-impact, controlled environment.
The Gentle Introduction
Put on your new shoes along with the same type of socks or tights you would normally wear for dancing. Wear them around your house for 20-30 minutes at a time. Walk on different surfaces like carpet and hardwood. This gentle, weight-bearing activity begins to warm up the muscles without the high-impact stress of a dance class.
Mimicking Dance Movements
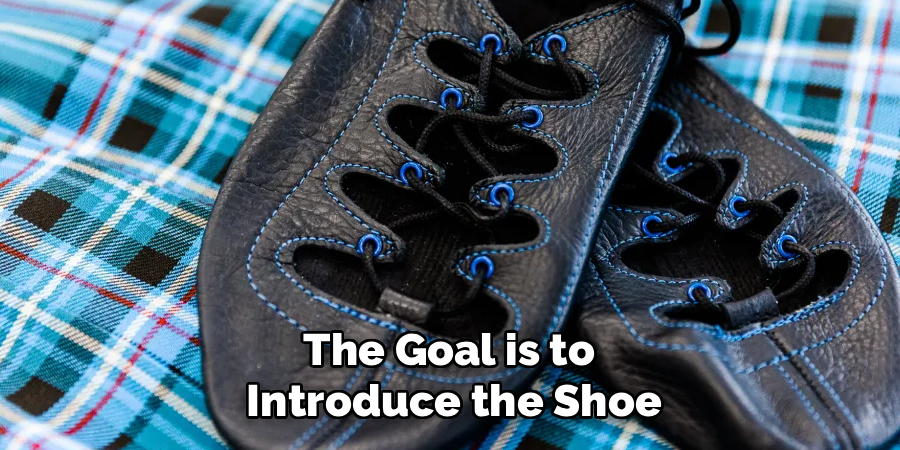
While wearing them at home, practice some basic movements. Rise onto demi-pointe, flex and point your feet, and walk through the basic foot positions. This helps the shoe start bending at the natural flex points of your foot. Listen to your body; if you start to feel a hot spot or painful rubbing, take the shoes off. The goal is to introduce the shoe to your foot gradually, not to endure pain.
Breaking in Specific Types of Dance Shoes
Different dance styles demand different types of footwear, and each requires a unique approach to the break-in process.
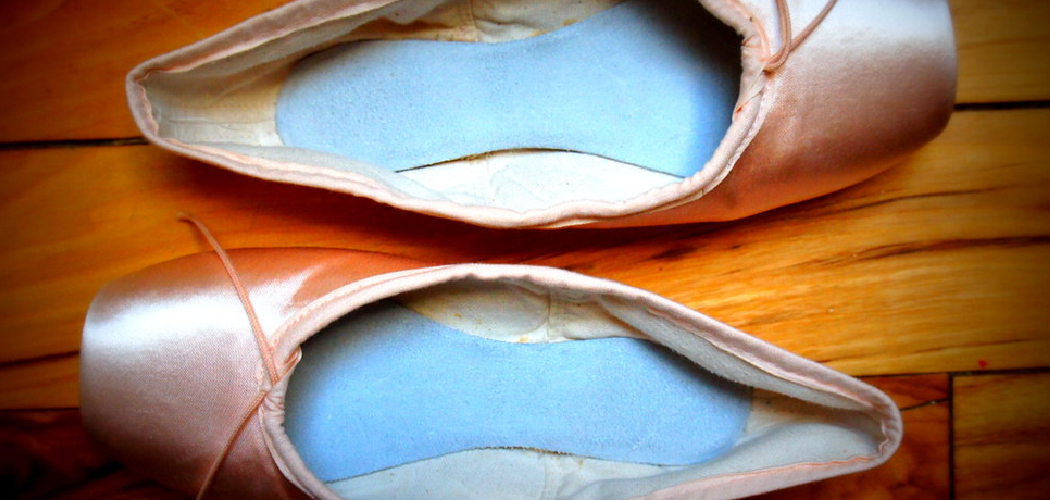
Ballet Slippers (Leather and Canvas)
Ballet slippers are soft, but they still need to mold to the arch and toes.
- Massaging the Sole: The leather or canvas sole can be stiff. Take the slipper in your hands and bend and roll the sole back and forth to increase its flexibility.
- Working the Drawstring: The drawstring is designed to create a snug fit around the opening of the shoe. Adjust it so it hugs your foot without pinching. Tie it in a secure knot and trim the excess, then tuck the knot inside the shoe to prevent it from rubbing.
- Articulation Exercises: Wear the slippers and sit on the floor. Manually work your feet through their full range of motion—flexing, pointing, and circling the ankles. This helps the fabric conform to the shape of your foot, especially in the arch.
Pointe Shoes
Breaking in pointe shoes is a highly specialized and ritualistic process that varies from dancer to dancer, but some general principles apply. This is about making the shoe functional, not just comfortable.
- Softening the Box: The box (the hard toe area) is extremely stiff. Gently step on the box with your heel to slightly flatten it, or press it against a door jamb. The goal is to make it a bit more pliable, not to crush it.
- Bending the Shank: The shank is the rigid insole. A new shank is often too stiff to allow a dancer to roll through demi-pointe. Gently bend the shank with your hands at the point where your arch will be. Avoid snapping it. Some dancers will bend it over the barre.
- Water (With Extreme Caution): Some professionals use a tiny amount of water or rubbing alcohol on specific parts of the shoe (like the “wings” on the side of the box) to speed up the softening process. This is an advanced technique that can easily ruin a shoe if done incorrectly, as water destroys the glue that holds the shoe together.
Jazz Shoes (Leather)
Jazz shoes need to be flexible enough for pointing and flexing, but supportive enough for leaps and turns.
- The Heat Method: Leather becomes more pliable with heat. You can wear a thick pair of socks and use a hair dryer on a low setting to gently warm the tight spots on your shoes while wearing them. As you do this, flex and move your foot. This encourages the leather to stretch and mold. Be careful not to overheat the leather.
- Using Leather Conditioner: A small amount of leather conditioner or mink oil can help soften stiff leather. Apply it sparingly to the tightest areas.
Tap Shoes
The challenge with tap shoes is often the stiffness of the leather upper and the newness of the taps themselves.
- Scuffing the Taps: New taps can be dangerously slippery on some floors. To improve their grip, scuff them gently on concrete or use sandpaper to rough up the surface.
- Working the Leather: Similar to jazz shoes, use the hair dryer method to soften the leather. You can also manually bend and flex the shoe to break down the stiffness in the sole. Because tap shoes are heavy, wearing them around the house for extended periods is particularly effective.
Ballroom and Latin Heels
These shoes need to be secure in the heel while allowing for flexibility in the ball of the foot.
- Stretching the Straps: The straps on new heels can dig into the foot. Gently stretch them with your hands before putting the shoe on.
- Protecting the Heel: The heel counter is often the stiffest part of the shoe. If it is rubbing, you can apply a piece of moleskin to the inside of the shoe to prevent blisters while the leather softens.
- Brushing the Sole: The suede soles of ballroom shoes need to be brushed with a wire brush before their first use to raise the nap and provide the correct amount of grip and slip.
Tools and Tricks of the Trade
Dancers have developed a number of creative solutions over the years to help them through the painful breaking-in period.
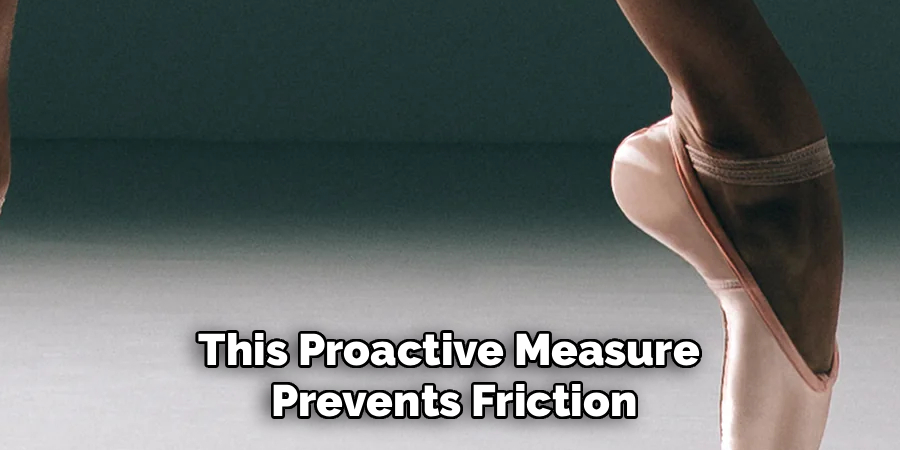
Moleskin and Blister Pads
This is a dancer’s best friend. Before you even feel a hot spot, identify the areas that are likely to rub (the back of the heel, the side of the big toe) and apply moleskin or a gel blister pad directly to your skin or the inside of the shoe. This proactive measure prevents friction before a blister can form.
Shoe Stretchers
For shoes that are tight all over, a mechanical shoe stretcher can be a valuable investment. These devices can be inserted into the shoe and expanded to gently stretch the leather overnight. There are even specialized spot-stretching attachments to target bunion areas.
The Freezer Method (For Leather Shoes)
This unconventional method uses the power of expansion. Fill a zip-top bag halfway with water, seal it tightly, and place it inside your shoe, ensuring it fills the tight areas. Put the shoe in the freezer. As the water freezes into ice, it will expand, gently stretching the leather from the inside.
What to Avoid During the Break-in Process
In a desperate attempt to achieve comfort quickly, it is easy to make mistakes that can permanently damage your shoes.
Soaking Shoes in Water
Unless you are a professional ballerina performing a very specific pointe shoe preparation technique, do not submerge your dance shoes in water. Water can warp the leather, destroy the glue, and cause the shank of a shoe to break down completely.
Using Direct, High Heat
Never place your dance shoes on a radiator, in front of a space heater, or in a hot car to soften them. Intense heat dries out the natural oils in leather, causing it to become brittle and crack. It can also melt the adhesives holding the shoe together.
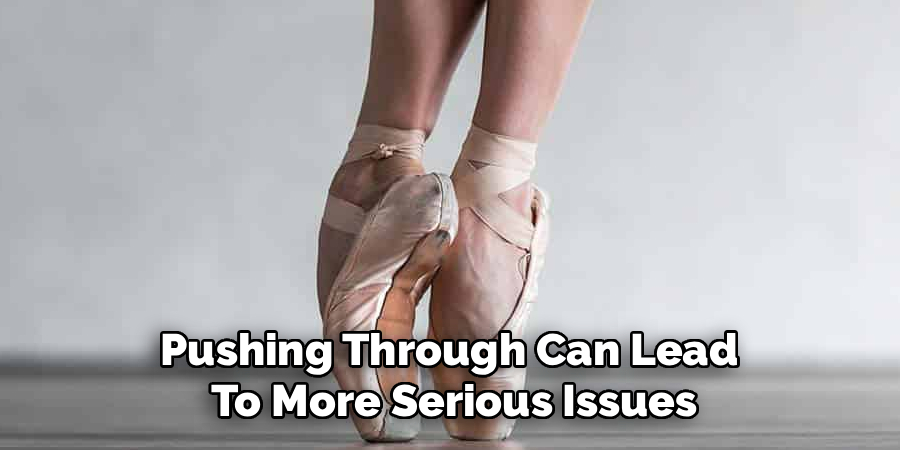
“Toughing it Out.”
Dancing through sharp pain is not a sign of dedication; it is a recipe for injury. If a shoe is causing you significant pain or creating a large blister, stop. Your body is telling you that something is wrong. Pushing through can lead to more serious issues like stress fractures or tendon damage.
Conclusion
The process of breaking in a new pair of dance shoes is an essential and intimate part of a dancer’s journey. It is a period that demands patience, care, and an attentiveness to the feedback your body is giving you. By taking the time to wear them around the house, manually working the materials, and using targeted techniques for your specific style of shoe, you are building a partnership with your footwear. This investment of time ensures that when you step onto the stage or into the studio, your shoes will not be a source of pain or distraction, but a seamless, supportive, and reliable foundation for your art.
Mastering how to break in dance shoes is a skill that elevates your craft, protecting your body while allowing you to move with greater freedom and expression. Embrace the process, and your feet will thank you for it.
About
As the lead voice behind Shoenify, I bridge the gap between footwear aesthetics and technical performance. With a career dedicated to the intersection of fashion and function, I provide readers with data-driven reviews and deep dives into the global footwear market. My mission is to help every reader find the perfect fit, whether they are hitting the track or the boardroom.
Education RMIT University
-
RMIT University: Bachelor of Design (Footwear & Accessories)
-
Nottingham Trent University: MA in Fashion Design (Specializing in Footwear Innovation)
Publications and Impact
My insights on footwear trends and sustainable manufacturing have been featured in leading industry trade journals. Through Shoenify, I have influenced thousands of purchasing decisions by prioritizing transparency and rigorous testing. My work focuses on the evolution of “smart” footwear and the impact of 3D printing on the future of the industry.