
Desert boots are a timeless and versatile addition to any wardrobe. Known for their simple design and comfortable fit, they can be dressed up or down for almost any occasion. Whether you’re wearing them to the office or on a casual weekend outing, keeping them clean is essential to maintaining their appearance and extending their life.

Proper care ensures your boots look great and withstand the test of time. Overlooking this simple maintenance can lead to permanent stains and material damage. This guide on how to clean Desert Boots will walk you through everything you need to know about cleaning your Desert Boots, from identifying the material to storing them correctly.
Identify the Material of Your Desert Boots
Before you begin the cleaning process, the most crucial first step is to identify the material of your desert boots. Most desert boots are made from either suede or smooth leather, and each material requires a different cleaning method and set of products.
Using the wrong technique can cause irreversible damage, such as discoloration, stiffness, or water spots. For example, the gentle brushing required for suede would be ineffective on leather, while the polish used on leather would ruin the delicate nap of suede. Always check the manufacturer’s label or product description if you are unsure. Knowing your boot’s material is the foundation for a successful and safe cleaning.
Tools and Supplies You’ll Need
Gathering the right tools beforehand will make the cleaning process smooth and efficient. Here is a list of supplies you may need, depending on whether your boots are suede or leather:
For Suede Desert Boots:
- Suede brush (with both nylon and rubber bristles)
- Suede eraser or a clean pencil eraser
- White vinegar or rubbing alcohol
- Clean, soft cloths
- Suede protector spray
- Cornstarch or talcum powder (for oil stains)
For Leather Desert Boots:
- Horsehair shoe brush
- Soft cloths or rags
- Leather cleaner or a mild soap solution (e.g., dish soap and water)
- Leather conditioner
- Cream or wax-based shoe polish (matching the boot color)
- Shoe trees
7 Simple Step-By-Step Guidelines on How to Clean Desert Boots
Step 1: Prepare Your Boots for Cleaning
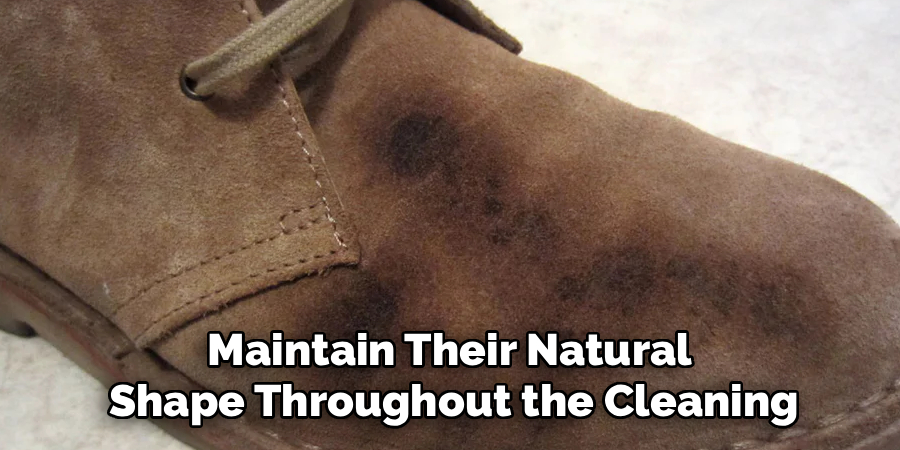
First, remove the laces from your boots to ensure you can access all areas, including the tongue and eyelets. You can wash the laces separately by hand with a bit of soap and water or put them in a small mesh bag and run them through a washing machine. Once the laces are removed, insert shoe trees into your boots. This is a vital step as shoe trees help the boots maintain their natural shape throughout the cleaning and drying process, preventing them from creasing or collapsing.
If you don’t have shoe trees, you can stuff the boots tightly with crumpled newspaper or paper towels. This will also help absorb any excess moisture from the inside as you clean. Once your boots are prepared, give them a quick, gentle wipe with a dry cloth to remove any loose surface dust and debris. This initial pass makes the deeper cleaning steps more effective and prevents you from grinding dirt further into the material.
Step 2: Dry-Brush the Boots to Remove Loose Dirt
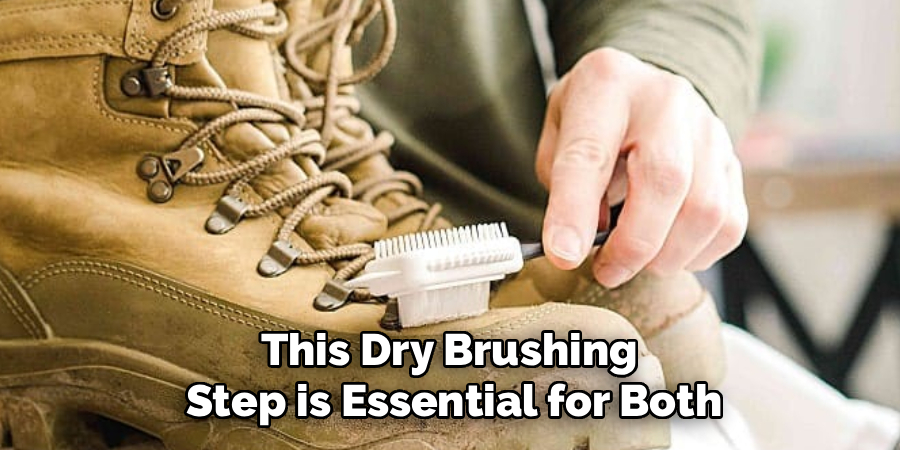
With your boots prepped, the next step is to perform a thorough dry brushing. For suede boots, use a suede brush to gently brush the entire surface of the boot. Always brush in one direction to lift dirt from the nap without damaging the delicate fibers. This motion helps restore the suede’s natural texture. For more stubborn scuffs and marks, you can use the rubber or crepe side of the brush, applying slightly more pressure in a back-and-forth motion to work the marks out.
For leather desert boots, use a horsehair shoe brush. This type of brush is firm enough to dislodge dirt but soft enough to avoid scratching the leather. Brush the entire boot with short, quick strokes, paying special attention to the welt, which is the seam where the upper part of the boot meets the sole. Dirt and grime often accumulate in this area, so ensure it’s completely clean before moving on to wet cleaning methods. This dry brushing step is essential for both materials as it removes the top layer of grit.
Step 3: Tackle Stains and Scuffs
Now it’s time to focus on specific stains. For suede boots, a suede eraser is your best friend. Rub it gently over scuffs, water spots, or minor stains as you would with a pencil eraser. For more persistent stains, you may need a slightly more aggressive approach. Lightly dampen a clean cloth with white vinegar or rubbing alcohol, blot the stained area carefully, and then let it dry completely. Once dry, use your suede brush to fluff the nap back up. For oil or grease stains, apply a light dusting of cornstarch to the spot, let it sit for a few hours to absorb the oil, and then brush it away.
For leather boots, scuffs can often be buffed out with a clean, soft cloth. If the scuff is deeper, you may need to use a small amount of polish later in the process. To treat stains on leather, create a mild cleaning solution by mixing a few drops of dish soap with warm water. Dip a soft cloth into the solution, wring it out so it’s damp, not soaking wet, and gently wipe the stained area. Follow up immediately by wiping the area with a clean, damp cloth to remove any soap residue. Avoid oversaturating the leather with water.
Step 4: Perform a Deep Clean
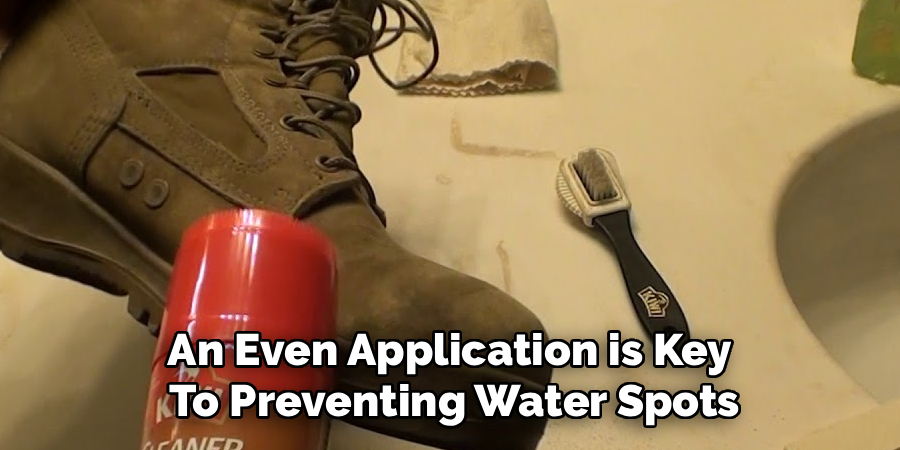
After spot-treating, you may need to perform a deeper, more uniform clean. For suede, this step should be approached with caution to avoid water damage. If your boots are heavily soiled, you can use a dedicated suede shampoo. Apply a small amount of the cleaner with a damp brush, working it into a lather across the entire surface of the boot. Use gentle, circular motions to clean evenly. An even application is key to preventing water spots and ensuring a consistent color once the boots dry.
For leather desert boots, a deeper clean is more straightforward. Use a commercial leather cleaner or your previously made mild soap solution. Apply the cleaner with a soft cloth over the entire boot, working in small sections. This will lift away any ingrained dirt and grime that the initial dry brushing missed. Be sure to clean the entire surface of both boots to maintain a consistent finish. After applying the cleaner, use a separate, clean, damp cloth to wipe off any excess solution.
Step 5: Rinse and Remove Cleaning Solution
Removing all traces of the cleaning agent is a critical step to prevent residue from drying on your boots, which can cause stiffness or discoloration. For suede boots that have been shampooed, you must be very careful. Lightly dampen a clean cloth with plain water and gently blot the entire surface of the boots. The goal is to lift the soap lather off the suede without soaking the material. Do not rinse the boots under running water. Repeat this blotting process until all the cleaner has been removed.
For leather boots, this step is simpler. Take a clean cloth, dampen it with fresh water, and wipe down the entire surface of each boot. This action removes any lingering soap film or leather cleaner residue. Be thorough and make sure you wipe down all the seams and crevices. This rinsing step ensures that the leather is clean and prepared for the conditioning and polishing that will follow, leaving a perfect canvas for the final protective layers.
Step 6: Allow Your Boots to Air Dry Completely
Patience is essential during the drying phase. After cleaning, your desert boots must be allowed to air dry naturally and completely. Place them in a well-ventilated room, away from direct sunlight and heat sources like radiators or fireplaces. Exposing wet leather or suede to direct heat can cause the material to crack, shrink, or become permanently stiff. Keep the shoe trees or newspaper inside the boots to help them retain their shape and to wick away internal moisture.
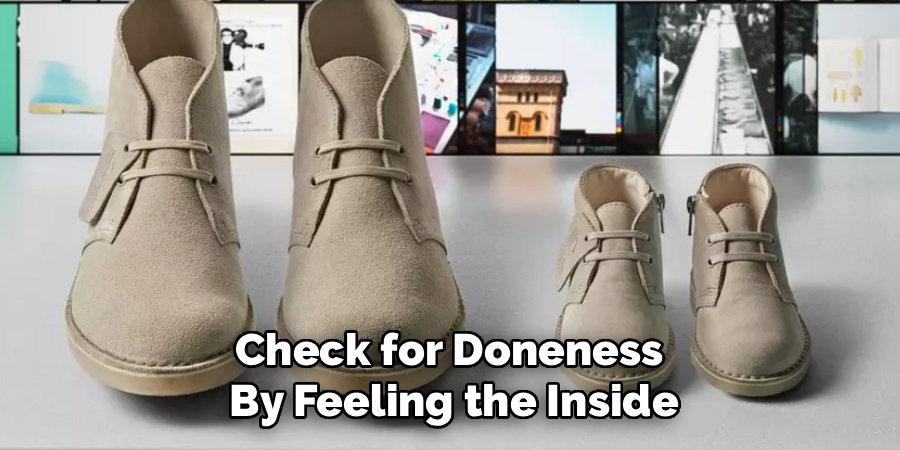
The drying process can take anywhere from 24 to 48 hours, depending on the humidity and how wet the boots became during cleaning. Do not be tempted to speed up the process with a hairdryer or other heat source. Rushing this step will undermine all your hard work. You can check for doneness by feeling the inside and outside of the boot. The material should feel completely dry to the touch, with no damp or cool spots, before you proceed to the final step.
Step 7: Condition and Brush to Restore Texture
Once your boots are completely dry, the final step is to restore their original texture and softness. For suede desert boots, take your suede brush and gently brush the nap in one direction. This will lift the fibers that may have become flattened during the cleaning and drying process, restoring the suede’s signature velvety texture. If any areas still look a bit flat, you can use the rubber bristles on the brush to work them a bit more vigorously until they look uniform.
For leather desert boots, this is when you apply a leather conditioner. A good conditioner replenishes the natural oils in the leather that may have been stripped away during cleaning, keeping it supple and preventing cracks. Apply a small amount of conditioner to a soft cloth and rub it into the leather using small, circular motions. Cover the entire boot, then let it sit for about 15-20 minutes before buffing off any excess with a clean cloth. This step not only revitalizes the leather but also adds a layer of protection.
Follow these detailed steps on how to clean Desert Bootsto restore your Desert Boots to their former glory. Remember to adjust the process based on your boot’s material.
Polishing and Protecting Your Boots
After cleaning and conditioning, an extra layer of protection will keep your boots looking better for longer. For leather desert boots, you can apply a cream or wax-based polish that matches the color of your boots. Apply a thin, even layer of polish with a soft cloth or applicator brush, let it dry, and then buff it to a shine with a horsehair brush.
For suede boots, polishing is not an option, but protection is still crucial. Use a high-quality suede protector spray. Hold the can about six to eight inches away from the boot and apply a light, even coat across the entire surface. This will create an invisible barrier that repels water and helps prevent future stains.
Common Cleaning Mistakes to Avoid
- Using direct heat (like a hairdryer) to dry your boots can cause cracking.
- Scrubbing suede too aggressively, which can permanently damage the nap.
- Using harsh chemical cleaners not designed for suede or leather.
- Completely soaking your boots in water leads to discoloration and shape loss.
- Forgetting to test a cleaning product on a small, inconspicuous area first.
How Often Should You Clean Desert Boots?
The frequency of cleaning depends entirely on how often you wear your boots and in what conditions. For regular wear in urban environments, a light brushing every few wears is sufficient to remove surface dust. A deeper clean, as outlined in the steps above, should be performed every few months or whenever you notice significant stains or dirt buildup.
If your boots are exposed to mud, rain, or snow, you should clean them as soon as possible to prevent long-term damage. Regular, light maintenance is always better than infrequent, heavy-duty cleaning.
Storage Tips After Cleaning
Proper storage is just as important as proper cleaning. Once your desert boots are clean and dry, store them in a cool, dry place away from direct sunlight, which can fade the color. Using shoe trees is highly recommended even for storage, as they help maintain the boot’s shape and absorb any lingering moisture and odors.
If you don’t have shoe trees, stuffing them with acid-free paper works as well. Avoid storing them in plastic bags or airtight containers, as this can trap moisture and lead to mold or mildew growth. Giving them space to breathe will ensure they are fresh and ready for your next wear.
Frequently Asked Questions
Q1: Can You Put Desert Boots in the Washing Machine?
A1: No, you should never put suede or leather desert boots in a washing machine. The combination of complete water saturation and the tumbling action of the machine can cause severe and irreversible damage. It can warp the shape of the boots, ruin the texture of the material, dissolve the adhesives holding the sole together, and cause the color to bleed or fade unevenly. Always stick to the manual cleaning methods detailed in this guide.
Q2: How Do You Remove Water Stains from Suede Desert Boots?
A2: To remove water stains from suede, it’s best to treat the entire boot for an even finish. Lightly mist the entire surface of both boots with water using a spray bottle. Then, use a sponge or a soft brush to gently spread the moisture evenly across the suede. This helps to blend the water stain with the rest of the material. Stuff the boots with newspaper to absorb excess water and help them hold their shape, then let them air dry completely away from direct heat. Once dry, use a suede brush to restore the nap.
Q3: What Is the Best Way to Protect New Desert Boots?
A3: The best way to protect new desert boots is to treat them before your first wear. For suede boots, apply a quality suede protector spray. This will create a barrier against water and stains, making them easier to clean in the future. For leather boots, applying a thin layer of leather conditioner or a protective wax can help nourish the material and provide a shield against moisture and dirt. This proactive step can significantly extend the life and appearance of your new boots.
Conclusion
Cleaning your desert boots doesn’t have to be an intimidating task. By understanding the material of your boots and following a consistent care routine, you can easily maintain their classic style and durability.
From preparing your boots and gathering the right tools to executing each cleaning step with care, you have the knowledge to tackle everything from light dust to stubborn stains. Regular maintenance, proper protection, and smart storage will ensure that your favorite pair of desert boots remains a staple in your collection for years to come. Thanks for reading this guide on how to clean Desert Boots.
About
As the lead voice behind Shoenify, I bridge the gap between footwear aesthetics and technical performance. With a career dedicated to the intersection of fashion and function, I provide readers with data-driven reviews and deep dives into the global footwear market. My mission is to help every reader find the perfect fit, whether they are hitting the track or the boardroom.
Education RMIT University
-
RMIT University: Bachelor of Design (Footwear & Accessories)
-
Nottingham Trent University: MA in Fashion Design (Specializing in Footwear Innovation)
Publications and Impact
My insights on footwear trends and sustainable manufacturing have been featured in leading industry trade journals. Through Shoenify, I have influenced thousands of purchasing decisions by prioritizing transparency and rigorous testing. My work focuses on the evolution of “smart” footwear and the impact of 3D printing on the future of the industry.