

Fabric shoes are a staple in almost everyone’s wardrobe. Whether they are classic canvas sneakers, trendy knit runners, or casual slip-ons, they offer comfort and style that leather often can’t match.
However, that breathable, soft material acts like a magnet for dirt, mud, and grass stains. Unlike leather, you can’t just wipe them down and move on. Cleaning them might seem intimidating at first—nobody wants to ruin their favorite pair by scrubbing too hard or using the wrong soap—but the process is actually quite straightforward.
With a little patience and the right technique, you can restore your fabric kicks to their former glory, making them look fresh out of the box again. Let’s dive into how to clean fabric shoes.
What are the Benefits?
Taking the time to properly clean your fabric shoes goes beyond just aesthetics. While having bright, stain-free footwear is obviously the main goal, regular maintenance extends the lifespan of the shoe significantly. Dirt and grit act like sandpaper on fabric fibers. Every time you walk, those tiny particles grind against the material, weakening it and eventually leading to tears or holes. By removing this debris, you are preserving the structural integrity of the upper part of the shoe.
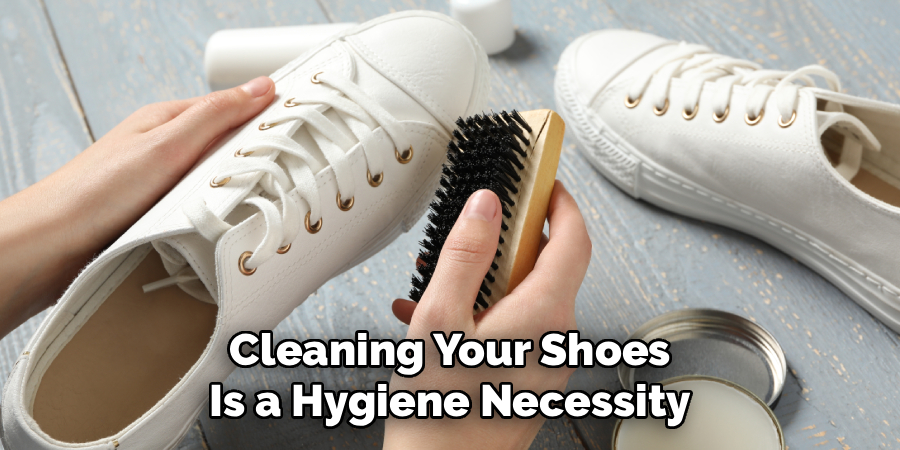
Additionally, cleaning your shoes is a hygiene necessity. Fabric shoes are breathable, which is great for comfort, but they also absorb sweat and moisture. This creates a perfect breeding ground for bacteria and fungi, which lead to unpleasant odors. A deep clean removes the bacterial buildup that causes that “old shoe” smell, keeping your feet healthier. Furthermore, regular cleaning prevents stains from setting permanently. A fresh spill is easy to lift, but one that has sat for months becomes part of the fabric’s dye. Maintaining your shoes saves you money in the long run, as you won’t need to replace dingy, smelly pairs nearly as often.
What Will You Need?
Before you start, gather these supplies to ensure a smooth cleaning process. You likely have most of these in your home already.
- Soft-bristled brush
- Mild laundry detergent or dish soap
- Warm water
- Clean, dry towels
- Paper towels or newspaper
- Baking soda (optional)
- Magic Eraser (optional)
- Mesh laundry bag
10 Easy Steps on How to Clean Fabric Shoes
Step 1: Remove Loose Dirt and Debris
The very first thing you must do is remove as much dry dirt as possible. If you add water to a shoe that is caked in dried mud, you will simply create more mud and push it deeper into the fabric fibers. Take your shoes outside or hold them over a trash can. Clap the soles together vigorously to shake off large chunks of dried earth. Next, use your soft-bristled brush (a dry one) to gently sweep over the entire surface of the shoe. Pay attention to the seams and the tongue area where dirt loves to hide. The goal here is to get the surface as clean as possible before introducing any liquid.
Step 2: Remove Laces and Insoles
For a truly thorough clean, you need to disassemble the shoe slightly. Take out the shoelaces and the removable insoles. Cleaning the shoe with the laces still threaded prevents you from reaching the tongue and the eyelets, which are often the dirtiest parts. The laces can be soaked separately or thrown in a mesh bag in the washing machine. The insoles, which absorb the most sweat, should be washed by hand to prevent them from losing their shape. Removing these parts also opens up the shoe, allowing better airflow for drying later on.
Step 3: Create Your Cleaning Solution
You don’t need expensive shoe cleaners for fabric shoes; a simple DIY mixture usually works best. Fill a small bowl or bucket with warm water—not hot, as heat can sometimes warp the glue used in shoe construction. Add a teaspoon of mild laundry detergent or dish soap. Mix it until it gets sudsy. If your shoes are white or very light-colored, you might add a paste made of baking soda and water to help lift stains, but for general colors, the soapy water is sufficient. Ensure the detergent is fully dissolved so you aren’t rubbing concentrated soap directly onto one spot.
Step 4: Scrub the Soles First
Start from the bottom and work your way up. The rubber soles are usually the grimiest part, and you don’t want to accidentally brush dirt from the sole onto the clean fabric upper. Dip your stiff brush or an old toothbrush into your cleaning solution and scrub the rubber midsoles and outsoles vigorously. Scuff marks on the white rubber can be stubborn. If soapy water isn’t cutting it, this is the time to use a melamine sponge (Magic Eraser). Wet the sponge and rub the rubber parts; the scuffs should disappear like magic. Wipe the soles clean with a damp rag before moving to the fabric.
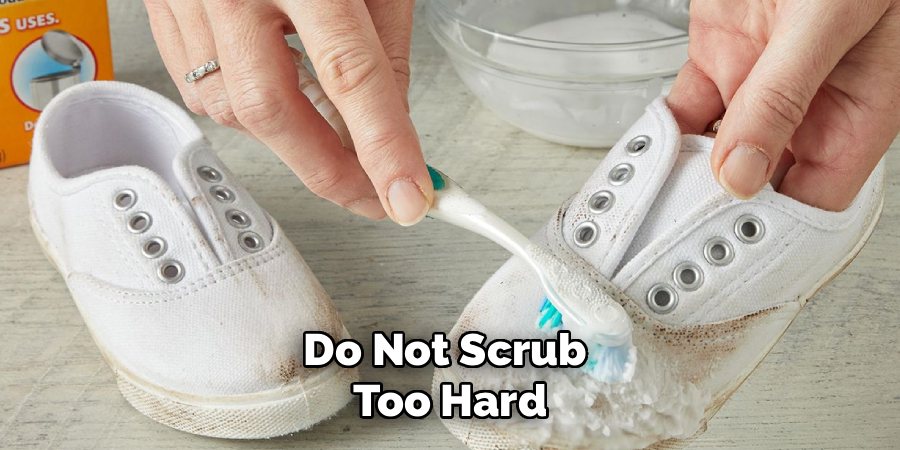
Step 5: Gently Scrub the Fabric Upper
Now, move to the delicate part. Dip your soft brush (or clean toothbrush) into the soapy water. Shake off the excess liquid; you want the brush damp, not soaking wet. Gently scrub the fabric using circular motions. Do not scrub too hard, or you risk “pilling” the fabric or making it look fuzzy. Work in small sections—start at the toe box, move to the sides, and finish at the heel. The circular motion helps lift dirt out of the weave of the fabric rather than just pushing it around. If you encounter a tough stain, apply a tiny drop of detergent directly to the brush and work it in gently.
Step 6: Tackle the Interior
The outside might look great now, but don’t forget the inside. This is where odors live. Dip your brush back into the soapy water and scrub the interior lining of the shoe, particularly around the heel and the ankle collar, where sweat accumulates. Be careful not to soak the inside too much, as the internal padding takes a long time to dry and can develop mildew if it stays wet for too long. A surface scrub is usually enough to freshen it up. If the odor is strong, you can sprinkle baking soda inside once the shoe is fully dry.
Step 7: Clean the Insoles and Laces
While your shoes sit for a moment, turn your attention to the parts you removed. Place the laces in the bowl of soapy water and massage them with your hands to work out the dirt. If they are white and stained, let them soak for about 20 minutes. Rinse them thoroughly and hang them to dry. For the insoles, scrub them gently with your soapy brush. Do not soak insoles completely, as the foam can deteriorate. Just scrub the top surface, wipe them down with a damp cloth, and set them aside to air dry away from direct heat.
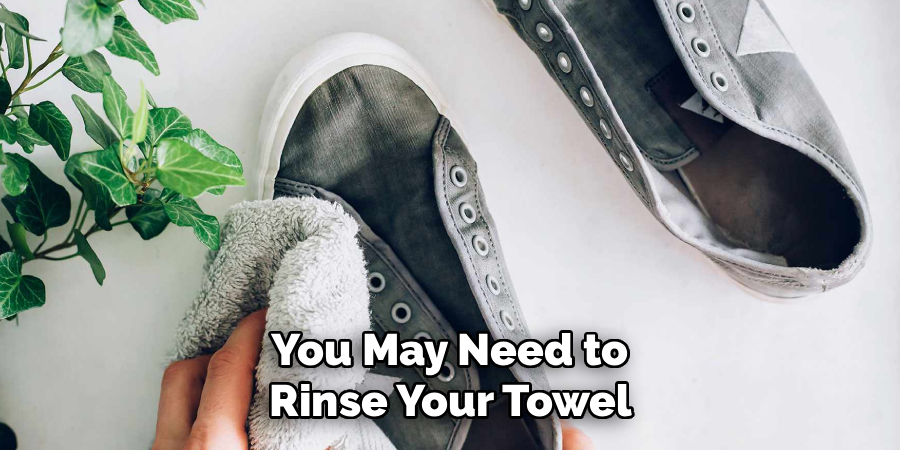
Step 8: Rinse the Soap Residue
This is a crucial step that many people skip. Soap residue left in fabric can attract more dirt later and leave unsightly yellow stains as it dries (especially on white shoes). Take a clean microfiber towel or sponge, dip it in fresh, plain water (no soap), and wring it out until it is just damp. Wipe down the entire shoe “rinsing” the fabric by blotting and wiping away the soap suds. You may need to rinse your towel and repeat this process several times until no more soapy bubbles appear when you press on the fabric.
Step 9: Blot to Remove Excess Moisture
Once the soap is gone, your shoes will be wet. To speed up the drying process and prevent water spots, take a dry, clean towel and press it firmly against the fabric. Blot the shoes inside and out to absorb as much water as you can. Do not rub the towel aggressively across the wet fabric, just press and squeeze. The more water you can remove manually at this stage, the faster your shoes will dry and the less likely they are to lose their shape.
Step 10: Shape and Dry Properly
Finally, prepare your shoes for drying. Crumple up plain paper towels or uncolored newsprint and stuff the shoes tightly. This serves two purposes: it helps the shoe retain its proper shape while drying, and the paper draws moisture out from the inside. Place the shoes in a well-ventilated area that is cool and shaded. Change the paper stuffing after a few hours if it becomes soaked. Once the shoes are completely dry (which may take up to 24 hours), re-lace them and insert the fresh insoles.
5 Things You Should Avoid
- Direct Heat: Never place wet fabric shoes near a radiator, heater, or use a hair dryer on them. High heat can melt the glue that holds the sole to the upper, causing the shoe to fall apart. It can also shrink certain fabrics.
- Direct Sunlight: While the sun dries things quickly, direct UV rays can bleach colors and turn white fabrics yellow. Always air-dry your shoes in a shaded spot.
- Bleach: Unless you are an expert at dilution, avoid using household bleach. It is too harsh for most shoe fabrics and can degrade the fibers or turn white rubber soles yellow permanently.
- Washer and Dryer: While some canvas shoes can handle a washing machine on a gentle cycle, it is risky. The agitation can warp the shoe’s structure. Never put shoes in the tumble dryer; the tumbling and heat are a recipe for destruction.
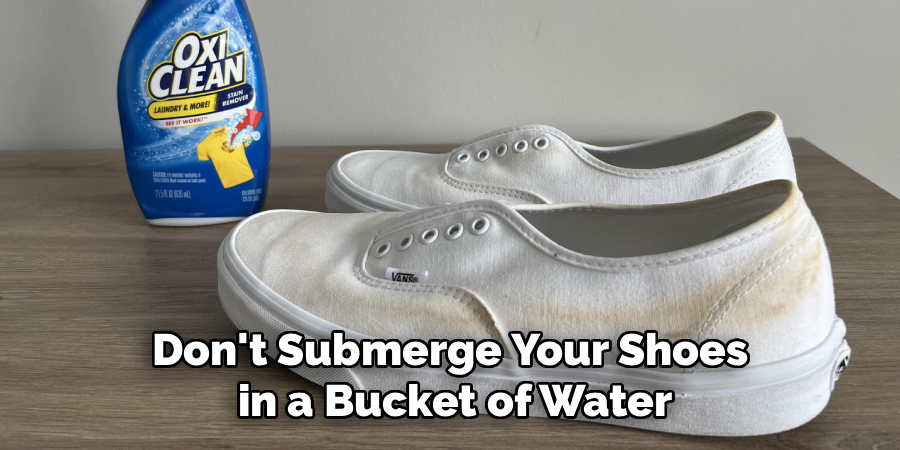
- Soaking the Entire Shoe: Don’t submerge your shoes in a bucket of water. While fabric can get wet, soaking the internal foam padding and the cardboard often found in the heel structure can ruin the shoe’s support system.
Conclusion
Cleaning your fabric shoes doesn’t have to be a chore that you dread. By following these simple steps and avoiding common pitfalls like high heat and harsh chemicals, you can keep your footwear looking sharp and feeling comfortable for years. Regular maintenance not only saves your wallet but also keeps your feet happy and hygienic.
Hopefully, this guide on how to clean fabric shoes has provided you with the information and confidence to properly clean your fabric shoes.
So, grab that old toothbrush and give your favorite pair the refresh they deserve!
About
As the lead voice behind Shoenify, I bridge the gap between footwear aesthetics and technical performance. With a career dedicated to the intersection of fashion and function, I provide readers with data-driven reviews and deep dives into the global footwear market. My mission is to help every reader find the perfect fit, whether they are hitting the track or the boardroom.
Education RMIT University
-
RMIT University: Bachelor of Design (Footwear & Accessories)
-
Nottingham Trent University: MA in Fashion Design (Specializing in Footwear Innovation)
Publications and Impact
My insights on footwear trends and sustainable manufacturing have been featured in leading industry trade journals. Through Shoenify, I have influenced thousands of purchasing decisions by prioritizing transparency and rigorous testing. My work focuses on the evolution of “smart” footwear and the impact of 3D printing on the future of the industry.