
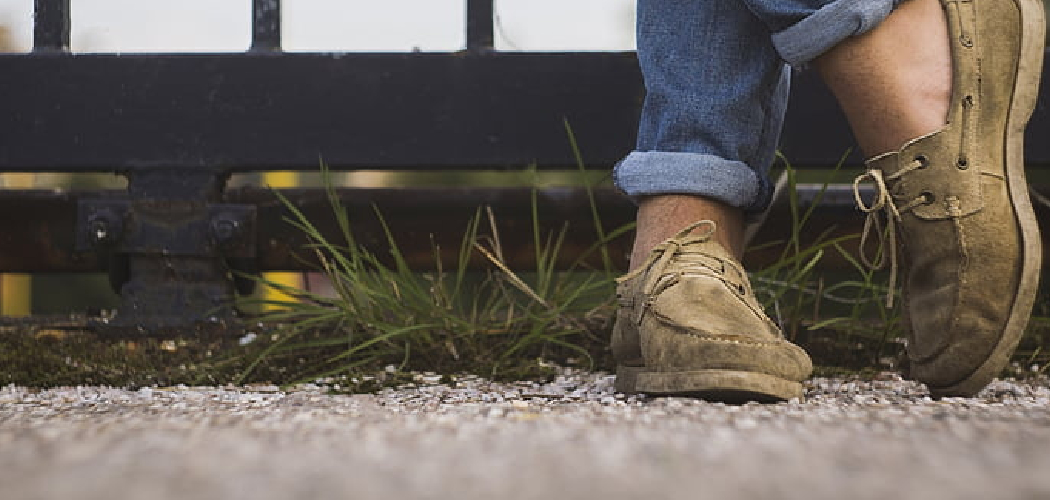
Sperry boat shoes are a timeless staple, known for their classic style, comfort, and durability. Whether you wear them on a boat deck or for a casual day out, they are designed to last. However, like any quality footwear, they require regular care and cleaning to maintain their appearance and extend their lifespan. Proper cleaning not only removes dirt and stains but also preserves the integrity of the leather or canvas.

This guide on how to clean Sperry boat shoes will walk you through everything you need to know about keeping your Sperrys in pristine condition. From the necessary tools and a detailed step-by-step process to common mistakes and safety tips, you’ll learn how to effectively clean your boat shoes. Following these instructions will help ensure your favorite pair of Sperrys looks great and feels comfortable for years to come.
6 Simple Step-By-Step Guidelines on How to Clean Sperry Boat Shoes
Step 1: Prepare Your Shoes for Cleaning
The first and most crucial step is to prepare your Sperry boat shoes for a deep clean. This initial preparation ensures that you can clean all parts of the shoe thoroughly and effectively without causing any damage. Begin by removing the laces from the shoes. This allows you to access the tongue and eyelets, which are areas that often accumulate a significant amount of dirt and grime. Washing the laces separately also ensures they get just as clean as the rest of the shoe. Once the laces are out, take a soft-bristled brush and gently brush off any loose dirt, mud, or debris from the entire surface of the shoes. Pay close attention to the seams and the area where the upper meets the sole, as this is where dirt tends to get trapped.
This dry-brushing stage is more important than it might seem. By removing the top layer of surface dirt, you prevent it from turning into a muddy paste when you introduce water and cleaning solutions. This makes the subsequent washing steps much more effective and less messy. For any caked-on mud, you might need to apply a little more pressure, but always be gentle to avoid scratching the leather or damaging the fabric. If your shoes have any removable insoles, take them out as well. This allows you to clean them separately and helps the interior of the shoe dry more thoroughly later on. Proper preparation is the foundation for a successful cleaning process.
Step 2: Clean the Laces and Insoles
With the laces and insoles removed, it’s time to give them their own dedicated cleaning. These components can often get just as dirty, if not dirtier, than the shoes themselves and cleaning them separately ensures a comprehensive clean. For the laces, fill a small bowl with warm water and a small amount of mild soap or detergent. Submerge the laces in the soapy water and let them soak for about 15-20 minutes. After soaking, you can gently rub them between your hands or use a small brush to scrub away any persistent stains or discoloration. Once they look clean, rinse them thoroughly under cool, running water until all the soap is gone. Squeeze out the excess water and lay them flat on a clean towel to air dry.
Cleaning the insoles requires a similar approach. If they are made of fabric, you can use the same soapy water mixture. Use a soft brush to gently scrub the surface of the insoles, focusing on the heel and toe areas where sweat and dirt build up the most. Be careful not to oversaturate them with water. For leather or synthetic insoles, it’s better to wipe them down with a damp cloth and a small amount of leather cleaner or a mild soap solution. If odor is an issue, you can sprinkle a little baking soda on the insoles and let it sit for a few hours before brushing it off. This will help absorb any unpleasant smells. After cleaning, rinse the insoles lightly or wipe them with a clean, damp cloth and let them air dry completely before placing them back in the shoes.
Step 3: Wash the Exterior of the Shoes
Now, you can focus on the main part of the task: cleaning the exterior of your Sperry boat shoes. The method you use will depend on the material of your shoes. For classic leather Sperrys, create a solution of one part mild soap and two parts cool water. Dip a soft cloth or brush into the solution, wringing out any excess liquid so it’s damp, not soaking wet. Gently scrub the entire surface of the shoe in small, circular motions. This technique helps to lift dirt from the grain of the leather without being too abrasive. For tougher stains, like scuffs or saltwater marks, you can use a solution of equal parts white vinegar and water. Apply this solution sparingly with a cloth, rub the stain gently, and then wipe the area with a clean, damp cloth to remove any vinegar residue.

If your Sperrys are made of canvas or other fabrics, the process is slightly different. You can use the same mild soap and water solution, but you can be a bit more liberal with the water, although you should still avoid completely soaking the shoes. Use a soft-bristled brush to scrub the fabric, paying extra attention to any stained areas. For grease or oil stains on canvas, you can apply a small amount of cornstarch or baking soda directly onto the stain. Let it sit for an hour to absorb the oil, then brush it off before proceeding with the soap and water wash. After scrubbing the entire shoe, take a separate clean cloth dampened with only water and wipe down the shoes to “rinse” away any soap residue. This step is important as leftover soap can attract more dirt.
Step 4: Address the Soles and Interior
Once the uppers are clean, it’s time to turn your attention to the often-neglected soles and interior. The outsoles of your Sperrys can pick up a lot of grime, and cleaning them is key to restoring the overall look of the shoes. For this task, you can use a stiffer brush and your soapy water mixture. Scrub the rubber sides and bottoms of the soles vigorously to remove any embedded dirt, scuff marks, and discoloration. An old toothbrush is particularly useful for getting into the intricate tread patterns on the bottom. For stubborn scuff marks on the white rubber sides, a magic eraser can work wonders. Simply dampen the eraser and gently rub the marks until they disappear.
Cleaning the interior of the shoes is just as important for hygiene and odor control. Using a cloth dampened with your mild soap solution, wipe down the inside of the shoes. Try not to use too much water, as the interior can take a long time to dry and may develop mildew if it stays wet. If there’s a persistent odor, you can create a paste of baking soda and water and apply it to the inside of the shoe. Let it sit for about 15 minutes before wiping it out with a damp cloth. This will help to neutralize odors rather than just masking them. After cleaning, wipe the interior with a cloth dampened with clean water to remove any soap or baking soda residue.
Step 5: Dry the Shoes Properly
Proper drying is a critical step that can make or break your shoe cleaning efforts. Mishandling this stage can lead to misshapen shoes, water damage, or even mildew growth. The most important rule is to never expose your Sperrys to direct heat. This means you should avoid using a hairdryer, placing it near a radiator, or leaving it in direct sunlight. High heat can cause leather to shrink, crack, and become brittle. It can also cause the adhesives used in the shoe’s construction to weaken, potentially leading to the sole separating from the upper. The best and safest way to dry your shoes is to let them air dry naturally.
To help your shoes maintain their shape as they dry, stuff them with crumpled-up newspaper or paper towels. The paper will not only provide structure but will also absorb excess moisture from the inside, speeding up the drying process. You should change the paper every few hours if the shoes are particularly wet. Alternatively, you can use adjustable shoe trees, which are excellent for preserving the shoe’s form. Place the stuffed shoes in a well-ventilated area away from direct sunlight and heat. Depending on the humidity and how wet they gget it can take anywhere from 24 to 48 hours for them to dry completely. Be patient; it’s crucial that they are thoroughly dry before you move on to the final step or wear them again.
Step 6: Condition and Protect
The final step in the cleaning process is to condition and protect your Sperry boat shoes. This step is essential, especially for leather shoes, as the cleaning process can strip away some of their natural oils, leaving them dry and vulnerable. Once you are absolutely certain that your shoes are completely dry, it’s time to apply a quality leather conditioner. Apply a small amount of conditioner onto a clean, soft cloth and rub it into the leather in gentle, circular motions. Make sure to cover the entire leather surface evenly, including the tongue and around the seams. The conditioner will replenish moisture, restore the leather’s suppleness, and bring back its natural sheen.

After applying the conditioner, let the shoes sit for about 15-20 minutes to allow the leather to fully absorb the product. Then, take another clean cloth and buff the shoes to remove any excess conditioner and to enhance their shine. For canvas or suede parts, you should skip the leather conditioner. Instead, consider applying a waterproofing or stain-repellent spray. This will create a protective barrier that helps to repel water and prevent future stains, making your next cleaning session much easier. Once conditioning and protecting are complete, you can re-lace your shoes with the now-clean-and-dry laces, re-insert the insoles, and admire your freshly restored Sperrys. This final step not only makes them look great but also significantly extends their life.
Following these steps on how to clean Sperry boat shoes will not only keep your shoes looking great but also help them last longer.
Safety Tips
When cleaning your shoes, it’s important to take a few precautions to protect both yourself and your footwear. Always work in a well-ventilated area, especially when using leather cleaners or waterproofing sprays, as these products can have strong fumes. It’s a good idea to wear gloves to protect your skin from detergents and cleaning chemicals.
Before using any new cleaning product, test it on a small, inconspicuous area of the shoe first to ensure it doesn’t cause discoloration or damage. Be gentle with your scrubbing; applying too much force can scratch leather or fray canvas. Finally, always let your shoes dry naturally and completely to prevent mildew.
Common Mistakes to Avoid
To keep your Sperrys in top shape, steer clear of these common cleaning errors. First, never put your boat shoes, especially leather ones, in a washing machine or dryer. This is the fastest way to ruin them by causing shrinking, warping, and glue damage.
Avoid using harsh chemicals like bleach or ammonia, as they can strip color and destroy the material. Don’t dry your shoes with direct heat sources. Also, avoid skipping the conditioning step for leather shoes; this leads to cracking and stiffness. Lastly, don’t wear your shoes before they are completely dry.
How Much Will It Cost?
Cleaning your Sperry boat shoes at home is a very cost-effective way to maintain them. The total cost will likely be under $30, and the supplies will last for multiple cleanings. Most of the basic items, such as mild soap, baking soda, and brushes, you may already have.

The main expenses will be a bottle of specialized leather cleaner and a good-quality leather conditioner, which typically range from $10 to $15 each. A waterproofing spray might add another $10 to $15 to the total. Considering that these products will serve you for many future cleanings for all your leather goods, this small investment is well worth it to protect your shoes, which can cost over $100 a pair.
Frequently Asked Questions
Q1: Can I Use a Washing Machine to Clean My Sperrys?
A1: It is strongly advised not to put leather Sperry boat shoes in a washing machine. The combination of excessive water, tumbling action, and detergents can strip the leather of its natural oils, cause it to shrink and harden, and may dissolve the adhesives holding the shoe together. For canvas Sperrys, some people report success with a gentle, cold water cycle, but it remains a risk. Hand washing is always the safest and most effective method to control the amount of water and ensure a gentle clean.
Q2: How Often Should I Clean My Boat Shoes?
A2: The frequency of cleaning depends entirely on how often you wear them and in what conditions. For regular wear, a light cleaning every month or two should suffice to keep them looking fresh. If they get visibly dirty, scuffed, or exposed to salt water, you should clean them as soon as possible. A deep clean, including conditioning, should be performed two to four times a year to maintain the health and longevity of the leather.
Q3: What Is the Best Way to Remove Salt Water Stains?
A3: Salt water can leave white, chalky stains on leather and can be very damaging over time as it draws moisture out of the material. To remove these stains, create a solution of one part white vinegar and two parts cool water. Dampen a clean cloth with this solution and gently wipe the stained areas. The mild acidity of the vinegar will dissolve the salt deposits. Afterward, wipe the area with a cloth dampened with plain water to remove any vinegar residue, then let the shoes dry completely before applying a leather conditioner.

Conclusion
Properly caring for your Sperry boat shoes is a straightforward process that yields fantastic results. By following this comprehensive guide on how to clean Sperry boat shoes, you can confidently tackle dirt, stains, and scuffs, restoring your footwear to its former glory.
Regular cleaning and conditioning not only enhance the appearance of your shoes but also play a crucial role in preserving the quality of the materials and extending their lifespan. With a small investment in time and a few basic supplies, you can ensure that.
About
As the lead voice behind Shoenify, I bridge the gap between footwear aesthetics and technical performance. With a career dedicated to the intersection of fashion and function, I provide readers with data-driven reviews and deep dives into the global footwear market. My mission is to help every reader find the perfect fit, whether they are hitting the track or the boardroom.
Education RMIT University
-
RMIT University: Bachelor of Design (Footwear & Accessories)
-
Nottingham Trent University: MA in Fashion Design (Specializing in Footwear Innovation)
Publications and Impact
My insights on footwear trends and sustainable manufacturing have been featured in leading industry trade journals. Through Shoenify, I have influenced thousands of purchasing decisions by prioritizing transparency and rigorous testing. My work focuses on the evolution of “smart” footwear and the impact of 3D printing on the future of the industry.