

White Huaraches are iconic sneakers known for their bold design and incredible comfort, but keeping that pristine look can feel like a full-time job. Dirt, scuffs, and everyday grime seem magnetically attracted to the bright white mesh and leather, quickly turning your favorite kicks into a dull, grey mess.
Fortunately, you don’t need expensive commercial cleaners to restore their original glory; a simple household ingredient like baking soda works wonders. This guide on how to clean white huaraches with baking soda will walk you through an easy, budget-friendly method to deep clean your Huaraches using items you likely already have in your pantry, ensuring they look fresh out of the box again.
Tools and Materials You’ll Need
- Baking soda
- White vinegar or hydrogen peroxide
- Warm water
- A soft-bristled toothbrush (an old one works perfectly)
- A small mixing bowl
- A clean microfiber cloth or soft towel
- Mild laundry detergent or dish soap
- Paper towels or shoe trees (for stuffing the shoes)
7 Simple Step-by-step Guidelines on How to Clean White Huaraches With Baking Soda
Step 1: Remove Laces and Insoles
Before you apply any cleaning solution, you need to strip the shoe down to its base components to ensure a thorough clean. Take out the shoelaces and the removable insoles from both sneakers, setting them aside in a separate bowl of warm, soapy water to soak while you work on the main shoe structure. Cleaning these parts separately prevents dirt from getting trapped in the eyelets or under the footbed, which can cause lingering odors or discoloration over time.
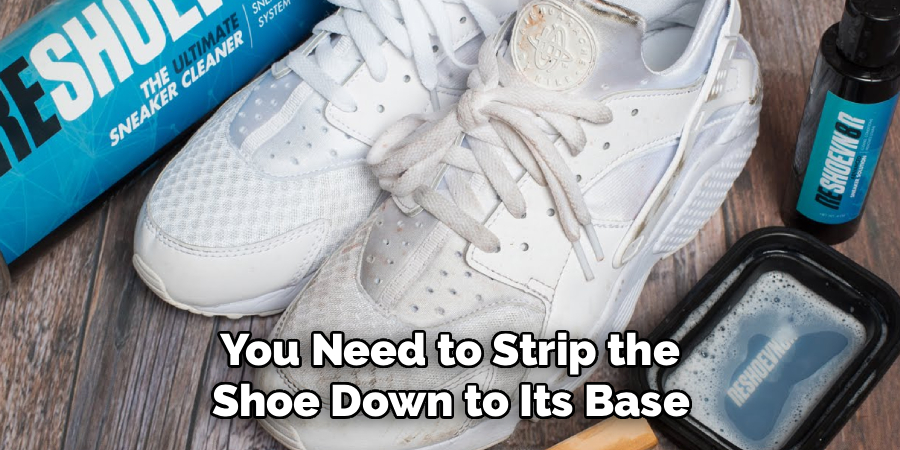
By removing these accessories, you open up the tongue and the interior of the shoe, giving you better access to those hard-to-reach crevices where dust loves to hide. If your laces are severely stained, you might need to scrub them individually later, but soaking them now loosens up the grime significantly. This initial prep work is crucial because washing the shoe with the laces still on often results in uneven cleaning and wet spots that take much longer to dry.
Step 2: Brush Off Loose Dirt
The next critical phase involves dry brushing the entire exterior of the sneaker to remove any caked-on mud, loose dust, or surface debris. Using a dry, soft-bristled brush or even a clean toothbrush, gently sweep over the mesh, the leather cage, and the heel strap to knock off anything that isn’t stuck fast to the material. If you skip this step and go straight to adding water, you will likely turn that dry dust into a muddy sludge that seeps deeper into the fabric mesh.
Focus closely on the textured areas of the sole and the breathable mesh toe box, as these are prime locations for trapping small rocks and dirt particles. Use quick, flicking motions rather than hard scrubbing to lift the dirt away from the surface, rather than grinding it in. Once you have removed as much dry debris as possible, wipe the shoes down quickly with a dry paper towel to ensure you have a clean canvas ready for the baking soda mixture.
Step 3: Create the Baking Soda Paste
Now it is time to mix your powerful cleaning agent by combining baking soda with water and a splash of hydrogen peroxide or white vinegar. In your small bowl, mix one tablespoon of baking soda, half a tablespoon of water, and half a tablespoon of hydrogen peroxide until it forms a consistency similar to thick toothpaste. This paste needs to be thick enough to cling to the shoe’s surface without running off, but wet enough to penetrate the woven fibers of the mesh upper.
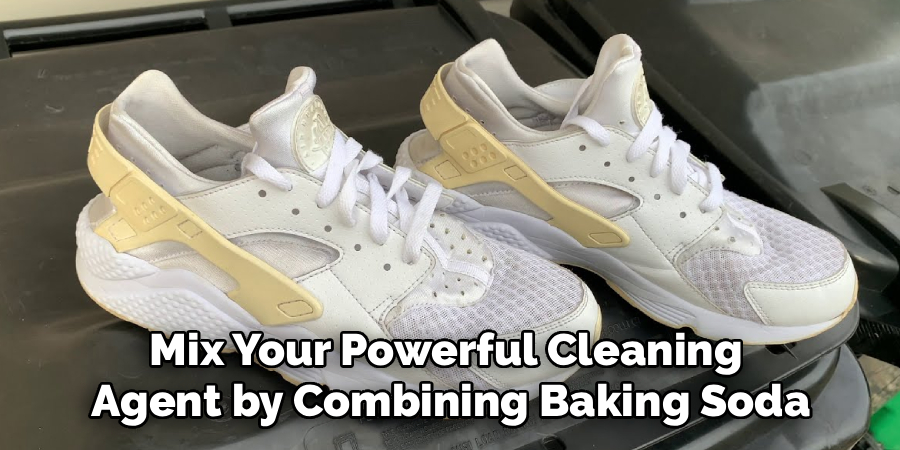
If the mixture is too runny, add a pinch more baking soda; if it is too dry and crumbly, add a few drops of water until you get the perfect texture. The chemical reaction between the baking soda and the liquid helps to lift stains and break down organic matter that causes yellowing on white fabrics. Mixing this fresh for each cleaning session ensures the ingredients are active and potent, providing the best possible whitening results for your Huaraches.
Step 4: Apply the Paste and Scrub
Dip your toothbrush into the paste and begin applying it generously to the dirty areas of the shoe, focusing heavily on the toe box and midsole. Using circular motions, scrub the paste into the fabric, allowing the bristles to work the mixture deep into the mesh pores where discoloration happens most. Be firm enough to agitate the stains but gentle enough not to fray the delicate material or scratch the rubber components of the heel strap.
Continue this process until the entire shoe is covered in the white paste, paying extra attention to scuff marks on the rubber sole and stubborn stains on the tongue. You should see the paste turning slightly grey as it lifts the dirt out of the material, which means the cleaning reaction is working effectively. Don’t rush this part; taking your time to scrub every section ensures an even whiteness across the whole sneaker rather than just spot-cleaning specific areas.
Step 5: Let the Paste Set
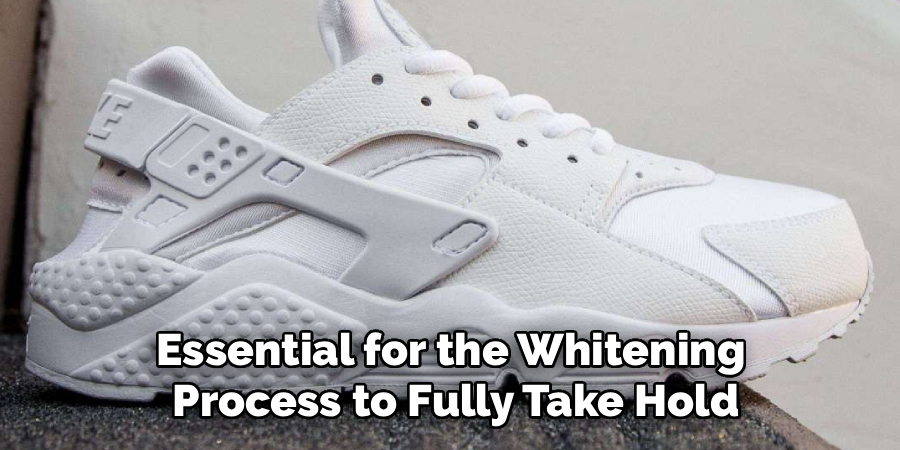
Once you have thoroughly scrubbed the shoes, leave the paste on the sneakers to dry and work its magic for at least 30 to 45 minutes. During this time, the baking soda mixture will harden and create a crust over the shoe, continuing to draw out moisture and dirt from deep within the fibers. Putting the shoes in a sunny spot (but not in direct, scorching heat) can help speed up the drying process and activate the bleaching effect of the hydrogen peroxide.
Do not be tempted to rinse the paste off while it is still wet, as the drying phase is essential for the whitening process to fully take hold. As the paste dries, it effectively bonds with the grime, making it much easier to remove during the final rinse. You can use this waiting time to go back and scrub your shoelaces and insoles, rinsing them out and setting them to dry so everything is ready at the same time.
Step 6: Rinse and Wipe Clean
After the paste has completely dried and cracked, use a damp microfiber cloth or sponge to wipe away the crusty residue. You can also gently clap the soles of the shoes together outside to knock off the larger chunks of dried baking soda before wiping them down. Rinse your cloth frequently in warm water to ensure you aren’t just smearing the dirty paste back onto the clean white fabric.
Make sure you remove every trace of the baking soda, especially from the mesh areas and the crevices around the midsole, or it might leave a white powdery film when it dries again. If the paste is stubborn in certain areas, use a clean, wet toothbrush to lightly scrub it away with plain water. The goal is to reveal the bright white material underneath without soaking the shoe so much that it loses its shape or takes days to dry.
Step 7: Air Dry Properly
Finally, stuff the inside of your Huaraches with white paper towels or clean rags to help them retain their shape and absorb excess moisture from the inside out. Place the shoes in a well-ventilated area that is cool and dry, avoiding direct sunlight or artificial heat sources like radiators, which can yellow the rubber or warp the glue. Let them air dry completely for at least 24 hours before you attempt to lace them back up or wear them.
Change the paper towels after a few hours if they become soaked, as this speeds up the drying process and prevents any mildew smells from developing in the damp padding. Patience is key here; wearing damp shoes is uncomfortable and can lead to immediate re-soiling or odor issues. Once they are bone dry, reinsert your fresh insoles, lace them up with your clean laces, and enjoy your revitalized, bright white sneakers.
Following these steps on how to clean white huaraches with baking soda will not only save you money but also allow you to maintain the cleanliness and freshness of your favorite shoes. It’s important to note that regular cleaning can extend the lifespan of your sneakers, preventing them from becoming discolored or damaged over time.
Safety Tips
When working with cleaning agents, even household ones, it is smart to wear rubber gloves to protect your skin from drying out or irritation, especially if you have sensitive skin or cuts on your hands. Always work in a well-ventilated area so you aren’t breathing in fine baking soda dust or strong vinegar fumes while you are mixing and scrubbing.
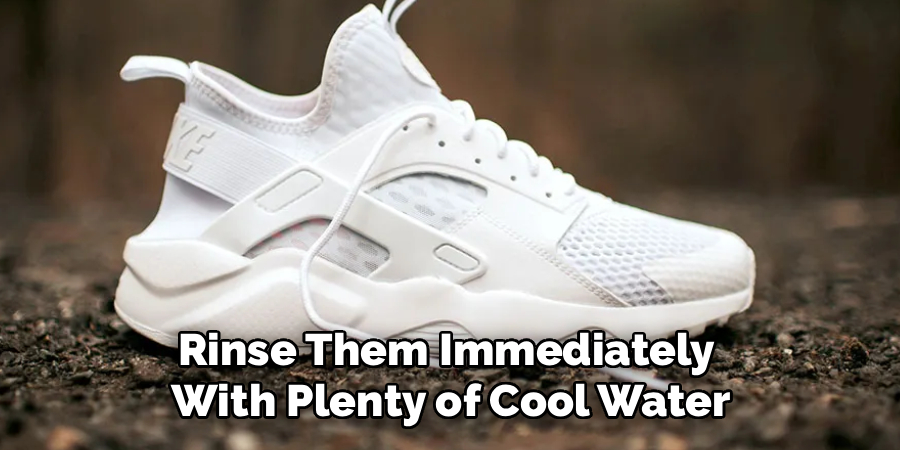
Avoid getting the cleaning solution in your eyes; if splashes occur, rinse them immediately with plenty of cool water. Be cautious not to mix ammonia-based cleaners with bleach or vinegar, as this creates toxic fumes—stick strictly to the ingredients listed. Finally, keep your cleaning supplies out of reach of children and pets to prevent accidental ingestion.
Common Mistakes to Avoid
One major mistake is using colored towels or rags to clean or stuff the shoes, as the dye can transfer onto the wet white mesh and ruin them permanently. Another error is throwing the Huaraches in the dryer to speed up the process, which often melts the glue and warps the unique heel strap structure.
Avoid using stiff wire brushes that can tear the mesh fabric or scratch the soft leather parts of the shoe. Many people also forget to rinse the paste off thoroughly, leaving a chalky residue that attracts more dirt immediately.
How Much Will It Cost?
Cleaning your Huaraches with this method is extremely cost-effective, typically costing less than $5 in total for all the supplies involved. A box of baking soda costs roughly $1, and a bottle of hydrogen peroxide or vinegar is usually around the same price at most drugstores or supermarkets. You likely already have an old toothbrush, water, and dish soap at home, which means your out-of-pocket expense is negligible.
Compared to buying a specialized sneaker cleaning kit that can cost upwards of $20 to $30, this DIY route saves you significant money. Even if you have to buy everything from scratch, the supplies will last for dozens of cleaning sessions.
Frequently Asked Questions
Q1: Can I Put My Huaraches In The Washing Machine?
A1: While some people do put them in the washer on a delicate cycle using a laundry bag, hand washing with baking soda is generally safer and extends the lifespan of the shoe. The agitation of a machine can warp the plastic heel cage and damage the glue that holds the sole together. Hand cleaning gives you control over the pressure and ensures you focus on the dirtiest areas without stressing the shoe’s structure.
Q2: How Often Should I Clean My White Huaraches?
A2: It is best to spot clean your white sneakers every two weeks or immediately after they get visibly dirty to prevent stains from setting in permanently. A deep clean using the baking soda method should be done every month or two, depending on how frequently you wear them and the weather conditions. Regular maintenance prevents the white mesh from turning that irreversible yellow tint that occurs with age and neglect.
Q3: Will Baking Soda Damage The Leather Parts?
A3: Baking soda is a mild abrasive, so while it is excellent for the rubber soles and mesh, you should be gentle when scrubbing the leather sections of the Huarache. It generally won’t damage the leather if you don’t scrub too hard, but you should wipe it off quickly rather than letting it cake on for hours. For the leather parts, a simple wipe with mild soapy water is often safer and just as effective.
Conclusion
Restoring your white Huaraches doesn’t require professional help or expensive chemicals; a little baking soda and some elbow grease are all you need. By following these seven simple steps on how to clean white huaraches with baking soda, you can lift tough stains, brighten the mesh, and keep your sneakers looking crisp and clean.
Regular maintenance using this safe, low-cost method will ensure your favorite shoes stay fresh and ready to wear for seasons to come.
About
As the lead voice behind Shoenify, I bridge the gap between footwear aesthetics and technical performance. With a career dedicated to the intersection of fashion and function, I provide readers with data-driven reviews and deep dives into the global footwear market. My mission is to help every reader find the perfect fit, whether they are hitting the track or the boardroom.
Education RMIT University
-
RMIT University: Bachelor of Design (Footwear & Accessories)
-
Nottingham Trent University: MA in Fashion Design (Specializing in Footwear Innovation)
Publications and Impact
My insights on footwear trends and sustainable manufacturing have been featured in leading industry trade journals. Through Shoenify, I have influenced thousands of purchasing decisions by prioritizing transparency and rigorous testing. My work focuses on the evolution of “smart” footwear and the impact of 3D printing on the future of the industry.