
Doc Martens have long been a symbol of rebellion and self-expression, but the 3-eye low-top version offers a particularly sharp, versatile look that works with everything from casual denim to smarter trousers. Getting the lacing right isn’t just about keeping them on your feet; it is about refining that classic silhouette to ensure you look polished while maintaining the brand’s signature edge.

Properly lacing your 3-eye Docs can dramatically improve comfort by reducing heel slippage and ensuring even pressure across the top of your foot. Whether you are breaking in a fresh pair of 1461s or refreshing an old favorite, mastering the lacing technique is the key to unlocking both the style and functionality that these iconic shoes are known for.
In this guide on how to lace 3-eye Doc Martens, we will cover the basic lacing pattern, as well as some fun variations to elevate your Docs game. B
Materials You’ll Need
- 3-eye Doc Martens (or any similar style)
- Laces (preferably in a contrasting color for added style)
- A bit of patience and practice
8 Step-by-step Guidelines on How to Lace 3-eye Doc Martens:
Step 1: Prepare Your Shoes and Choose the Right Laces
Before you even thread the first piece of fabric, it is crucial to ensure your Doc Martens are clean and ready for the process, as old dirt can make lacing difficult and messy. Start by wiping down the leather around the eyelets with a soft, slightly damp cloth to remove any accumulated dust or grime that might get trapped under the new laces.
If you are using old laces, inspect them closely for fraying or thinning spots; using damaged laces on a sturdy shoe like a Doc Marten often leads to snapping at inconvenient times. For the 3-eye style, selecting the correct length is vital because excess lace looks sloppy on a low-top shoe, while too little lace makes tying a secure knot impossible.
Once the shoes are clean, make sure the tongue is centered and pulled up straight so it doesn’t bunch up inside the shoe once you start tightening things down. This preparation phase is often overlooked, but taking the time to condition the leather around the tongue and eyelets can make the lacing process smoother and help the shoe conform to your foot better.

Ensure your chosen laces are the appropriate thickness for the eyelets; the classic 1461s usually work best with round laces for a traditional look or flat laces for a more casual, skater-inspired aesthetic. Lay everything out in front of you so you can work efficiently without having to search for tools or adjust the shoe constantly.
Step 2: Create the Foundation Bar
The first actual movement in lacing your 3-eye Docs involves creating a straight bar across the bottom two eyelets, which sets the foundation for the entire lacing pattern. Take your lace and thread it through the bottom two eyelets (closest to the toe) from the outside going in, creating a clean horizontal line across the top of the shoe.
It is essential that you go from the top down into the eyelet, rather than coming up from underneath, because this “over-under” technique keeps the bar flat against the leather and prevents unsightly bumps that can dig into your toes.
After you have threaded the lace through both bottom eyelets, pull the ends of the laces up tightly to ensure the bar is snug against the tongue of the shoe without wrinkling the leather. At this point, you must stop and ensure that both ends of the lace are perfectly even in length; if one side is longer than the other now, you will end up with mismatched lengths at the final knot.
Hold the two aglets (the plastic tips) together and pull the lace taut to center it perfectly. This initial step is the anchor for the rest of the shoe, and getting it right ensures the rest of the pattern stays symmetrical and holds your foot securely in place.

Step 3: Begin the Crossover Technique
With your foundation bar securely in place, you will now begin the crossover pattern that gives the shoe its classic crisscross appearance and structural integrity. Take the lace end from the right side and bring it diagonally across the tongue to the next available eyelet on the left side, feeding it from the underside of the eyelet upwards.
This “under-over” motion is crucial here because it keeps the laces hidden beneath the leather flaps as much as possible, creating a cleaner look compared to feeding it from the top down.
Repeat this motion with the left lace end, crossing it over the right lace and feeding it through the empty eyelet on the right side, again coming from underneath and pulling it through the top. As you pull the laces through, make sure they lie flat against the tongue and do not twist, as twisted laces can create pressure points on the top of your foot and ruin the aesthetic of the shoe.
Give both ends a gentle tug to tighten the cross, ensuring the tension is firm but not so tight that it puckers the leather. This first cross is essential for locking the heel into the back of the shoe.
Step 4: Adjusting Tension and Tongue Position
Now that you have completed the first crossover, pause to check the positioning of the tongue and the tension of the laces across your instep. The tongue on Doc Martens, especially on newer pairs, has a tendency to slide to the side, which can be uncomfortable and look unkempt if not managed during the lacing process. Grip the top of the tongue and give it a firm pull upwards to smooth out any wrinkles that may have formed underneath the first cross, ensuring it sits perfectly centered between the two sides of the shoe.

After centering the tongue, check the tension of the laces you have just threaded; they should be snug enough to hold the shoe shape but loose enough to allow for natural foot movement. If the laces are too loose, your foot will slide forward, leading to blisters; if they are too tight, you will restrict circulation and make breaking in the leather much more painful. This intermediate step is about recalibrating the fit before you move to the final eyelets, as it is much harder to adjust the tension at the bottom once the top knot is tied. Take a moment to visually inspect the symmetry of the cross you just made to ensure it looks balanced.
Step 5: The Final Cross to the Top Eyelets
You are now ready to thread the laces through the third and final pair of eyelets at the top of the shoe, completing the primary lacing structure. Take the lace that is currently on the left side and bring it diagonally across the tongue to the top eyelet on the right side, threading it from the inside of the shoe to the outside. This direction is important because having the lace exit the shoe pointing away from the tongue makes tying the final bow much easier and keeps the knot secure against the shoe.
Do the same with the lace on the right side, crossing it over to the final top eyelet on the left and threading it from the inside out. At this stage, you should have a distinct crisscross pattern visible between the three sets of eyelets, with both lace ends emerging freely from the top holes. Double-check that the laces haven’t twisted during this final cross, as the top cross is the most visible part of the shoe, and messy laces here will detract from the overall look. Pull both ends firmly to seat the laces against the eyelets, preparing the shoe for the final knotting process.
Step 6: Checking for Even Lengths
Before you tie the knot, you need to perform a final check to ensure that the remaining lengths of lace on the left and right sides are roughly equal. It is very common for one side to become shorter during the crossing process if youpulld unevenly at any point, and discovering this after you have tied a knot is incredibly frustrating. Pull both laces straight up and hold them side-by-side to compare their lengths; a difference of half an inch is acceptable, but anything more will result in a lopsided bow that drags on the ground or comes undone easily.
If you find that the lengths are significantly different, you do not need to unlace the whole shoe; simply work the slack through the crosses from the top down to the bottom bar and then back up the other side. This micro-adjustment helps redistribute the lace length without destroying your hard work. Once the lengths are even, pull the laces tight one last time to lock the heel into the back of the shoe cup. This tightness check is the final safeguard against the infamous “heel slip” that plagues many wearers of stiff leather shoes like Doc Martens.
Step 7: Tying the Standard Bow
With your laces threaded and even, it is time to tie the shoe securely using a standard bow knot that balances security with ease of removal. Start by crossing the left lace over the right (or vice versa, depending on your habit) and pulling it through the loop to create a simple overhand knot. Pull this base knot tight against the tongue of the shoe so that it holds the tension you established in the previous steps; if this base slips, the whole shoe will feel loose within minutes of walking.
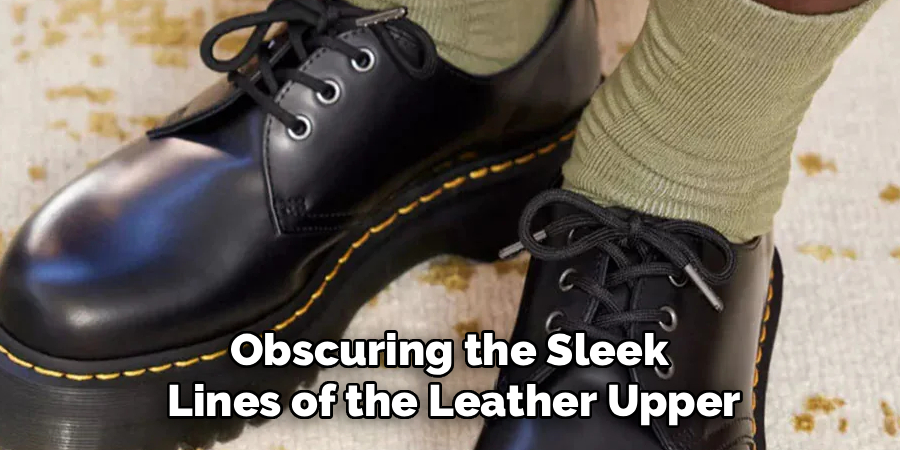
Next, form a loop with one of the laces and wrap the other lace around it, pushing a bight of the lace through the hole to form the second loop of the bow. Pull both loops outward to tighten the knot, adjusting the size of the loops so they are proportional to the shoe—too large and they look floppy, too small and they are hard to untie. For 3-eye Docs, you generally want a compact, neat bow that sits cleanly on the top of the shoe without dragging on the ground or obscuring the sleek lines of the leather upper.
Step 8: Optional: The Hidden Knot Method
If you prefer a cleaner, more minimalist silhouette, you can opt for the hidden knot method instead of the standard bow displayed on the outside. After threading the final eyelets in Step 5 (threading from outside to inside instead of inside to outside), do not tie a bow on top of the tongue. Instead, tuck the loose ends of the laces down inside the shoe, either under the insole or along the sides of your foot, effectively hiding the mechanics of how the shoe is secured.
Alternatively, you can tie a small square knot underneath the tongue, behind the leather flap, so that it sits against the top of your foot. This method requires careful placement to ensure the knot doesn’t rub against your instep and cause discomfort while walking. This style completely changes the vibe of the 3-eye Doc Marten, transforming it from a standard Oxford look into a sleek, slip-on style appearance that highlights the smooth leather and yellow stitching without the distraction of a bow.
Following these steps on how to lace 3-eye Doc Martens, you can customize your lacing style to fit your personal aesthetic and preference. Experiment with different patterns and techniques to find the perfect fit for your feet.
Frequently Asked Questions
Q1: How Tight Should I Lace My Doc Martens?
You should lace your Doc Martens firmly enough that your foot does not slide forward when you walk, but loose enough to wiggle your toes comfortably. When the leather is new, it is very stiff, so lacing it too tightly can cut off circulation and cause pain across the top of the instep. Conversely, if they are too loose, the heavy sole will cause the heel to slip up and down, leading to painful blisters. Aim for a “snug hug” feeling where the shoe moves with your foot as a single unit rather than your foot moving inside the shoe.
Q2: Can I Use Straight Bar Lacing On 3-Eye Docs?
Yes, straight bar lacing is actually a very popular and stylish choice for 3-eye Doc Martens because it creates a very neat, horizontal look that complements the formal shape of the shoe. To do this, you would modify the steps so that the laces run horizontally across the outside and vertically along the inside, eliminating the diagonal crossover entirely. This method is slightly more dressy and works exceptionally well if you are wearing your Docs with a suit or formal trousers. However, be aware that straight lacing can sometimes make it harder to tighten the shoe quickly compared to standard crisscross lacing.
Q3: What Length Laces Do I Need For 3-Eye Shoes?
For standard 3-eye Doc Martens like the 1461, the ideal lace length is typically 65cm or roughly 26 inches. This length provides enough slack to comfortably tie a standard bow without leaving huge loops that drag on the floor or get stepped on. If you have wider feet and require the eyelets to be spaced further apart, you might consider stepping up to a 75cm lace to ensure you have enough room to tie them easily. Conversely, if you plan on using the hidden knot method, a shorter lace might be preferable to avoid having too much excess material stuffed inside your shoe.
Conclusion
Mastering the art of lacing your 3-eye Doc Martens is a small but significant detail that elevates your overall style and maximizes comfort. Whether you stick to the classic crisscross method for a rugged, everyday look or experiment with straight bar lacing for a sharper aesthetic, the way you secure your shoes speaks to your attention to detail. Proper lacing ensures your shoes age gracefully, molding to your feet correctly and preventing unnecessary wear and tear.
Don’t be afraid to switch up your lacing style depending on the occasion or your outfit. Doc Martens are designed to be a canvas for self-expression, and something as simple as changing from round to flat laces or hiding the knot can completely transform the vibe of your footwear. Take the time to get the tension right, keep your laces clean, and enjoy the timeless appeal of your perfectly laced Docs. Thanks for reading this guide on how to lace 3-eye Doc Martens.
About
As the lead voice behind Shoenify, I bridge the gap between footwear aesthetics and technical performance. With a career dedicated to the intersection of fashion and function, I provide readers with data-driven reviews and deep dives into the global footwear market. My mission is to help every reader find the perfect fit, whether they are hitting the track or the boardroom.
Education RMIT University
-
RMIT University: Bachelor of Design (Footwear & Accessories)
-
Nottingham Trent University: MA in Fashion Design (Specializing in Footwear Innovation)
Publications and Impact
My insights on footwear trends and sustainable manufacturing have been featured in leading industry trade journals. Through Shoenify, I have influenced thousands of purchasing decisions by prioritizing transparency and rigorous testing. My work focuses on the evolution of “smart” footwear and the impact of 3D printing on the future of the industry.