

Dr. Martens are more than just durable footwear; they are a subcultural icon that demands a specific attitude and attention to detail, right down to how the laces are arranged on the leather upper. Whether you are breaking in a fresh pair of 1460s or revitalizing a vintage find, the way you tie your boots significantly impacts both your comfort levels and your overall aesthetic.

Mastering the art of lacing these boots is an essential ritual for any owner, blending functionality with a distinct sense of personal style that has evolved over decades of punk and grunge fashion history.
Properly tied boots prevent the notorious tongue slippage and ensure the stiff leather molds correctly to your ankle, turning a potentially painful break-in period into a comfortable stride. In this guide on how to tie dr martens boots, we’ll cover the basic lacing techniques as well as some fun and creative ways to style your laces.
Do Dr Martens Boots Actually Need to Be Tied?
While the classic silhouette of a Dr. Martens boot suggests a rigorous lacing routine, the necessity of tying them tightly is often debated within the fashion community. In the realm of casual streetwear and grunge aesthetics, leaving the boots loosely laced or even untied at the top eyelets is a deliberate stylistic choice that signals a relaxed, non-conformist attitude.
However, from a functional standpoint, failing to tie your boots securely can lead to faster wear on the heel lining and a lack of ankle support, which counteracts the orthopedic design the brand was originally famous for. Ultimately, while you don’t need to tie them in a traditional constriction for them to stay on your feet, securing them properly is crucial for longevity and preventing blisters during long walks.
Types of Dr Martens Boots That May Involve Laces
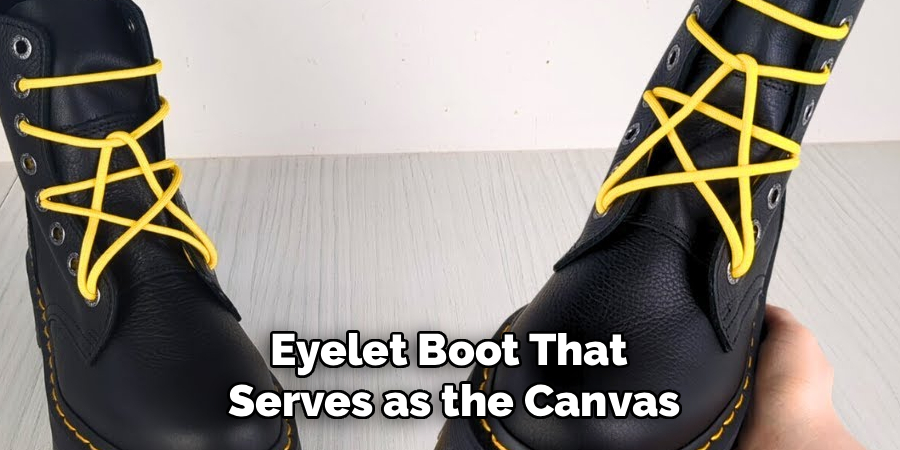
When discussing lacing techniques, it is important to recognize the variety of models in the Dr. Martens lineup, as the eyelet count dictates the lacing strategy. The most iconic is the 1460, the original eight-eyelet boot that serves as the canvas for most lacing experiments. Then there is the 1461, the classic three-eye shoe, which requires a much tighter, neater lacing approach suitable for semi-formal wear.
The 1490 represents the ten-eyelet boot, often favored by punks and skins, offering more height for elaborate ladder lacing. Finally, modern platform variations like the Jadon or Sinclair often feature laces, though the Sinclair includes a removable jungle zipper piece that fundamentally changes how the laces interact with the boot.
Understanding Decorative vs. Functional Laces
It is vital to distinguish between laces that serve a structural purpose and those that are merely there for the “Doc DNA” aesthetic. Functional laces are the primary mechanism for securing the boot to your foot; they control the tension across the instep and the stability of the ankle shaft. If you have a standard pair of 1460s without a zipper, your laces are purely functional and critical for fit.
Conversely, many newer platform models feature a side zipper for easy entry. On these models, the front laces become largely decorative after the first tie. You can set the tension once to your preferred tightness and look, and then rely entirely on the zipper for daily wear. Understanding this distinction saves time and allows you to use more complex, permanent lacing patterns (like straight bar lacing) on zippered boots since you won’t need to undo them constantly.
6 Simple Step-By-Step Guidelines on How to Tie Dr Martens Boots
Step 1: Preparation and Tongue Alignment
Before you even thread the first piece of lace, you must prepare the boot to ensure a smooth, tangle-free process that maximizes comfort and visual appeal. Start by completely removing any old laces and brushing off dust from the tongue and eyelets, as debris trapped under the laces can damage the leather over time.

This is also the perfect moment to apply a layer of Wonder Balsam or leather conditioner to the tongue, an area often neglected yet subject to the most friction. Once the leather is prepped, take your lace and ensure it is free of knots or twists.
Hold the lace by the ends to find the exact center point. This center point is crucial because if your laces are uneven from the start, you will end up with one ridiculously long end and one short end at the top, forcing you to unlace and restart the entire process.
Begin the actual lacing by feeding the two ends of the lace through the bottom two eyelets (closest to the toe), moving from the outside in. This creates a straight horizontal bar across the bottom, which is the signature clean look for most Dr. Martens styles.
Pull the laces through until the horizontal bar is tight against the leather, and pull both ends upwards to verify they remain perfectly even in length.
At this stage, you must also straighten the tongue physically. Ensure it is perfectly centered between the two rows of eyelets. If the tongue is skewed to the left or right now, it will permanently crease in that direction as you tighten the subsequent rows, leading to discomfort on the top of your foot later in the day.
Step 2: The First Cross and Tension Check
Once your bottom bar is established, take the left lace and thread it through the second eyelet on the right side, going from the inside out. Repeat this with the right lace, crossing it over to the second eyelet on the left side, also threading from the inside out. This “inside-out” method places the “X” of the cross underneath the side flaps of the boot, or alternatively, on top if you prefer the classic criss-cross look.
For the most traditional, rugged Dr. Martens appearance, you want the crosses to be visible on top. Therefore, bring the lace end up from under the leather and insert it into the opposite eyelet from the top down. As you make this first cross, pause to flatten the lace with your fingers. Dr. Martens laces are typically thick and round or flat and wide; if they twist now, the pressure points will dig into your instep.

This step is critical for establishing the “volume” of the boot. You need to slide your foot into the boot (or a hand if you are lacing them off-foot) to gauge the tension. The area just above the toes (the vamp) needs to be snug but not constricting. If you pull too tightly at this second eyelet stage, you will crush your toes and restrict circulation before you even reach the ankle.
Conversely, if it is too loose, your foot will slide forward when you walk, causing “toe bang” against the reinforced front of the boot. Aim for a firm hold where the leather touches your sock without squeezing. Adjust the cross so it sits flat against the tongue, and give the laces a sharp tug to lock the tension in place before moving to the third set of eyelets.
Step 3: Navigating the Mid-Section and the Tongue Loop
As you proceed up the boot to the third and fourth eyelets, continue your crossing pattern, maintaining consistent tension. However, around the fourth or fifth eyelet (depending on the specific model of your boot), you will encounter the tongue loop or a slit cut into the leather of the tongue itself. This is a functional feature designed to prevent the tongue from sliding sideways—a notorious issue with Dr. Martens known as “wandering tongue.”
When you reach the eyelets adjacent to this loop, you must thread the laces through the loop as you cross them to the other side. Do not skip this step. By locking the laces through this central anchor point, you ensure the tongue stays upright and centered, providing padding exactly where the laces cross the sensitive bridge of your foot.
During this mid-section phase, consistency is key. Visually inspect the “X” shapes you are creating. Are they uniform? Is the left lace always crossing over the right, or are you switching it up randomly? For a polished look, decide on a pattern (e.g., left always over right) and stick to it for every single cross.
This attention to detail creates a harmonious visual rhythm that distinguishes a hastily tied boot from a styled one. Furthermore, check the width of the gap between the eyelet rows. The two sides of the boot should be coming together in parallel lines. If they start to bow outward or touch completely, your fit might be off, or the boot may be the wrong width for your foot. Adjust the tightness here carefully, as this mid-section controls arch support.
Step 4: The Ankle Transition and Flexibility
When you reach the ankle area—usually the sixth eyelet on a standard 1460 boot—the mechanics of the lacing need to change slightly to accommodate movement. The boot shaft needs to grip your ankle to prevent heel slip, but it must also allow for the natural flexion of your leg as you walk. If you lace this section as tightly as the foot area, you risk cutting off circulation or creating a “muffin top” effect with your socks and skin.
As you cross the laces into the ankle eyelets, flex your foot forward (dorsiflexion) to simulate the walking motion. Lace the boots while your foot is in this flexed position. This trick ensures that when you return to a standing position, there is just enough slack to allow movement without the leather digging into your Achilles tendon or shin.
This transition point is also where many people choose to deviate from the standard pattern. If you have high arches or find the break-in period painful around the ankle, you can employ a “heel lock” or skip an eyelet here to relieve pressure. However, assuming a standard tie, continue your crossover pattern but pull with slightly less force than you did on the instep. The goal here is stability, not compression.
Ensure the laces are still lying flat against the vertical part of the tongue. Twisted laces at the ankle are a common source of blisters and irritation. Take a moment to smooth the leather flaps of the boot shaft against your leg, ensuring your socks are not bunched up underneath, as the laces will lock any wrinkles in place.
Step 5: The Top Eyelets and Wraparound Options
Approaching the top of the boot, you have a stylistic decision to make regarding the final eyelets. On an 8-eye boot, you can choose to lace all the way to the eighth eyelet for maximum support and a rigid, military-esque look, or stop at the seventh eyelet for a more relaxed, flexible fit.
Stopping one eyelet short is very common among Dr. Martens wearers as it allows the top of the boot to flare slightly, which can be more flattering on the calf and significantly more comfortable for driving or sitting. If you choose to go to the very top, cross your laces one last time and bring them through the final eyelets from the inside out. This positions the lace ends on the exterior, ready for knotting.

Alternatively, a popular method for dealing with the often-long laces provided with Dr. Martens is the “wraparound.” Instead of using the top eyelets for a knot immediately, leave the top eyelet empty (or thread through it) and then wrap the excess lace length around the back of your ankle shaft. Bring the laces back to the front to tie them.
This technique, born out of necessity to manage long laces and provide extra heel stability, has become a quintessential part of the Doc Martens look. If you do this, ensure the wrap is not directly on the skin but over the leather boot shaft or a thick sock. The wrap should be snug enough to stay up but loose enough that you can slip a finger between the lace and the boot.
Step 6: The Final Knot and Security
The final step is securing the structure you have built with a knot that won’t slip. Dr. Martens laces, especially the round nylon ones, can be slippery and prone to coming undone. Start with a standard overhand knot (right over left and pull). Then, form your loops for a bow.
To ensure the bow stays horizontal and secure, utilize the “reef knot” technique: if your starting knot was right-over-left, your bow loop should be left-over-right. This opposition creates a square knot that tightens under tension rather than loosening. If you are active or attending a concert, consider a double knot by taking the two loops of your finished bow and tying them together once more.
Once the knot is tied, take a moment for the final aesthetic adjustment. Fluff the loops of the bow so they look balanced. If you have excessively long ends even after wrapping, you can tuck them into the top of the boot shaft for a cleaner silhouette, keeping them hidden between your sock and the leather. This “hidden knot” look is sleek and prevents the laces from dragging in mud or getting caught on objects.
Finally, stand up and walk a few paces. Your heel should lift slightly inside the boot (about a quarter inch is normal for boots), but your foot shouldn’t be swimming. If you feel pinching, sit back down and loosen the specific zone (instep or ankle) where the pressure is localized, rather than re-tying the whole boot.
Following these steps on how to tie dr martens boots can help you achieve the perfect fit and prevent discomfort or blisters while wearing them.
Seasonal Styling Tips
Dr. Martens are year-round footwear, but how you style your laces should adapt to the weather. In the winter, you will likely be wearing thicker wool socks; this necessitates loosening your laces significantly to accommodate the extra bulk without cutting off blood flow to your toes, which keeps your feet warmer.
For autumn, the “cuffed jean” look is classic—lace the boots high and tight so the hem of your jeans sits neatly atop the boot collar without bunching. In the summer, when wearing Docs with shorts or dresses, try lacing them only halfway up or skipping the top two eyelets. This looser, lower lacing style promotes airflow and gives the boots a slouchier, more relaxed vibe that fits the season.
Common Mistakes to Avoid
One of the most frequent mistakes is lacing the boots too tightly during the break-in period, which accelerates blister formation on the heel and top of the foot; give your feet room to breathe initially. Another error is ignoring the “tongue loop” or slit, leading to a tongue that constantly slides to the side and looks sloppy.
Avoid pulling the laces vertically violently, as this can stretch or rip the eyelets over time; pull outwards and then tighten. Many people also use laces that are too short for the wraparound style, choking their ankles—if you want to wrap, buy longer laces (140cm+). Lastly, never leave wet laces knotted tight; they will dry in that shape and become brittle.
Comfort and Fit Tips
Comfort in Dr. Martens is largely dictated by the “break-in” process, and your lacing plays a huge role here. If you experience pain on the top of your foot (the instep), try “bar lacing” instead of criss-cross, as it removes the pressure points created by the overlapping laces. Always wear thick socks or even double socks to fill out the boot and protect your skin from friction.
If you feel significant heel slippage, employ a “heel lock” lacing method at the ankle to pull the heel cup tighter against your foot. Remember that leather stretches; a boot that feels uncomfortably snug across the width today will likely fit perfectly after two weeks of wear, so rely on lacing tension to manage this expansion.
Care and Maintenance
Your laces get just as dirty as your boots and require care to maintain their strength and color. Every few months, completely unlace your boots to clean the leather tongue underneath, which collects dirt and sweat that can rot the leather stitching. You can wash standard Dr. Martens laces in a mesh bag in the washing machine or soak them in soapy water to remove street grime.
Regularly check your laces for fraying, particularly where they pass through the metal eyelets; a snapped lace is an annoyance you want to avoid. While the laces are off, apply Wonder Balsam to the eyelet area to lubricate the leather, helping the laces slide more smoothly when you tighten them.
Conclusion
Tying your Dr. Martens is the final step in a commitment to durability, style, and self-expression. By understanding the nuances of tension, utilizing the tongue loop, and choosing a lacing method that suits your foot shape, you transform a stiff leather boot into a custom-fitted extension of yourself.
Whether you opt for the clean lines of bar lacing or the rugged security of a wraparound tie, taking the time to lace your boots properly ensures they will support you through every concert, commute, and adventure for years to come. Thanks for reading this guide on how to tie dr martens boots.
About
As the lead voice behind Shoenify, I bridge the gap between footwear aesthetics and technical performance. With a career dedicated to the intersection of fashion and function, I provide readers with data-driven reviews and deep dives into the global footwear market. My mission is to help every reader find the perfect fit, whether they are hitting the track or the boardroom.
Education RMIT University
-
RMIT University: Bachelor of Design (Footwear & Accessories)
-
Nottingham Trent University: MA in Fashion Design (Specializing in Footwear Innovation)
Publications and Impact
My insights on footwear trends and sustainable manufacturing have been featured in leading industry trade journals. Through Shoenify, I have influenced thousands of purchasing decisions by prioritizing transparency and rigorous testing. My work focuses on the evolution of “smart” footwear and the impact of 3D printing on the future of the industry.