

Golden Goose sneakers have carved out a unique niche in the luxury footwear market. Instantly recognizable by their signature star motif and deliberate “lived-in” distressing, these Italian-made shoes bridge the gap between high fashion and streetwear. They are the epitome of “perfectly imperfect,” a design philosophy that suggests effortless cool and casual luxury. However, owning a pair of Golden Goose sneakers comes with a specific styling challenge that many new owners overlook: the laces.
Unlike pristine white leather sneakers that might demand a crisp, horizontal bow, Golden Goose shoes are designed to look undone. The laces are often intentionally frayed, stained, or twisted to match the shoe’s aesthetic. Tying them with a standard “bunny ear” knot can clash with the brand’s carefully curated vibe of nonchalance. To truly capture the Golden Goose look, the lacing needs to be as deliberate as the scuffs on the rubber soles.
This article serves as your comprehensive guide on how to tie Golden Goose shoes to match their distinct personality. We will explore the philosophy behind the brand’s styling, detail the preparation needed for the perfect knot, and provide step-by-step instructions for the most popular tying methods, including the iconic “factory knot” and the slip-on style. By mastering these techniques, you can ensure your sneakers look effortlessly stylish rather than accidentally messy.
The Aesthetic of Imperfection: Why Lacing Matters
To understand how to tie these shoes, you must first understand the Golden Goose ethos. The brand was founded on the idea that clothes and shoes should tell a story. The distressing—the scuffs, the smudges, the worn-in leather—is meant to evoke a sense of history and adventure. Therefore, the way you lace the shoes should contribute to this narrative.
The “Undone” Look
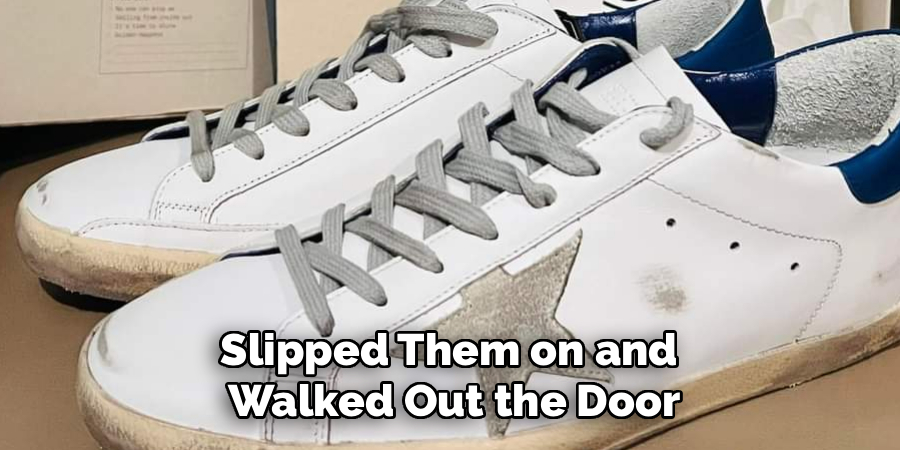
The most coveted look for Golden Goose sneakers is the appearance that they haven’t been tied at all. It is a paradox of fashion: it takes effort to look effortless. A tight, symmetrical bow often looks too rigid against the soft, broken-in leather of a Superstar or Ball Star model. Instead, the laces should drape loosely, creating a relaxed silhouette that implies you just slipped them on and walked out the door. This styling choice is not just about aesthetics; it also enhances comfort. By keeping the lacing loose, the shoe moves more freely with the foot, enhancing the worn-in feel that makes the brand so popular.
Respecting the Materials
Golden Goose laces are distinct. They are often made of high-quality cotton that has been treated to look aged. They might be slightly greyed or have a vintage texture. Because they are designed to hold their shape without being stiff, they respond well to specific knots that rely on friction rather than tension. Understanding that these laces are a key design element—not just a functional tool—is the first step in styling them correctly.
Preparation: Setting the Stage for the Perfect Knot
Before you attempt a specific knot, you need to prepare the shoe. You cannot achieve the signature Golden Goose look if the foundation is messy. While the shoes are meant to look distressed, they are not meant to look sloppy. There is a fine line between “cool” and “careless.”
Assessing Lace Length
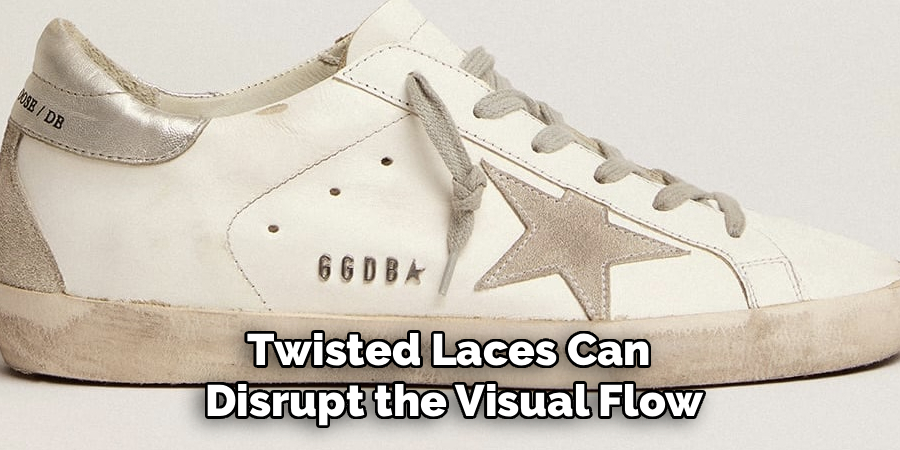
One common issue with Golden Goose sneakers is that the laces can be quite long. This is intentional, as it allows for various styling options, including wrapping around the ankle or double-knotting. However, for the classic slip-on look, you may find you have too much excess material. Before you start, pull the laces through the eyelets to ensure they are even on both sides. If they are twisted inside the eyelets, flatten them out. Even in a distressed shoe, twisted laces can disrupt the visual flow of the upper.
Adjusting the Tension
The key to the Golden Goose aesthetic is loose tension throughout the entire shoe, not just at the knot. Start at the bottom eyelet and gently pull the laces outward to create slack. Work your way up the shoe, ensuring that the cross-over sections hover slightly above the tongue rather than pinning it down. The shoe should feel roomy. This loose tension is essential for the “factory knot” style, as it consumes some of the lace length, leaving you with the perfect amount of ends to work with at the top.
How to Tie Golden Goose Shoes: The Golden Goose “Factory Knot”
If you have ever taken a fresh pair of Golden Goose sneakers out of the box, you likely noticed the peculiar knot at the end of the laces. It is essentially a small, messy coil that prevents the lace from slipping through the eyelet but doesn’t connect the two ends. This is the “factory knot,” and replicating it is the most authentic way to style your shoes.
Step 1: Loosen the Laces Completely
Begin with the shoe on your foot. As mentioned in the preparation section, loosen the laces significantly from the toe box up to the ankle. Your foot should be able to slide in and out of the shoe without untying anything. This is critical because once the factory knot is tied, the shoe essentially becomes a slip-on.
Step 2: Threading the Final Eyelet
Ensure the laces are threaded through the top eyelets from the inside out. You should have two loose ends hanging down on either side of the shoe. Because you loosened the laces in step one, these ends should be shorter than usual—typically about 3 to 5 inches long. If they are longer than this, you need to loosen the lacing across the bridge of the foot even more.
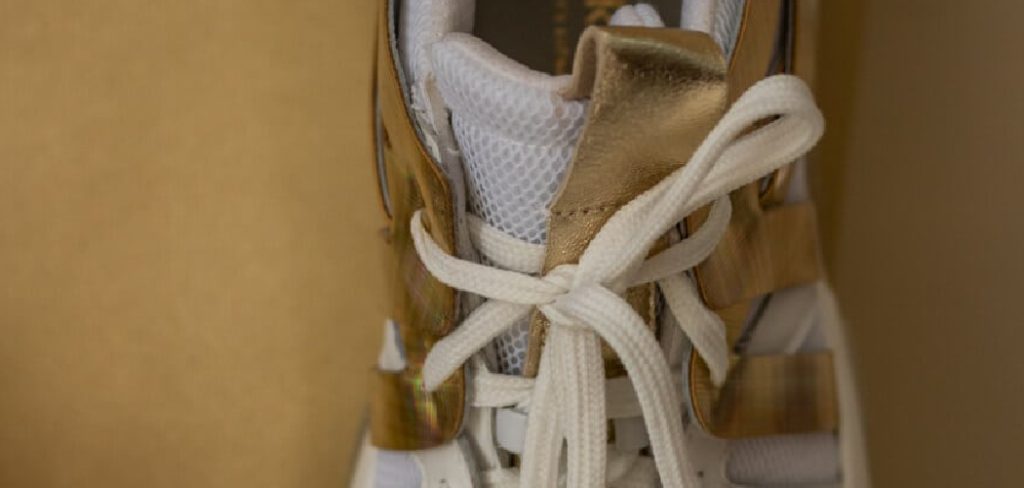
Step 3: Forming the Loop
Pick up one lace end. Place your index finger against the lace about an inch away from the eyelet. Wrap the remaining length of the lace around your finger to create a loop. It doesn’t need to be neat; in fact, a slightly messy loop is better.
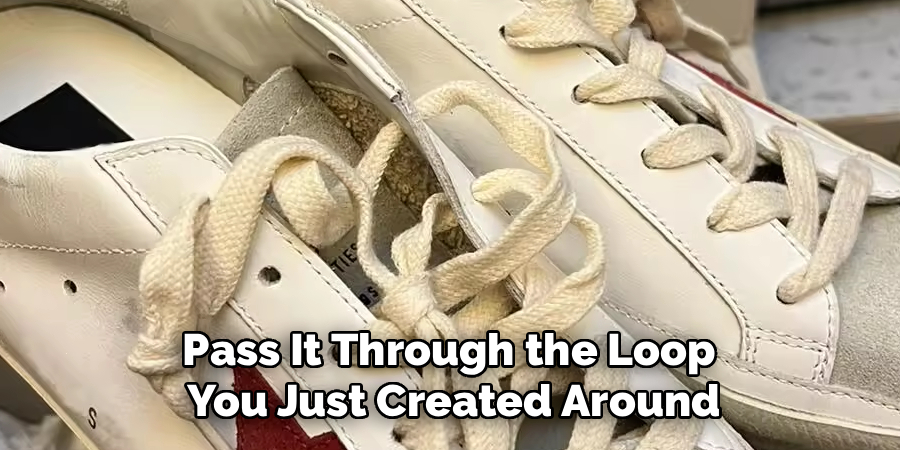
Step 4: The Pass-Through
Take the very tip of the lace (the aglet) and pass it through the loop you just created around your finger. However, do not pull it all the way through to create a standard knot. Instead, guide the end through just enough to catch, creating a loose, coiled ball of lace.
Step 5: Tightening the Coil
Gently slide the coil down towards the eyelet while removing your finger. Pull on the aglet slightly to tighten the knot upon itself. The result should look like a small, tangled ball of lace sitting right at the end of the eyelet. Repeat this process for the other side. The two lace ends hang independently, giving the shoe its signature deconstructed look.
The Hidden Knot (For a Minimalist Approach)
For those who prefer a cleaner look or find the hanging laces distracting, the hidden knot is an excellent alternative. This style maintains the loose, comfortable fit of the factory look but tucks the excess lace away, allowing the star logo and the distressed leather to take center stage.
Step 1: Lace Under the Tongue
Follow the same loose-lacing procedure as before. However, when you reach the final eyelets, thread the laces from the outside in, so the ends end up inside the shoe.
Step 2: Tying Underneath
Lift the tongue of the shoe. Pull the laces tight enough so the shoe stays on your foot, but loose enough to remain comfortable. Tie a standard bow or a square knot underneath the tongue.
Step 3: Tucking the Excess
The challenge with this method is comfort. You do not want a hard knot pressing against the top of your foot. To mitigate this, slide the knot to the side of the tongue, tucking it into the hollow space next to your ankle bone. Alternatively, you can lay the loops of the bow flat against the underside of the tongue. The result is a clean silhouette with no visible laces flopping around, perfect for wearing with cropped trousers or dresses.
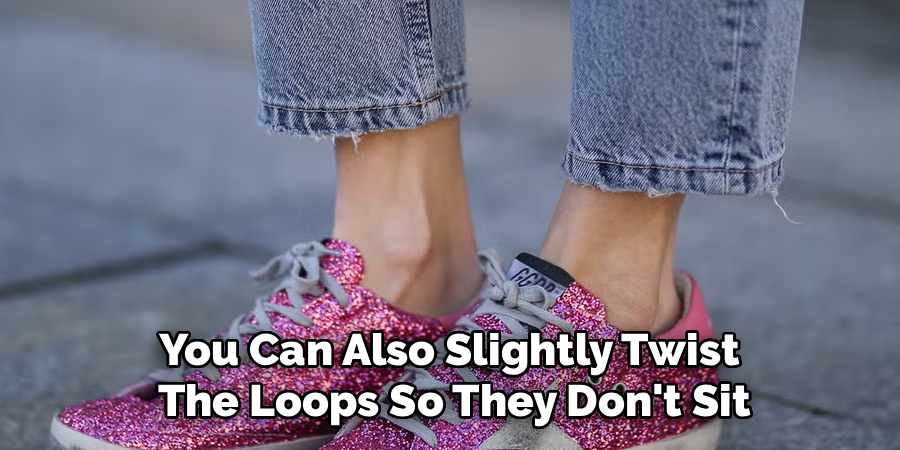
The Traditional Bow (With a Twist)
Sometimes, you just want to tie your shoes securely, especially if you plan on doing a lot of walking. However, a standard “bunny ear” bow can look too pristine for Golden Goose. The solution is a relaxed, slightly asymmetrical bow that matches the shoe’s vibe.
Step 1: The Initial Cross
Start with a standard cross-over knot (left over right). Do not pull it tight against the tongue. Leave a little bit of breathing room so the knot hovers slightly.
Step 2: The Loop and Swoop
Create your first loop. When you wrap the other lace around, keep the tension low. Pull the second loop through.
Step 3: The Adjustment
Here is the trick: once the bow is tied, pull on the loops to make them large and floppy, while shortening the tails. A bow with long, drooping loops and short tails looks more casual and “fashion-forward” than a tight, small bow with long tails. You can also slightly twist the loops so they don’t sit perfectly horizontal. This intentional asymmetry mimics the distressed nature of the shoe.
Styling Tips for Different Models
Golden Goose offers a variety of silhouettes, and the lacing technique should complement the specific model you are wearing.
Styling the Super-Star and Ball Star
These are low-top models and the most common in the lineup. They look best with the “Factory Knot” or the “Hidden Knot.” Because the shoe sits below the ankle, having long laces dragging on the ground can visually shorten your legs. Keeping the knots tight to the eyelet or hidden completely helps elongate the leg line.
Styling the Slide and Francy (High-Tops)
High-top Golden Goose sneakers offer more real estate for lacing. With these models, you can embrace the length of the laces. A popular method is to leave the top one or two eyelets empty, wrap the excess lace around the ankle once, and then tie a loose bow or a factory knot at the front. This adds a rugged, utilitarian vibe that suits the high-top silhouette perfectly.
Dealing with Glitter and Shearling
Some Golden Goose models feature heavy glitter or shearling linings. When tying these, be careful not to trap the shearling in the knot, which can look messy. For glitter models, the “Hidden Knot” is often preferred to prevent the laces from rubbing against the glitter texture, which can cause fraying over time.
Common Lacing Mistakes to Avoid
Even with a shoe designed to look messy, there are ways to get it wrong. Avoiding these common pitfalls will ensure your sneakers look expensive rather than just old.
The “Choke Hold”
The biggest mistake is over-tightening the laces. Pulling the laces tight distorts the shape of the leather, causing it to pucker and wrinkle in unattractive ways. It also makes the shoe look smaller and less substantial. Golden Goose sneakers are meant to look slightly oversized and relaxed. Always prioritize volume over tension.
Uneven Lace Ends
If you opt for the factory knot or the hanging loose style, symmetry is crucial. Having one lace dragging on the floor while the other is three inches off the ground looks accidental, not intentional. Take the time to adjust the tension through the eyelets until the ends are perfectly even before you tie your finishing knots.
Ignoring Dirty Laces
While the shoes are meant to be distressed, they are not meant to be filthy. The laces are often the first part of the shoe to look genuinely dirty rather than “designer dirty.” If your laces turn a grimy grey or brown from street wear, they can detract from the look. You can wash Golden Goose laces in a mesh bag with mild detergent to freshen them up without losing their vintage texture. If they are beyond saving, replace them with official Golden Goose laces or high-quality vintage-style cotton replacements.
Conclusion
Tying Golden Goose shoes is an exercise in curated nonchalance. It is about understanding that the imperfection is the point. By moving away from the rigid, functional knots of athletic wear and embracing the loose, draped styles like the factory knot, you align the styling of the laces with the philosophy of the brand.
Whether you choose the dangling coil of the factory knot, the clean lines of the hidden knot, or a relaxed traditional bow, the key is intention. You are not just tying a shoe; you are finishing a look. With these techniques on how to tie Golden Goose shoes, you can step out with confidence, knowing that your footwear creates the perfect balance of luxury and lived-in cool.
About
As the lead voice behind Shoenify, I bridge the gap between footwear aesthetics and technical performance. With a career dedicated to the intersection of fashion and function, I provide readers with data-driven reviews and deep dives into the global footwear market. My mission is to help every reader find the perfect fit, whether they are hitting the track or the boardroom.
Education RMIT University
-
RMIT University: Bachelor of Design (Footwear & Accessories)
-
Nottingham Trent University: MA in Fashion Design (Specializing in Footwear Innovation)
Publications and Impact
My insights on footwear trends and sustainable manufacturing have been featured in leading industry trade journals. Through Shoenify, I have influenced thousands of purchasing decisions by prioritizing transparency and rigorous testing. My work focuses on the evolution of “smart” footwear and the impact of 3D printing on the future of the industry.