
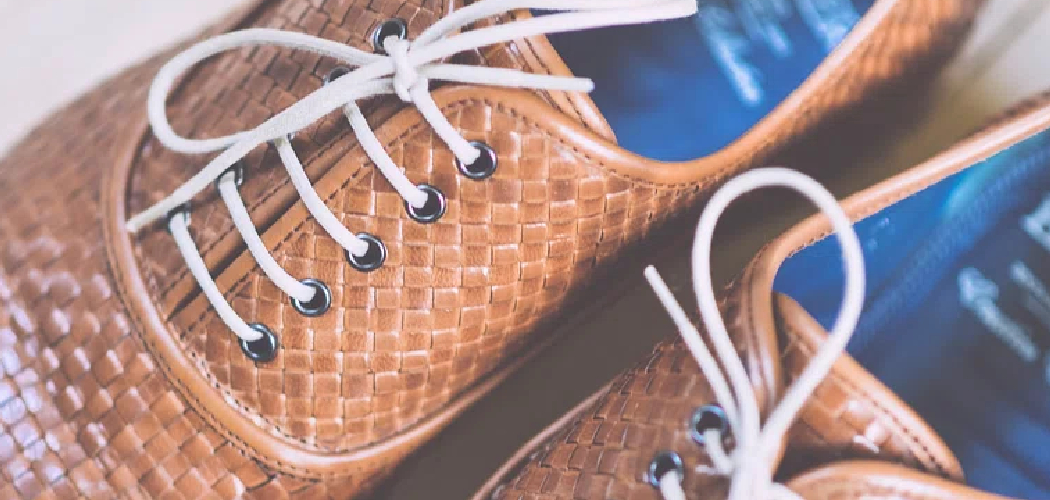
Loafers are the quintessential slip-on shoe, celebrated for their ease and timeless style, yet many modern variations now feature laces that can confuse even the savviest dresser. Whether dealing with boat shoes, driving mocs, or tasseled designs, knowing how to manage these laces is crucial for maintaining a sharp, polished appearance rather than looking unkempt.

Mastering the art of tying loafers isn’t just about aesthetics; it also ensures your footwear stays secure and comfortable throughout the day, preventing slips or blisters. By understanding the nuances of different loafer styles and their specific lacing needs, you can elevate your entire outfit with just a few simple adjustments. In this guide on how to tie Loafers.
Do Loafers Actually Need to Be Tied?
Traditionally, loafers are defined by their lack of fastenings, functioning primarily as slip-on footwear that requires no effort to put on or take off. However, the definition has expanded over time to include styles like boat shoes and moccasins, which feature laces, leading to the common question of necessity.
While many of these laces are purely decorative and sewn into a fixed position, others are functional 360-degree lacing systems that adjust the fit around the heel and throat of the shoe. If your loafers have functional laces, tying them is absolutely necessary to prevent the leather cord from dragging on the ground, becoming a tripping hazard, or simply looking sloppy. Even decorative laces often require re-tying if they come undone, as a loose bow ruins the sleek silhouette that makes loafers so desirable in the first place.
Types of Loafers That May Involve Laces
While the classic penny loafer or horsebit loafer is devoid of laces, several popular variations incorporate them as a key design element. Recognizing these types helps you determine whether you are dealing with a functional necessity or a stylistic flourish.
Boat Shoes (Deck Shoes):
Perhaps the most common “laced loafer,” these feature leather laces that typically run around the entire heel and tie at the front. They are designed for adjustment.
Driving Moccasins:
These soft, unstructured shoes often have leather cords that tie in a bow on the vamp. While sometimes functional, they are frequently decorative.
Tasseled Loafers:
While they don’t have traditional shoelaces for tying, the tassel is often constructed from a leather cord that mimics a tied knot. Occasionally, these knots loosen and need re-tying.
Camp Mocs:
Similar to boat shoes but often with a different sole, these usually feature a functional lacing system for tightening the upper leather.
Espadrille Loafers:
Some modern hybrid styles mix the canvas upper of an espadrille with loafer styling, utilizing laces to secure the foot.
Understanding Decorative vs. Functional Laces
Distinguishing between decorative and functional laces saves you time and prevents you from damaging your shoes. Functional laces generally run through a channel around the top edge (the collar) of the shoe. If you pull on the ends of the laces and feel the heel of the shoe tighten against your foot, you are working with a functional 360-degree lacing system. These are crucial for fit.

Decorative laces, on the other hand, are tacked or glued into place. They exist solely for visual interest. You might see a bow on the front of a driving moccasin, but pulling it does nothing to the fit of the shoe. If these come untied, you simply need to retie them for appearances. Tugging on them aggressively in an attempt to tighten the shoe can rip the stitching or damage the leather upper.
6 Simple Step-By-Step Guidelines on How to Tie Loafers
Step 1: Prep the Laces and straighten the Leather
Before you even attempt a knot, it is essential to prepare the laces, which on loafers are typically made of rawhide or leather rather than the cotton or nylon found on sneakers. Leather laces have a tendency to twist, curl, and become rigid over time, making them difficult to manipulate into a neat knot. Start by running your fingers firmly along the length of each lace to flatten them out, ensuring the rough side (the flesh side) is facing down and the smooth side (the grain side) is facing up.
If the laces are functional and run around the heel, give them a gentle pull to ensure the tension is even on both sides of the shoe. You want the ends to be equal in length before you start tying. If the leather is particularly stiff or dry, you might apply a tiny amount of leather conditioner to make it more pliable. This preparation phase is often overlooked, but it is the secret to achieving a knot that lies flat and stays tied all day, rather than a bulky mess that comes undone within an hour of walking.
Step 2: Create the Initial Loop (The Barrel Knot Base)
For loafers, particularly boat shoes and moccasins, the standard “bunny ear” knot often looks bulky and tends to come undone because leather laces lack friction. Instead, we will focus on the “Barrel Knot” or “Heaving Line Knot,” which is the gold standard for this footwear style. To begin, take one lace end and fold it back on itself to create a loop, leaving a generous amount of the “tail” end free. This loop should be standing vertically, roughly the size you want the final knot to be.
Hold the base of this loop firmly between your thumb and forefinger, close to the shoe’s eyelet. This loop acts as the core structure for the rest of the knot. It is crucial at this stage to maintain tension; if you let the leather slip, the coil we are about to create will be loose and unattractive. The goal here is to create a compact, cylindrical shape rather than a wide bow. This step sets the foundation for a knot that looks intentional and nautical, perfectly suiting the aesthetic of laced loafers.

Step 3: Wrap the Lace Around the Loop
With your loop securely held in place, take the long working end (the tail) of the lace and begin wrapping it around the loop you just created. You should start wrapping from the top of the loop and work your way down toward the shoe. This is counterintuitive for some, but essential for the barrel knot structure. Wrap the lace snugly around the loop roughly 3 to 5 times, depending on the length of your laces and the thickness of the leather.
As you wrap, ensure each coil sits neatly directly below the previous one, creating a tight, stacked spiral effect. Do not let the coils overlap or cross over each other, as this will ruin the clean look of the knot. The coils should be tight enough to hold their shape but not so tight that you can’t manipulate the leather later. This wrapping action consumes the length of the lace, leaving you with a tidy, coiled barrel shape that sits flush against the shoe, eliminating long, dangling ends that can be a tripping hazard.
Step 4: Secure the End Through the Bottom
Once you have wrapped the lace down to the base of the loop (close to the shoe itself), you will have a small amount of the lace tip remaining. You must now secure this coil so it doesn’t unravel. Take the tip of the working end and thread it through the bottom of the loop that is protruding from underneath your coils.
Sometimes the bottom eye of the loop is small, so you may need to wiggle the leather tip through carefully. This step locks the coils in place. It effectively traps the free end of the lace inside the structure of the knot. At this point, the knot might look a bit loose or messy, but don’t worry—the tightening phase comes next. Ensuring the end is thoroughly threaded through is critical; if it slips out, the entire barrel will collapse instantly when you start walking.

Step 5: Tighten and Adjust the Barrel
Now comes the mechanics of finalizing the knot. To tighten the barrel knot, you need to pull on the top part of the original loop (the part sticking out of the top of your coils). Pulling this top loop upward draws the bottom of the loop (where you just threaded the lace tip) up into the coils, trapping the loose end securely inside the wraps.
Pull slowly and firmly. You will see the coils tighten and compress together. You may need to use your fingers to massage the coils into a neat stack as you pull. Do not yank the loop too hard, or you might pull the bottom loop all the way through and undo your work. The goal is to trap the loose end firmly inside the coils so it is invisible and secure. The result should be a neat cylinder of leather with a small loop sticking out the top and no loose ends dangling at the bottom.
Step 6: Trim and Final Polish (Optional but Recommended)
Once your barrel knot is tight and secure, examine the aesthetic. You should have a neat cylinder with a small loop at the top. If the free end you tucked in is still poking out significantly from the bottom or top, you can carefully trim it with a pair of sharp scissors for an ultra-clean look. However, be careful not to cut it too short, or the knot might fail if the leather stretches.
Finally, give the knot a quick roll between your thumb and forefinger to round it out and ensure the leather is settled. Repeat the entire process for the other lace on the same shoe, and then do the same for the other foot. Achieving symmetry between the left and right shoes is important for a polished look. If one knot has four coils and the other has three, it will be visually noticeable. Take a moment to ensure they match in size and tightness before heading out.
Following these steps on how to tie Loafers, your shoes will stay secure and comfortable throughout the day. However, it’s important to note that there are different methods for tying loafers depending on the type of laces they have.

Seasonal Styling Tips
Styling loafers with laces changes significantly depending on the weather and the season. In the summer months, the “sockless” look is king; pair your boat shoes or laced driving mocs with linen trousers or tailored shorts, ensuring your ankles are bare (or protected by invisible socks) to highlight the casual nature of the knotted laces.
During the cooler transition months of autumn, you can pivot to styling them with cuffed dark denim or chinos and a patterned wool sock. The texture of the leather laces complements the heavier fabrics of fall, like corduroy and flannel. Avoid wearing laced loafers in deep winter or snow, as the functional lacing systems are rarely watertight, and the salt can destroy the leather cords quickly.
Common Mistakes to Avoid
One of the biggest errors people make is using a standard “granny knot” on leather laces, which almost always sits crooked and comes undone due to the leather’s stiffness. Another mistake is leaving the ends too long, causing them to drag on the pavement and fray, or get caught under the sole of the shoe while walking.
Avoid pulling the laces so tight that they pucker the leather upper of the shoe, distorting its shape. Additionally, never ignore dry, cracking laces; if they snap, re-lacing a 360-degree system is a difficult and tedious repair job. Lastly, don’t mix formal wear with barrel-knotted boat shoes; keep the knot style consistent with the shoe’s formality.
Comfort and Fit Tips
The beauty of loafers with functional laces is the ability to customize the fit, particularly around the heel cup, where slippage often occurs. If you find your heel popping out with every step, retie the laces tighter to cinch the collar of the shoe closer to your ankle. However, be wary of over-tightening the instep, which can cut off circulation and cause the top of your foot to ache after a few hours.
Leather laces will stretch over time, so you should expect to adjust the tightness periodically, especially during the first few weeks of wear. If the knot itself is causing pressure on the top of your foot, try positioning the tongue of the shoe differently or use a tongue pad to provide a cushion between the hard leather knot and your skin.
Care and Maintenance
Leather laces require just as much care as the shoe upper, yet they are frequently neglected until they snap. Periodically, you rub a small amount of mink oil or leather conditioner into the laces to keep them flexible and prevent them from drying out and becoming brittle. If your laces get wet, allow them to air dry away from direct heat sources like radiators, which can bake the leather and cause it to crack.
When polishing your loafers, try to avoid getting colored wax polish on the laces if they are a contrasting color (e.g., white laces on brown shoes), as this can look messy and is hard to remove. If a lace does fray significantly, replace it immediately rather than waiting for it to break, as a broken lace usually happens at the most inconvenient time.
Frequently Asked Questions
Q1: Can I Replace Leather Loafer Laces With Regular Shoelaces?
Technically, you can thread standard cotton or nylon shoelaces into loafers, but it is strongly advised against from a style perspective. Leather loafers, specifically boat shoes and moccasins, are designed with an aesthetic that relies on the rugged, natural texture of rawhide laces. Replacing them with the flat athletic laces found on sneakers will clash with the shoe’s design, making them look cheap and mismatched. Furthermore, cotton laces may not have the structural integrity to hold the tension required for a 360-degree lacing system, potentially altering the fit of the shoe.
Q2: How Do I Stop Leather Laces From constantly Coming Undone?
Leather laces are notorious for untying themselves because the material is smooth and stiff, lacking the friction that keeps cotton laces secure. The best solution is to wet the knot slightly with water right after you tie it firmly; as the leather dries, it will shrink slightly and “set” into the shape of the knot, holding it securely. Alternatively, switching to a barrel knot (as described in the guide above) rather than a standard bow provides a mechanical lock that is much harder to shake loose. If all else fails, a tiny dab of flexible fabric glue inside the center of the knot can secure it permanently, though this makes adjusting the fit later difficult.
Conclusion
Tying loafers might seem like a contradiction in terms for a shoe famous for being slip-on, but understanding how to manage laces on boat shoes, moccasins, and other hybrids is a hallmark of a well-dressed individual. By distinguishing between decorative and functional laces and mastering the secure, stylish barrel knot, you ensure your footwear looks intentional and stays comfortable.
Whether you are strolling on a summer deck or navigating a casual office environment, these small details in grooming and garment care speak volumes. Treat your laces well, keep them conditioned, and tie them right, and your loafers will serve you reliably for seasons to come. Thanks for reading this guide on how to tie Loafers.
About
As the lead voice behind Shoenify, I bridge the gap between footwear aesthetics and technical performance. With a career dedicated to the intersection of fashion and function, I provide readers with data-driven reviews and deep dives into the global footwear market. My mission is to help every reader find the perfect fit, whether they are hitting the track or the boardroom.
Education RMIT University
-
RMIT University: Bachelor of Design (Footwear & Accessories)
-
Nottingham Trent University: MA in Fashion Design (Specializing in Footwear Innovation)
Publications and Impact
My insights on footwear trends and sustainable manufacturing have been featured in leading industry trade journals. Through Shoenify, I have influenced thousands of purchasing decisions by prioritizing transparency and rigorous testing. My work focuses on the evolution of “smart” footwear and the impact of 3D printing on the future of the industry.