
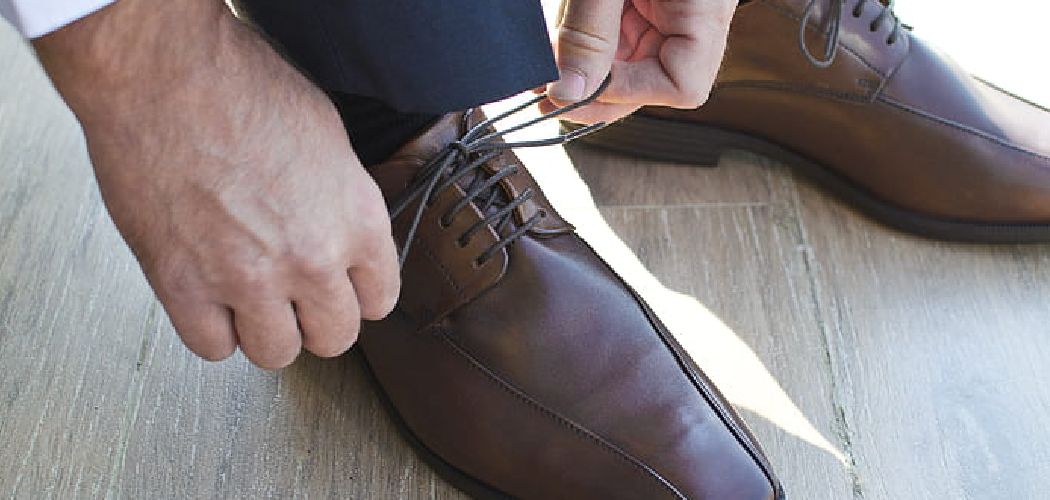
Tying tuxedo shoes is an art form that transcends mere functionality, serving as the final polish on a gentleman’s formal ensemble. The perfect knot signals attention to detail and respect for the occasion, elevating your overall aesthetic from simply dressed to impeccably styled.

When you prepare for a black-tie event, the method you use to secure your footwear can dramatically impact your comfort and confidence throughout the evening. Mastering this skill ensures that your laces remain horizontal, symmetrical, and secure, preventing any awkward wardrobe malfunctions during significant moments. In this guide on how to tie tuxedo shoes, we will explore the different methods for achieving a perfectly-tied bow and the benefits of each.
Types of Tuxedo Shoes That May Involve Laces
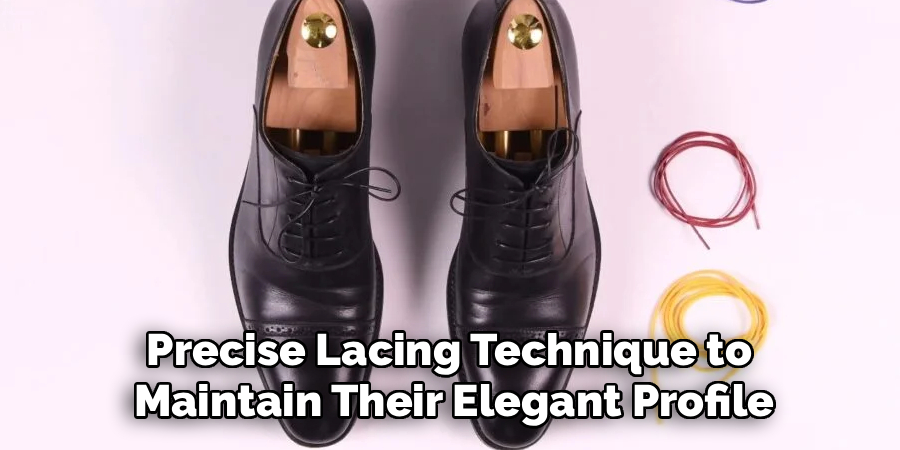
When navigating the world of formal footwear, it is essential to recognize which styles actually require your lace-tying expertise. The most iconic tuxedo shoe is undoubtedly the Oxford, specifically the Wholecut Oxford or the Plain Toe Oxford. These shoes are characterized by their “closed lacing” system, where the eyelet tabs are stitched underneath the vamp, creating a sleek and streamlined silhouette that is perfect for black-tie affairs. Unlike Derbies, which have open lacing and are generally considered too casual for tuxedos, Oxfords demand a precise lacing technique to maintain their elegant profile. The laces on these shoes are typically thin, round, and waxed, designed to blend seamlessly with the high-shine patent leather or polished calfskin.
Another common option is the formal pump or opera pump, though these are traditionally slip-ons adorned with a silk bow. However, modern variations and hybrids sometimes incorporate lacing systems for a more contemporary fit. Additionally, high-end patent leather boots or formal chukkas may be worn in colder climates, and these definitely require meticulous lacing. Regardless of the specific variation, if the shoe has eyelets and laces, the goal remains the same: to create a visual continuity that does not distract from the clean lines of the tuxedo trousers and the shoe itself.
Understanding Decorative vs. Functional Laces
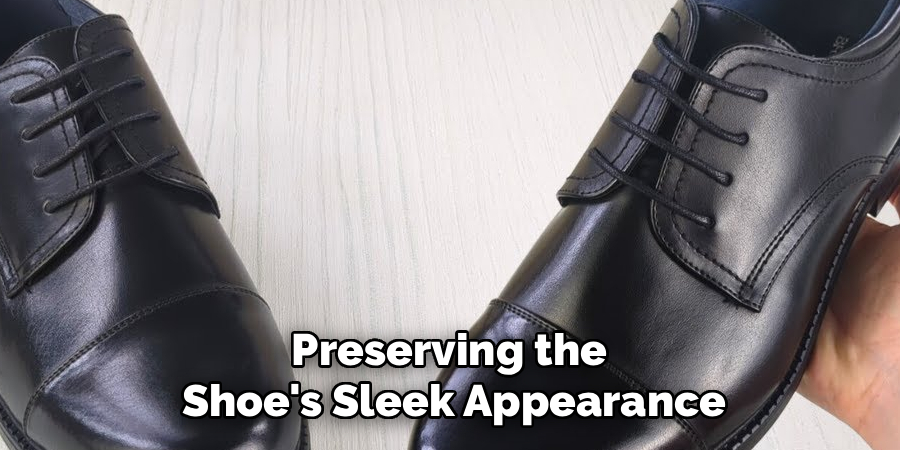
In the realm of high-end formal wear, not all laces are created equal, and distinguishing between decorative and functional elements is crucial for achieving the perfect look. Functional laces are the workhorses of your footwear; they are threaded through the eyelets and are responsible for securing the shoe to your foot. They need to be tightened appropriately to ensure the heel doesn’t slip and the arch is supported. In tuxedo shoes, these are almost always made of waxed cotton or sometimes a grosgrain ribbon material to match the lapels of the dinner jacket. The friction from the wax helps the knot stay secure without requiring a bulky double knot, preserving the shoe’s sleek appearance.
Decorative laces, on the other hand, are often found on pre-tied styles or specific loafer-hybrid formal shoes where the bow is fixed in place. These exist solely for aesthetic purposes, providing the visual cue of a tied shoe without the mechanical function. However, for a true lace-up Oxford, the laces are functional but must be treated with a decorative mindset. The way they are strung—typically using “straight bar lacing” rather than the crisscross method found on sneakers—turns a functional necessity into a decorative asset. This technique creates horizontal bars across the shoe, which mirrors the horizontal lines of a bow tie and cummerbund, creating a cohesive and harmonious formal appearance.
6 Simple Step-By-Step Guidelines on How to Tie Tuxedo Shoes
Step 1: Preparation and Alignment of the Laces
Before you even attempt to cross a lace, the preparation phase is critical for ensuring the final knot sits perfectly on the shoe. Begin by sitting in a comfortable chair with good lighting, placing your foot on a low stool or ottoman if possible, so you aren’t hunched over excessively. Ensure that your heel is firmly planted in the back of the shoe and the tongue is pulled straight up and smoothed out against the top of your foot. Take both ends of the laces and pull them upwards and outwards to remove any slack from the lower eyelets. It is vital at this stage to check that the lengths of the lace ends are perfectly equal.
If one side is longer than the other, even by half an inch, it will result in a lopsided bow that looks messy and unrefined. Adjust the laces through the eyelets until you have achieved perfect symmetry. Run your fingers along the length of the laces to smooth out any twists; for flat laces or grosgrain ribbons, a twist in the lace at this stage will be permanently visible in the final knot. This attention to the initial setup establishes the foundation for a knot that is not only secure but geometrically pleasing, which is the hallmark of formal dressing.
Step 2: Creating the Foundation Knot
The second step involves creating the starting knot that holds the tension across the top of the foot. Cross the left lace over the right lace (or vice versa, depending on your dominant hand, but stick to one consistent method) to form an ‘X’ shape. Bring the top lace down through the loop you have created and pull both ends tight. This is the standard starting knot used for almost all shoes, but for a tuxedo shoe, you must ensure it lies completely flat against the tongue of the shoe.
Avoid pulling it so tight that it puckers the leather or cuts off circulation, but it must be taut enough to prevent the shoe from shifting. As you tighten this foundation, observe the direction the laces naturally want to fall. For the perfect “Berluti” style knot or a standard square knot that sits horizontally, you must pay attention to this initial cross. If you started left-over-right here, you must alternate your loop crossing in the later steps to avoid a “granny knot,” which sits vertically and looks crooked. Flatten the center of the knot with your thumb to ensure it maintains a low profile, keeping the silhouette of the shoe elegant.
Step 3: Forming the First Loop (The Bunny Ear)
With your foundation secure, it is time to form the first loop of the bow. Take the lace in your right hand and fold it back on itself to create a loop. Hold the base of this loop firmly between your right thumb and forefinger, right where the lace exits the foundation knot. The size of this loop is important; it should be proportionate to the shoe size—too large and it will flop around, dragging on the ground; too small and it will look pinched and ridiculous.
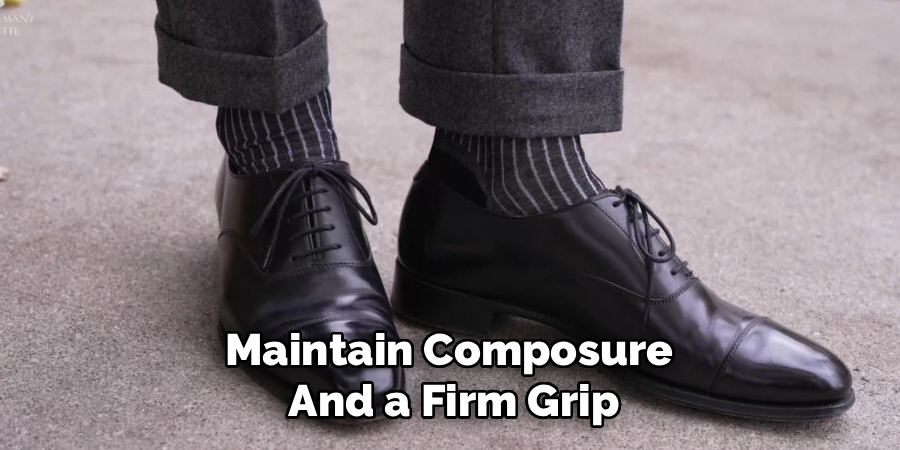
Ideally, the loop should extend about an inch and a half to two inches from the center knot. While holding this loop secure, ensure the lace is flat and not twisted. If you are using ribbon laces, ensure the shiny side is facing outward. This loop acts as the anchor for the rest of the knot. Your left hand should still be holding the other free end of the lace straight. The tension in your right hand is key here; if you let go or loosen your grip, the foundation knot from Step 2 will loosen, and the shoe will not fit securely. Maintain composure and a firm grip as you prepare for the wrap.
Step 4: The Critical Wrap Around
This step is where the mechanics of the knot determine its orientation. Take the free lace in your left hand and wrap it around the loop you are holding in your right hand. To ensure a horizontal bow (a square knot), if you crossed left-over-right in Step 2, you must wrap this lace over the top of the loop and around the back. If you wrap it under, you risk creating a vertical twist. The motion should be smooth and deliberate.
As you wrap the lace around, use your thumb to keep the loop in place. This wrapping motion creates a small hole or “tunnel” between the wrapped lace and the foundation knot. It is essential to keep this wrap tight against the center. Do not allow slack to build up. This is the moment where many people rush and lose the aesthetic quality of the knot. By moving slowly, you ensure that the lace remains flat and untwisted as it encircles the loop. The wrap should look clean and precise, acting as the central “knot” of the bow tie shape you are creating on your foot.
Step 5: Pulling Through the Second Loop
Now that you have wrapped the lace and identified the small hole created by the wrap, you need to push the middle of the lace you are wrapping through that hole to form the second loop. Use your left thumb or forefinger to push the lace through, but—and this is crucial—do not pull the end of the lace all the way through. You are pushing a bight of the lace through to create a match for the first loop.
As the second loop emerges on the other side, grab it with your left hand while simultaneously holding the first loop with your right hand. You should now have a loop in each hand. Before you pull them tight, check the visual balance. Are the loops roughly the same size? Is the central knot looking complicated or twisted? This is the transition phase where the knot is loose enough to be corrected but formed enough to see the final shape. Gently tug on the loops to begin tightening the structure, ensuring that the ends of the laces (the aglets) are not getting caught in the knot itself.
Step 6: The Final Tightening and Adjustment
The final step is the finesse that separates a hastily tied shoe from a tuxedo-ready masterpiece. Pull both loops outward simultaneously to tighten the knot. As you pull, you will notice the knot orienting itself. If you have followed the alternating cross method correctly (Square Knot principle), the bow will naturally sit horizontally across the shoe, perpendicular to the length of your foot. If it tries to twist vertically, you may need to start over and reverse your initial cross in Step 2 or the direction of your wrap in Step 4.
Once tight, adjust the length of the loops and the loose ends. For the most polished look, the loops and the ends should be roughly the same length, creating a symmetrical four-part flower shape. Smooth out the “wings” of the loops so they balloon nicely rather than looking crushed. Finally, do a quick “dress” of the knot, centering it perfectly on the tongue of the shoe. If you are wearing particularly long formal trousers, ensure the knot is secure enough that it won’t come undone with the friction of the hem moving over it. Your shoes are now impeccable.
Following these steps on how to tie tuxedo shoes, you can ensure that your formal wear will look polished and elegant. However, the knot is not the only important aspect to consider when wearing tuxedo shoes. It’s also important to choose the right style of shoes to complete your outfit.
Seasonal Styling Tips
Styling tuxedo shoes requires minor adjustments depending on the season to ensure both comfort and aesthetic preservation. In the winter months, when you might be dealing with slush or salt on the way to a venue, it is advisable to wear galoshes over your patent leather shoes to protect the shine and the laces from water damage, removing them only once you are indoors.
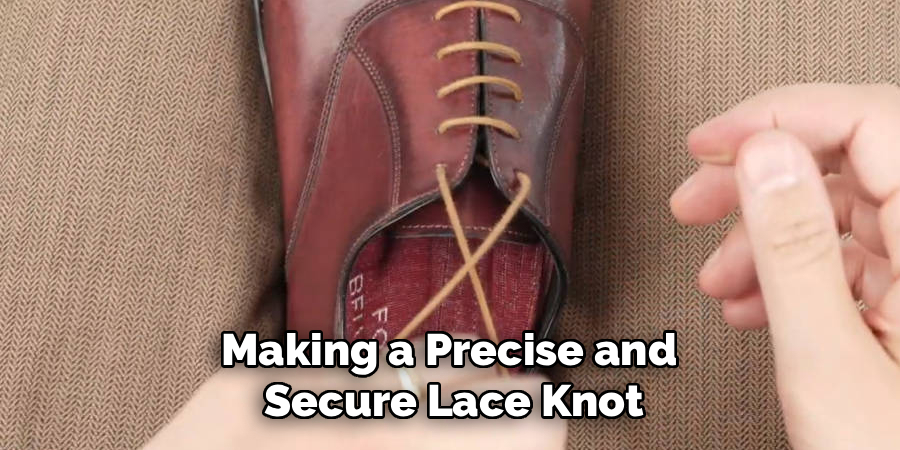
Conversely, during summer black-tie events, heat can cause feet to swell, so you may want to tie your laces slightly looser than usual to accommodate this expansion without compromising the visual tightness of the knot. Furthermore, summer calls for lighter socks, usually sheer silk, which can affect how the shoe grips your foot, making a precise and secure lace knot even more vital to prevent slipping.
Common Mistakes to Avoid
One of the most frequent errors is using the “Granny Knot,” which results in the bow sitting vertically rather than horizontally, ruining the clean lines of the outfit. Another common mistake is failing to polish the area of the tongue, specifically under the laces; if the laces shift, dull leather is revealed.
Many men also leave the lace ends too long, causing them to drag on the floor or look messy, or conversely, tie the loops too small so they look disproportionate to the shoe. Finally, using old, frayed laces on pristine shoes is a detail that instantly lowers the quality of the entire ensemble.
Comfort and Fit Tips
Achieving the perfect balance between a secure fit and enduring comfort is essential for a night that likely involves standing and dancing. When tying your tuxedo shoes, flex your foot slightly by curling your toes upward; this expands the volume of your foot and ensures you don’t tie the laces too tightly while sitting, which can become painful once you stand up.
Always wear the specific formal socks you intend to wear with the tuxedo when testing the lace tension, as thickness varies greatly between cotton and silk varieties. If you feel pressure points on the top of your foot, try “straight bar lacing” instead of crisscross, as this relieves pressure on the instep and often feels more comfortable for high arches.
Care and Maintenance
Proper care of your tuxedo shoes and their laces extends their lifespan and keeps them looking red-carpet ready. After every wear, remove the laces completely to brush dirt out of the eyelets and to allow the tongue of the shoe to breathe and recover its shape. If you have grosgrain or silk laces, iron them on a low heat setting to remove wrinkles and keep them crisp for the next event; for waxed cotton laces, inspect them for fraying and replace them immediately if they look worn.
Store the shoes with cedar shoe trees inserted to maintain the structure and absorb moisture, and coil the laces neatly beside them rather than stuffing them inside the shoe where they can become tangled and misshapen.
Conclusion
Tying tuxedo shoes is a subtle yet significant detail in the tapestry of formal attire. By understanding the types of shoes, selecting the right lacing technique, and executing the knot with precision, you ensure that your footwear complements the elegance of your tuxedo rather than detracting from it.
Whether you are attending a winter gala or a summer wedding, the attention you pay to your laces—ensuring they are horizontal, symmetrical, and secure—speaks volumes about your personal style and discipline. With proper care and the right technique, your shoes will carry you through the night in comfort and sophisticated style. Thanks for reading this guide on how to tie tuxedo shoes.
About
As the lead voice behind Shoenify, I bridge the gap between footwear aesthetics and technical performance. With a career dedicated to the intersection of fashion and function, I provide readers with data-driven reviews and deep dives into the global footwear market. My mission is to help every reader find the perfect fit, whether they are hitting the track or the boardroom.
Education RMIT University
-
RMIT University: Bachelor of Design (Footwear & Accessories)
-
Nottingham Trent University: MA in Fashion Design (Specializing in Footwear Innovation)
Publications and Impact
My insights on footwear trends and sustainable manufacturing have been featured in leading industry trade journals. Through Shoenify, I have influenced thousands of purchasing decisions by prioritizing transparency and rigorous testing. My work focuses on the evolution of “smart” footwear and the impact of 3D printing on the future of the industry.